
Xeoma Control Panel
Starting from beta version 26.8.20, Xeoma features a new Control Panel — a hub where you can configure cameras and chains in bulk or one at a time, and get information about the “health” of your Xeoma servers.
More about the Control Panel
The Control Panel is built on the Setup Wizard that already existed in the program. The Setup Wizard configurator was entirely devoted to configuring chains — it became the basis of Simple mode in the Control Panel. Beyond this mode, however, the Control Panel also offers an Expert settings mode (sometimes called “expert mode”), where you can manage Xeoma servers and monitor the system’s “health”: see errors, problems, resource shortages, the number of connected operators, and much more.
How to open the Control Panel
To open the Control Panel, go to the “+” menu in the All Cameras view or the Single Camera view and select the “Control Panel” option.
If you are launching Xeoma for the first time and have no cameras added yet, the Control Panel will open in Simple mode, intended for adding cameras and configuring their chains. Once cameras have been added, the Control Panel will open by default in Expert settings mode, but you can always switch to Simple mode using the “Expert settings” toggle in the top-right corner: to return to Simple mode, set the toggle to the “off” position (grey).
The Control Panel’s Simple mode
Simple mode offers camera search and basic configuration of all cameras at once. Here you will find the following settings:
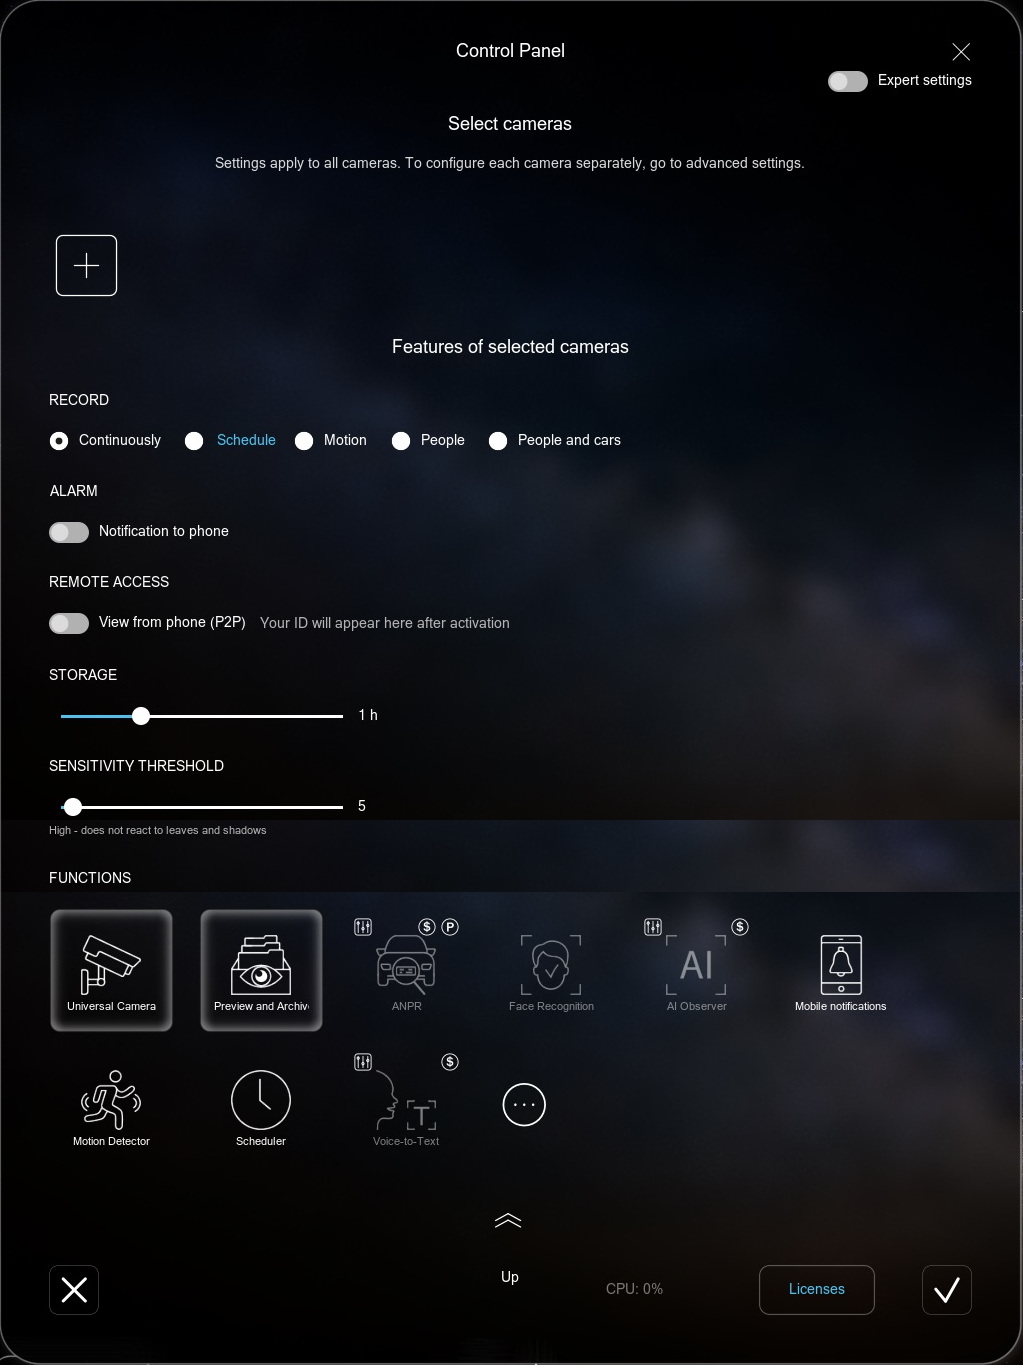
To add cameras, click the + icon. Xeoma’s standard camera search dialog will appear. Fill in the details and click OK:
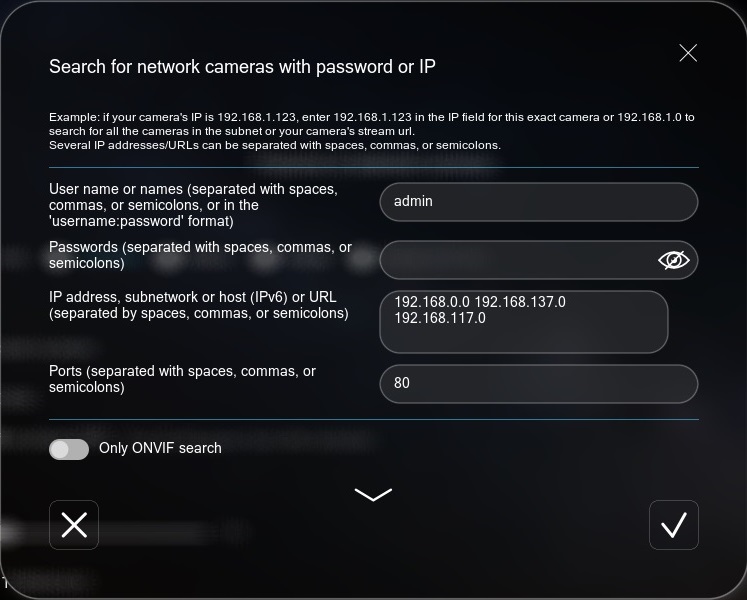
While the search is running, the label “Searching for cameras: N%” appears next to the “Select cameras” heading. You can stop the search (for example, if all the cameras you need have already been found) by clicking this label.

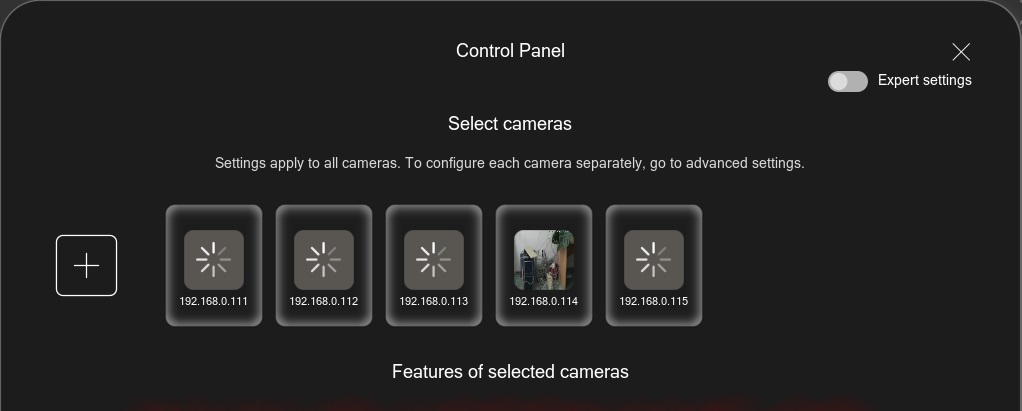
Once cameras have been found and added, you will see them here:
RECORDING: Choose the kind of recordings you want to create:
- Continuous: constant, round-the-clock recording of everything the camera “sees”.
- Schedule: recording only on selected days and times (click the “Schedule” label to set up the timetable). If this option is selected, the “Scheduler” module will be added below in the “FEATURES” list. If you deselect the “Scheduler” module, the selection here in the “RECORDING” section will be cleared as well.
- Motion: recording only when motion is detected in the frame. By default, the basic motion detection settings are used, which are optimal for most systems, but you can reconfigure this feature: the “Motion Detector” module will be highlighted below in the “FEATURES” section. To the left of the module icon there is an “Equalizer” icon — click it to open the detector’s settings. Note: these changes will apply to all cameras. The “SENSITIVITY THRESHOLD” setting will also become available below for this option.
- People: only episodes where people were detected in the cameras’ field of view will be recorded.
- People and vehicles: only episodes where people or vehicles were detected in the cameras’ field of view will be recorded.
ALARM: Choose whether you also want to receive notifications on your phone. It makes sense to enable this feature if you selected “Motion”, “People”, or “People and vehicles” in the “RECORDING” section — you will then receive notifications when these events are detected.
If this option is selected, the “Mobile Notifications” module will be added below in the “FEATURES” list. And if you deselect this module, the toggle here in the “ALARM” section will move to the “Off” position.
REMOTE ACCESS: This toggle lets you enable or disable a dedicated P2P channel for viewing cameras remotely from another device. More about this feature
STORAGE: Choose how long recordings are kept — from 2 minutes to 1 month. Below this scale you will see an automatic estimate of whether the current disk space is enough for the selected retention period. You can change the disk in Expert settings mode.
SENSITIVITY THRESHOLD: A setting for those who selected “Motion” in the “RECORDING” section. With this scale you can filter out minor changes in the camera’s video stream — shadows, glare, and the like. The higher the threshold, the less often the motion sensor will trigger.
FEATURES: The Xeoma modules required for the settings chosen above to work. Here you can add features, opt out of some of them, and configure the ones you need.
Module names scroll on hover:
For some modules the “Equalizer” icon is shown right away — this means the module must be configured before it can start working. For other modules — those that do not require prior configuration but can be reconfigured if desired — the “Equalizer” icon is shown only on hover:
Modules may also have license requirement icons. For instance, the $ icon means that the module requires a license for the corresponding Additional module (for example, the “AI Observer” module). The “P” icon means the module is available in the Xeoma Pro edition. Some modules have both icons — this means they are available both in the Xeoma Pro edition and as an Additional module.
Below, you will see information about the CPU load on this machine, a button for quickly purchasing any missing licenses, and system buttons to apply the settings or exit the dialog without saving changes.
Expert settings mode
Expert settings mode offers greater configuration flexibility and server management. Here you will find the following settings:
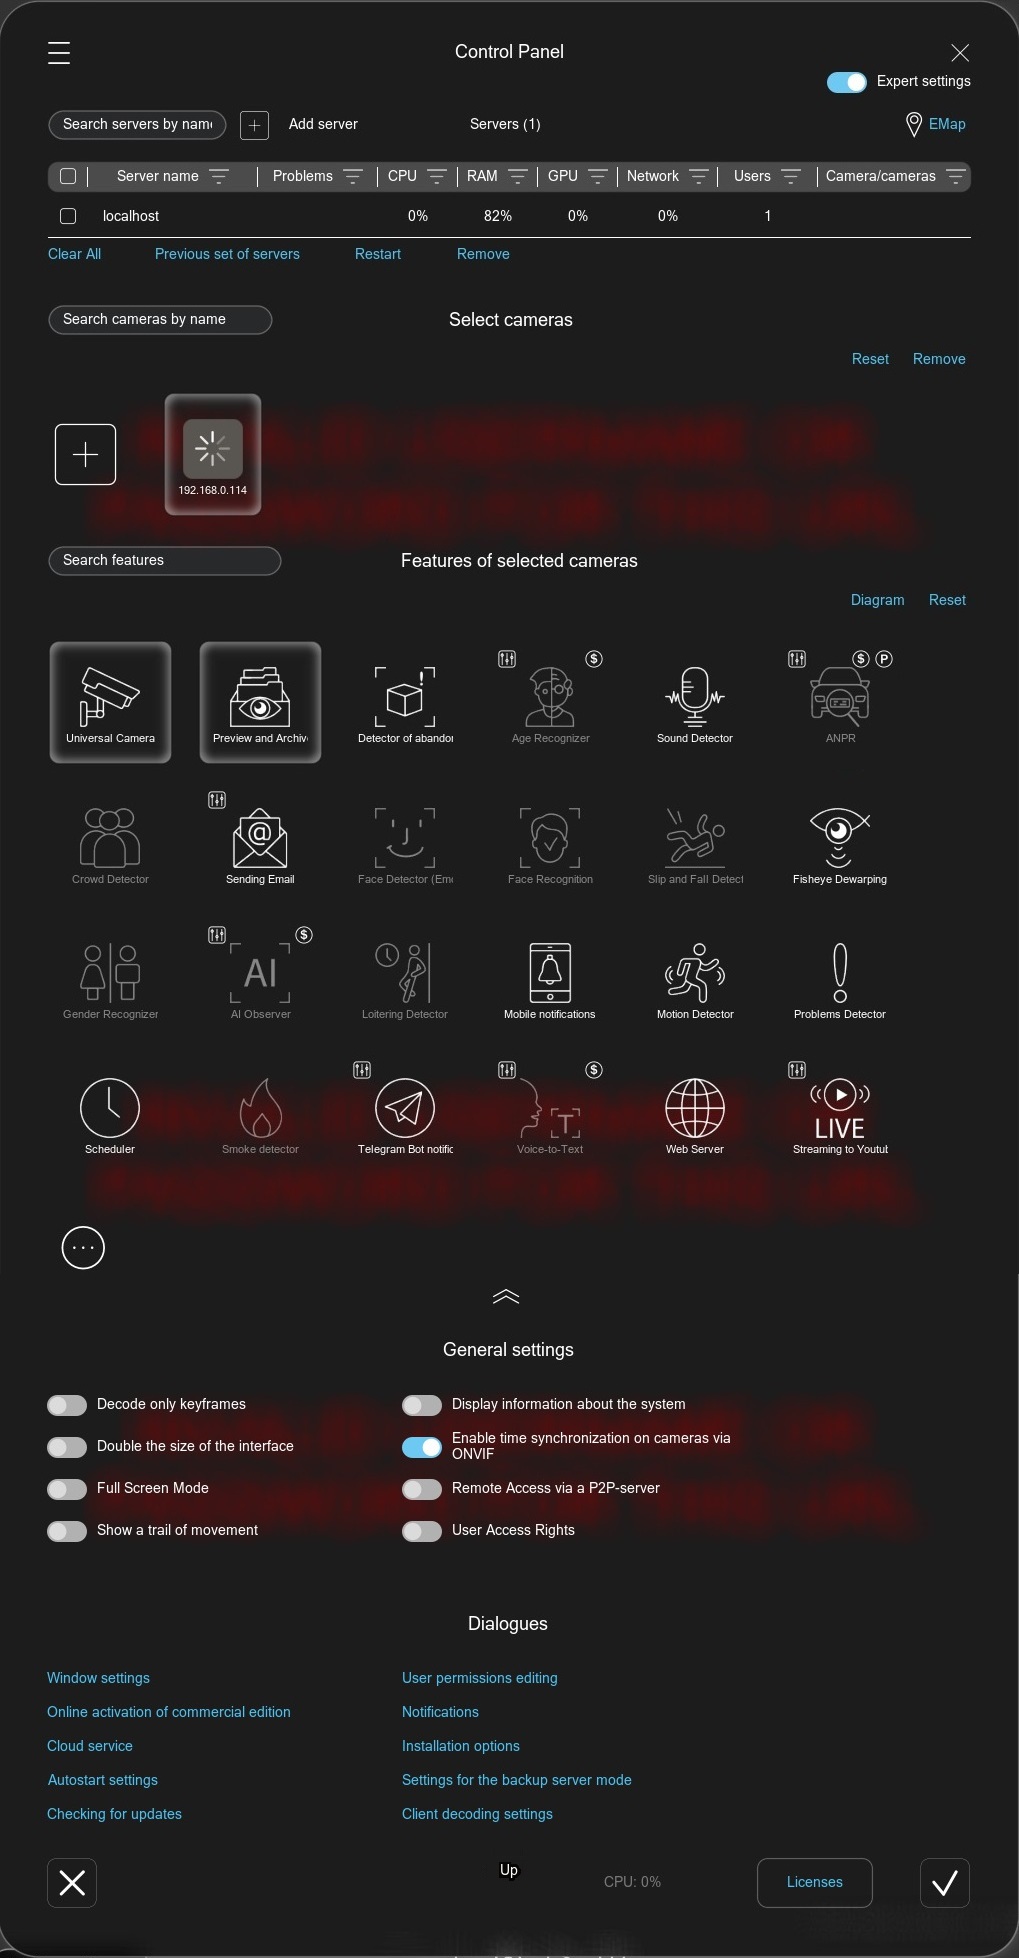
To the left of the heading you will see a menu button (three horizontal lines), which opens the user settings dialog. On the right you will see the mode toggle.
The first block is the server monitoring section. Here you can add your Xeoma servers for bulk camera configuration and system monitoring.
A server search is available on the left.
The button for opening the EMap interactive map is on the right.
Below the server table are the following buttons:
Clear all — deselect everything.
Previous server set — add the servers that were added earlier to the list.
Restart — restart the selected servers.
Delete — delete the selected servers.
Cameras section. Here you can select the cameras that the settings below will be applied to. A camera search field is available on the left. Selected cameras have a white frame. On hover, the frame turns blue.
Features of these cameras. Here you can select the features that will be added to the cameras selected above. Selected features have a white frame. On hover, the frame turns blue.
General settings. Here you can select general options — for example, increase the interface size or enable full-screen mode.
Dialogs. Here you can open various configuration dialogs — for example, the cloud service or notifications.
Below, you will see information about the CPU load on this machine, a button for quickly purchasing any missing licenses, and system buttons to apply the settings or exit the dialog without saving changes.
The Control Panel is currently in beta testing. If you have any comments, suggestions, or questions, let us know.