PTZ joysticks in Xeoma
Professional joystick for PTZ control is an integral part of a security post and cctv systems. PTZ joysticks help not only to monitor the viewing area, but also to respond quickly if a particular module is triggered e.g. motion detector.

Starting with 19.11.26 version we’ve added possibility to use PTZ joysticks in Xeoma.
We’ve added support for USB controllers that are identified as joysticks in the system. Development is currently available for Windows only.
Starting from Xeoma Beta 24.7.9 USB joysticks and control boards will also be supported in Linux distros that Xeoma works on.

|
If you’d like to use PTZ joystick in other OSes, please contact us. |
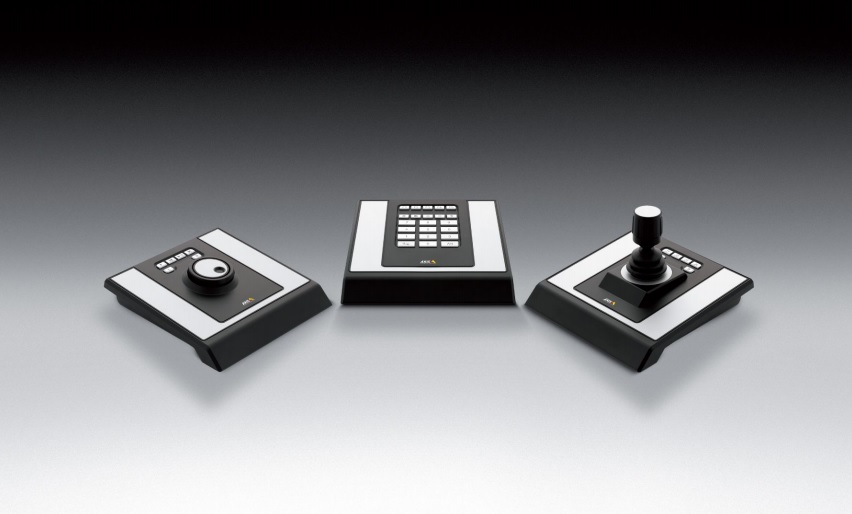
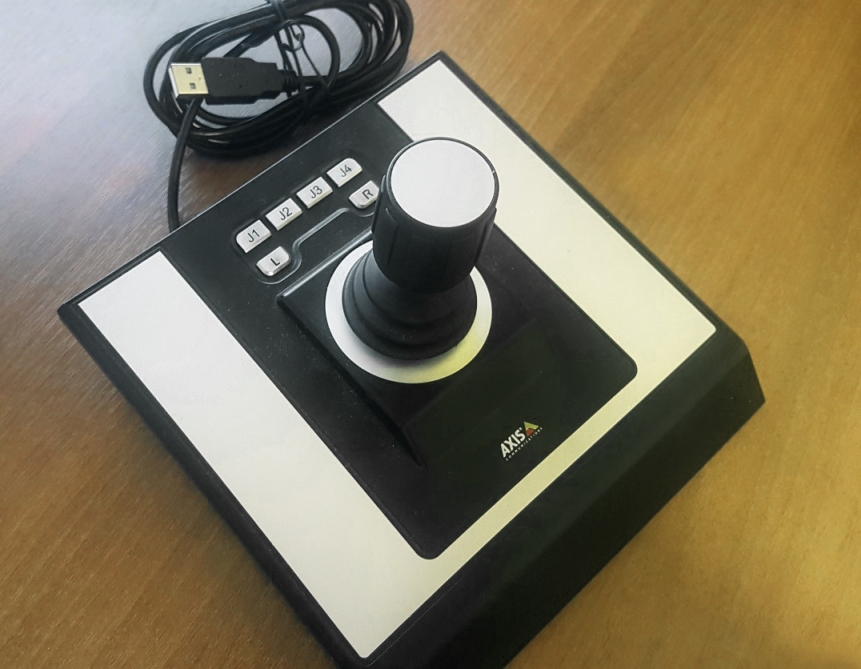
Initially, the integration was conducted for the AXIS t8311 PTZ joystick, however any USB joystick that is identified as a joystick in the system will work in Xeoma.

Buttons functionality is supported as well.
In all cameras preview mode:
• X-axis rotation, i.e. turning of the joystick up/down allows you to choose one of the cameras
• Clicking on the “2” (J2) button allows you to switch between single camera view mode and all cameras view mode
In single camera preview mode:
• X-axis (up and down) rotation and Y-axis (left and right) rotation allows you to control PTZ camera
• Z-axis rotation (joystick rotation in clockwise order and counterclockwise) allows you to use camera’s zoom
• Clicking on the “3” (J3) allows you to switch to the next PTZ pre-configured preset
• Clicking on the “4” (J4) allows you to get back to the previous PTZ pre-configured preset
Control board buttons setup
Xeoma also offers a dialog where you could assign control board’s button to specific actions in Xeoma.
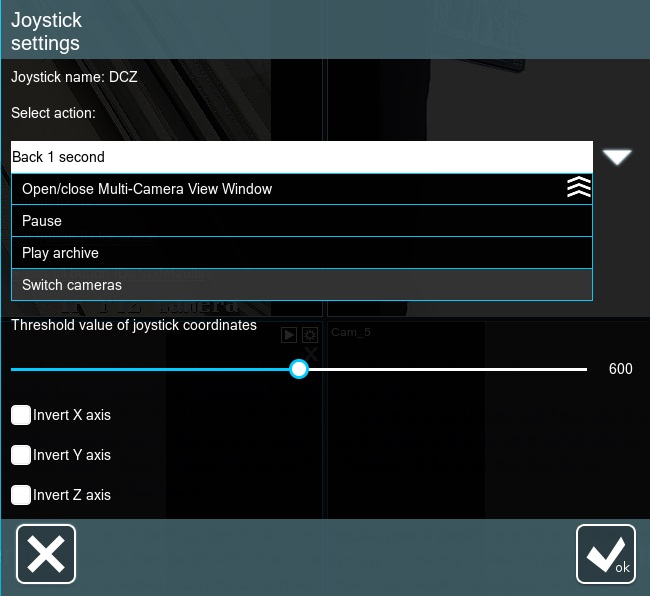
To open this configuration window, go to Layouts menu -> Joystick settings (accessible from the Multi-Camera View mode). The joystick settings popup window will be opened, in which the following settings are available:

* Enable/disable Tour: select this option to view the assigned button or re-assign the button used to launch the PTZ patrol tour selected in Xeoma’s PTZ control (please mind that the tours themselves are to be configured separately – in the camera web admin page, or in Xeoma’s tour option);
* Play Archive: select this option to view the assigned button or re-assign the button used to start playback of recordings in Xeoma’s embedded Archive Player (not to be mixed with the «Open archive» button that is used to open the Xeoma’s Archive Player);
* Change sound state (enabled/disabled): select this option to view the assigned button or re-assign the button used to mute or unmute the selected camera;
* OK Button: select this option to view the assigned button or re-assign the button used for confirmation of choices on selecting options in Xeoma;
* Open/close Multi-Camera View Window: select this option to view the assigned button or re-assign the button used to quickly go to the the Multi-Camera View window (view of all cameras in one screen) or back to whatever window you had open before the Multi-Camera View window;
* Open Archive: select this option to view the assigned button or re-assign the button used to open Xeoma’s Archive Player for the selected camera;
* Open Main Menu: select this option to view the assigned button or re-assign the button used to open Xeoma’s Main Menu (use joystick to navigate through submenus inside this menu);
* Open Calendar: select this option to view the assigned button or re-assign the button used to open the calendar inside Xeoma’s Archive Player. To open Xeoma’s Archive Player, see the Open Archive button;
* Open preview by number: select this option to view the assigned button or re-assign the button used to open the Single-Camera window for a certain camera by entering its number (only for joysticks with a numeric keypad).
How to use: set a button here (for example, :CAM:). Afterwards, when you want to open the Single-Camera View window of this camera, press and hold this button (in our example, the :CAM: button) and at the same time dial the preview number of the desired camera – then release the CAM button. As the result, the camera with this number will be opened in Single-Camera View mode. To return to the view of all cameras, use the button assigned to the “Open/close Multi-Camera View Window” action (see above);
* Pause: select this option to view the assigned button or re-assign the button used to stop playback of recordings in Xeoma’s Archive Player (use buttons for “Open archive” and “Playback archive” to open the Xeoma’s Archive Player and to start playback, correspondingly);
* Go to the first recording: select this option to view the assigned button or re-assign the button used to go to the very beginning of all recordings for this camera in Xeoma’s Archive Player (use buttons for “Open archive” and “Playback archive” to open the Xeoma’s Archive Player and to start playback, correspondingly);
* Go to the last recording: select this option to view the assigned button or re-assign the button used to skip to the very latest recording for this camera in Xeoma’s Archive Player (use buttons for “Open archive” and “Playback archive” to open the Xeoma’s Archive Player and to start playback, correspondingly);
* Go to next preset: select this option to view the assigned button or re-assign the button used to launch a preset of PTZ camera that is previous to the one engaged now in the list of presets. Note that the presets themselves are to be configured separately – in the camera web admin page or in Xeoma’s presets option;
* Go to previous preset: select this option to view the assigned button or re-assign the button used to launch a preset of PTZ camera that is next to the one engaged now in the list of presets. Note that the presets themselves are to be configured separately – in the camera web admin page or in Xeoma’s presets option;
* Forward 1 second: select this option to view the assigned button or re-assign the button used to jump 1 second forward while viewing recordings in Xeoma’s Archive Player;
* Back 1 second: select this option to view the assigned button or re-assign the button used to go 1 second back while viewing recordings in Xeoma’s Archive Player;
* NEW: Switch Cameras: select this option to view the assigned button or re-assign the button used to switch to the next camera;
* Threshold value of joystick coordinates. This setting will allow you to eliminate unintentional slight camera rotation when the joystick is shaking or at other insignificant joystick rotations. Here you can set to how much joystick tilt Xeoma should react;
* Invert X, Y, or Z axis. If you need to invert rotation around any of these axes, check the corresponding box. This is useful, for example, if the camera is installed upside down.
How to view the given button for the desired action:
Select the desired action from the “Select an action” list. Under this drop-down list, the ID of the button that is currently assigned to this action will appear.
How to set your own button for the desired action:
Select the desired action from the “Select an action” list. Under this drop-down list, the clickable text “Set button ID for action” will appear – click on it. “Button ID” will turn green – at this point, press the desired button on the joystick that you want to set for this action once and release. After a few moments, the information in the “Button ID” will update to show the button you selected.
Switching to the next camera (scrolling):
Starting with Xeoma version 23.3.22 the new joystick mode is available, where you can set a button that will switch cameras in turn on the selected tab and return to the tab overview.
To use this feature, go to Layouts -> Joystick settings. In the opened dialog go to ‘Select action’ field and choose ‘Switch cameras’. The button ID will be indicated below – this is the button, by pressing which on the joystick, you can switch between your cameras in turn. Button ID can be changed by clicking on “Set button ID for action”.
Fields of application:
PTZ joysticks are commonly used in security posts alongside video walls or cctv systems with multiple monitors. This way operators will be able to control all processes and monitor all zones using PTZ cameras.
Speedy response helps ensure reliable video surveillance and well-timed actions to prevent any emergency.
Rotary controllers for PTZ cameras and professional cctv systems provide quick and accurate control of all PTZ cameras and network PTZ dome cameras.
But rotary controllers a.k.a. PTZ joysticks are often used not only in professional cctv systems and security posts, but also on the private territory. USB joysticks are often used in private residences to monitor the area and navigate between cameras in case of emergency, e.g. intrusion of uninvited guests such as squirrels or dogs which may cause false alarms of detectors.
Since PTZ joysticks are constructed of durable materials, their reliability and performance will be ensured for a long time.
With PTZ joysticks working in Xeoma will become easier and even more interesting. You can download Trial version and test USB joysticks here.
7th of February 2020
Read more:
Article from our user: Joystick function in Xeoma on Linux machines
Additional modules in Xeoma.
Shop surveillance and crime prevention
Videowall, panic button and alarm monitor for security officers
Video surveillance system in the bank
Video surveillance installation at the industrial enterprise
Video surveillance in hospitals
Video surveillance in a warehouse
Sports Ball Detection and Tracking
Private residence video surveillance (video)