Setting up PTZ guard tour in Xeoma
Many PTZ cameras have a very useful ability to remember user-defined points of interest (often referred to as “presets”) and automatically move from one such point to another. Such moving between points using presets is called PTZ patrolling or a PTZ guard tour.
Contemporary cameras can “remember” hundreds of such pre-set camera positions. A preset is set not just for horizontal or vertical position of a camera, but also for zooming in or out. Popular position “bookmarks” (presets) include focusing camera on windows, doors. Once set, a preset can be used to quickly move the focus of your camera to a certain position with just 1 click – or completely automatically with the guard tour feature.
The guard tour can make the camera go to the pre-set points in order defined by an operator, administrator, or in a chronological order.

|
Xeoma also has other PTZ options. Please see more here |
Setting up PTZ presets and PTZ guard tours in video surveillance with Xeoma

|
Attention! PTZ presets and PTZ touring is supported in Xeoma starting from version 18.7.10 for cameras that work through ONVIF. You need to have a valid Xeoma Pro license for at least 1 camera to use this feature. |
1. When you added your PTZ camera that supports ONVIF, you will see a PTZ icon in the upper right corner of the camera preview box or on the lower panel. Click on this icon and the PTZ camera control menu will be opened.
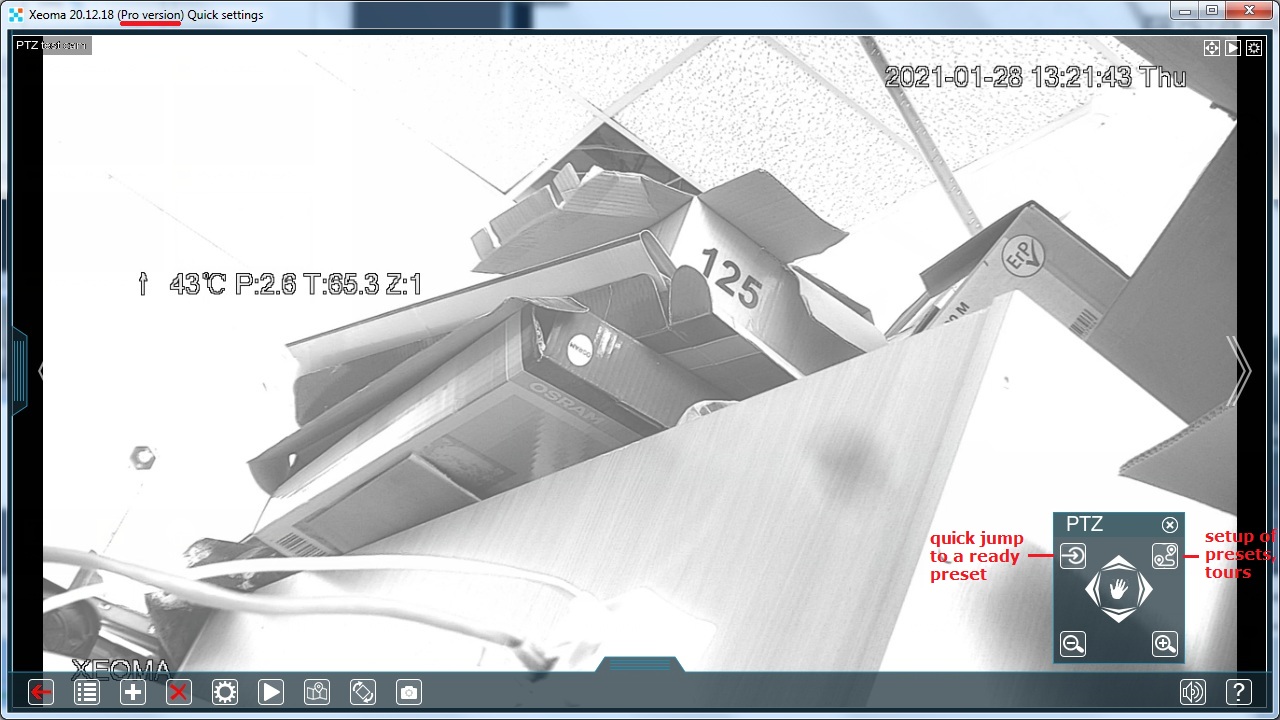
2. In this menu you can see the following items:
• “Go to preset” icon – opens a list of already added presets (ones you added through Xeoma or ones available in the camera through ONVIF).
• “Tour” icon – opens a window where presets and tours based on presets can be set up. For tours, order and duration of the stop at the specified points (presets) can be set. See more about this below;
• Standard joystick (arrows) and zoom in/zoom out buttons to move the PTZ camera;
• In newer versions of Xeoma, more icons are available for ONVIF PTZ cameras: focus in, focus out, auxiliary commands. See more about it here
3. To add or change a preset or to make or change a tour click the “Tour” icon. You will see a “PTZ Tour” dialog window that has several fields and options.
Note: to add a preset or change one of the existing ones, first use arrows and zoom buttons to position the camera in the desired position before you click the “Tour” button.
4. Once in the “PTZ Tour” window, you can make or change a patrol tour – a schedule of positions (presets) that the camera needs to “visit”, and the stay time in each of the positions.
If you’re here to add a preset, enter a new preset’s name in the “Preset settings” field and click the “+” below the field.
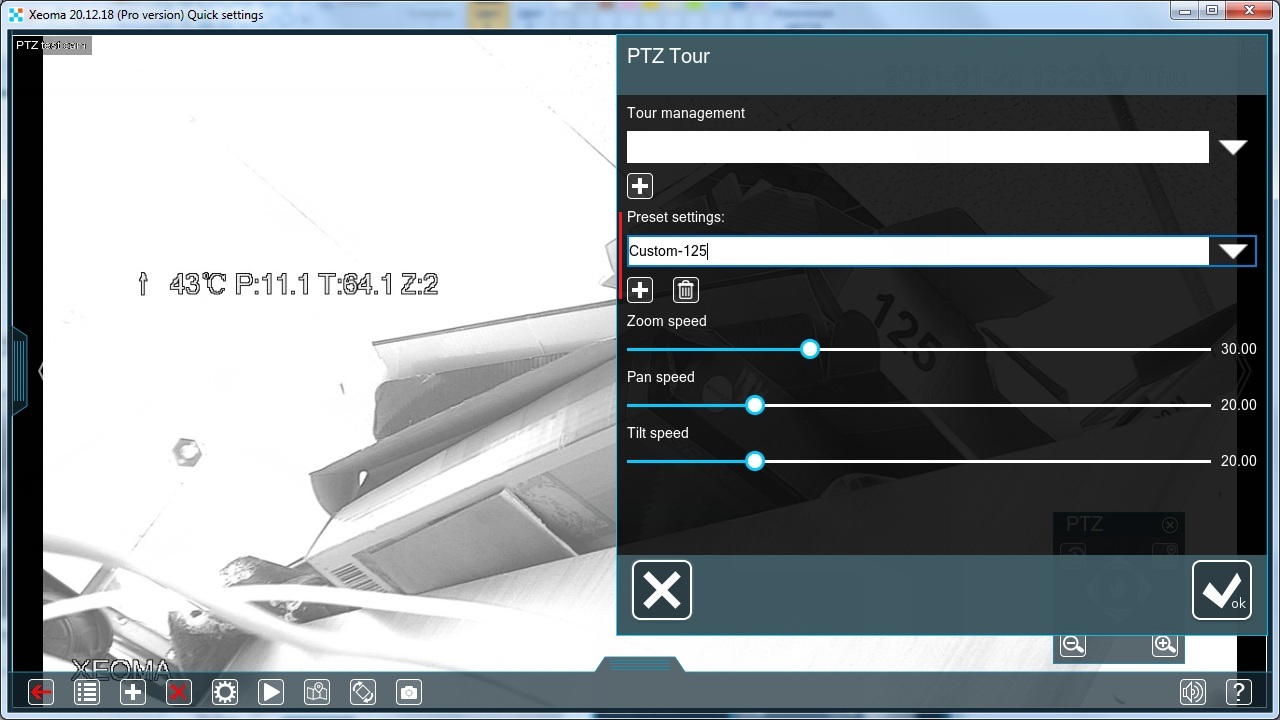
If you want to change an already existing preset, first move the camera to the “right” position using the standard Xeoma PTZ control – arrows or hand, and then go into “Tour” menu, select the preset from the list, and click OK. Note: a camera might not allow to change or remove its “built-in” presets. All presets created through Xeoma can be removed.
If you’re in this window to make a guard tour, you need to work with the “Tour management” window:
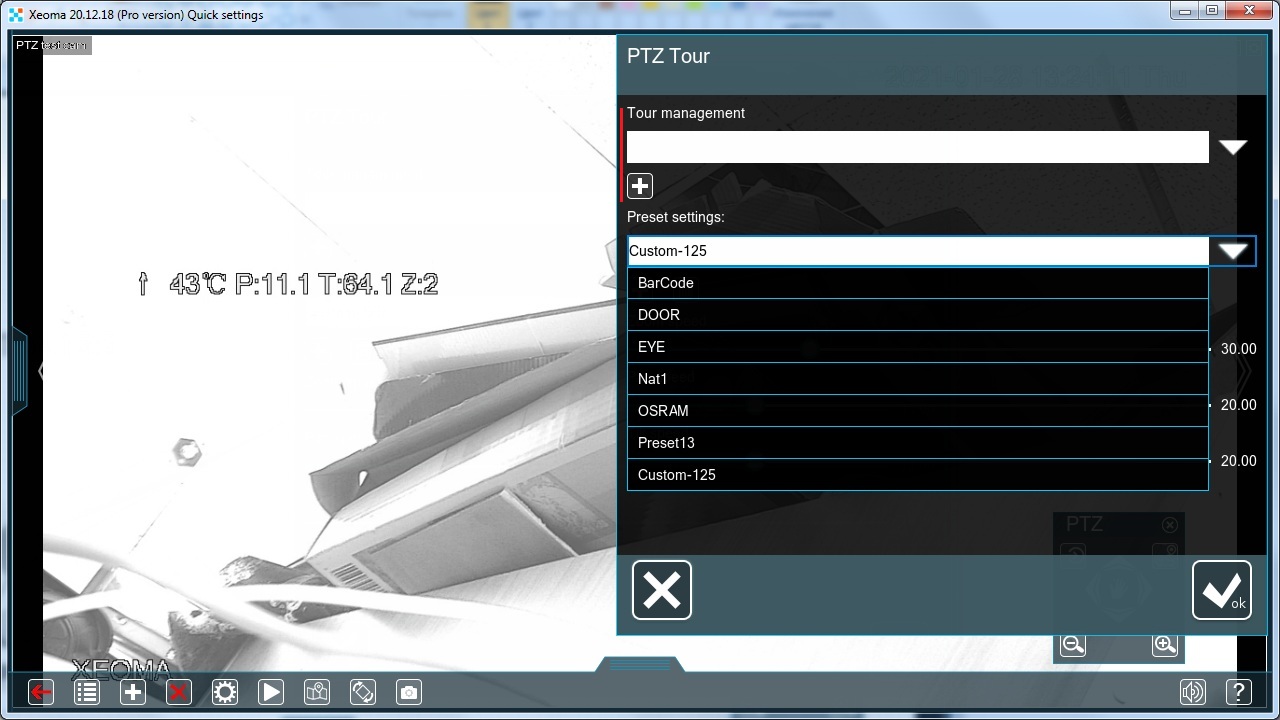
5. Enter the Tour’s name in the “Tour management” field and click the “+” button under it. You will get to the “PTZ Tour Settings” dialog offering to form a tour schedule out of the available presets (1):
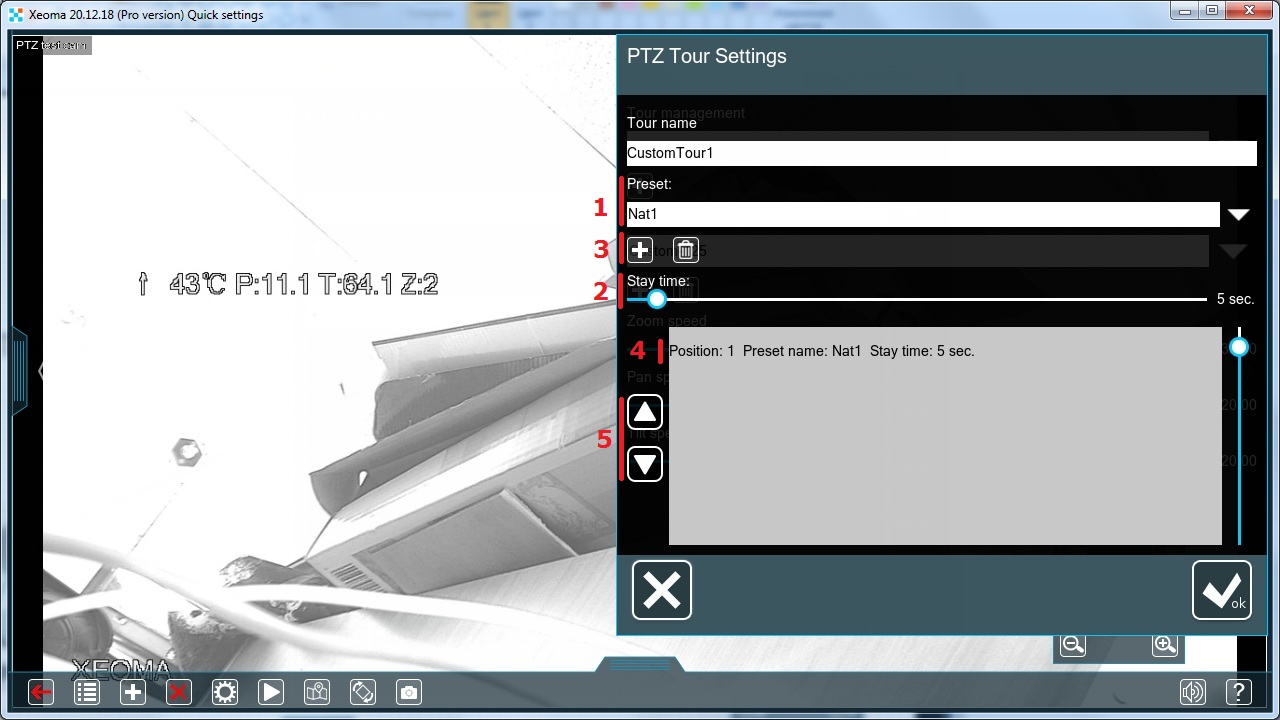
Select a preset from the list and set the time for camera to “stay” in that position with the slider (2). Click the “+” button (3). The selected preset will be shown in the tour schedule field (4) where you can use up and down buttons to shift presets order (5).
Repeat these actions with all needed “bookmarks” (presets). After the tour schedule is done, click the OK button, and you will get back to the “PTZ Tour” dialog.
6. After you have at least one tour set up, they will be shown and can be chosen from the “Tour management” dropdown list. Besides, more icons will be below it – apart from the already known “+” button to add more tours (6) there will be an icon for editing the tour currently selected in the “Tour management” field (7); an icon for deletion of the tour currently selected in the “Tour management” field (8); and an icon for launching the tour currently selected in the “Tour management” field.
Press the “START” button on the right for the camera to start moving to the specified positions. When a tour is launched, this icon will change its look and stop the tour when pressed (9).
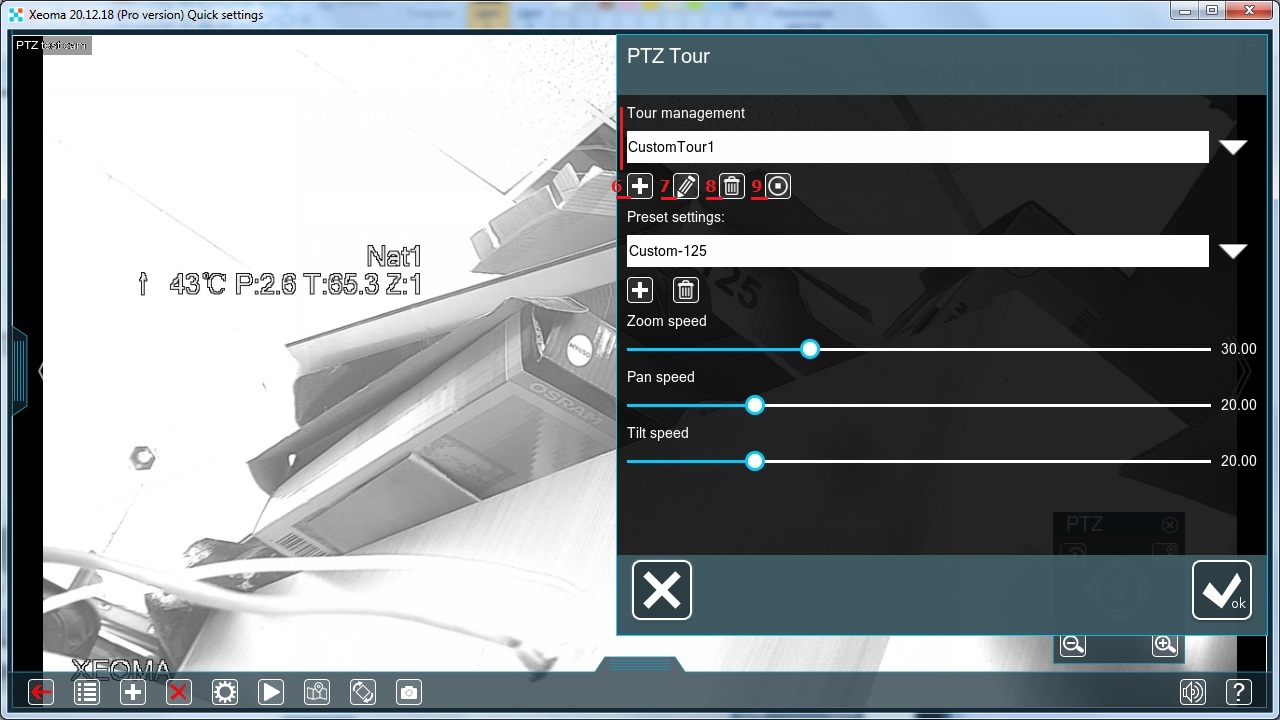
When the tour is launched, the camera preview will have an overlay with the preset name that the camera is currently visiting.
7. If you need several tours for this camera, repeat these steps.
Note: There are particular cameras that provide a list of presets that can not be changed or deleted. I.e. Xeoma takes a list of PTZ presets from the camera through ONVIF, and there are particular cameras that provide Preset1, Preset2…Preset1000. And these PTZ presets can not be deleted and in rare cases can not be changed. This usually happens with ‘no name’ Chinese cameras. So in this case you can choose e.g. “Preset10” and adjust this preset (position, configuration etc.), but all these presets (even the unnecessary ones) can not be deleted from Xeoma.
As you can see, it’s easy to set up and use such an essential feature as PTZ presets and tours in Xeoma.

|
Starting with Xeoma 23.12.7 we added the autofocus feature. You can automatically check for loss of focus on cameras with ONVIF-facilitated support for PTZ, and attempt to return it. Find ‘Autofocus Settings’ in the ‘Universal Camera’ module settings and select one of the two options: ‘Autofocus based on image analysis’ which makes the program constantly check the camera scene for signs of defocusing, or ‘Autofocus at regular time interval’ to just make the camera focus back regularly at given intervals. |
10 September 2018; updated 16 April 2021
Read also:
PTZ control and zoom in Xeoma
PTZ Tracking for PTZ security cameras in video surveillance systems
Easy configuration of PTZ cameras in Xeoma
ONVIF PTZ troubleshooting
Digital zoom (ePTZ) in Xeoma video surveillance software