Video surveillance usage in jail security: Senstar and Flexzone integration
Perimeter security is of utmost importance. Take a fence. Take Senstar’s FlexZone® fence-mounted intrusion detection sensors and place them in strategic areas of the fence. Use Xeoma and its advanced Senstar module to rotate camera to a certain area when the sensor is triggered.
Setting up the Senstar module in Xeoma
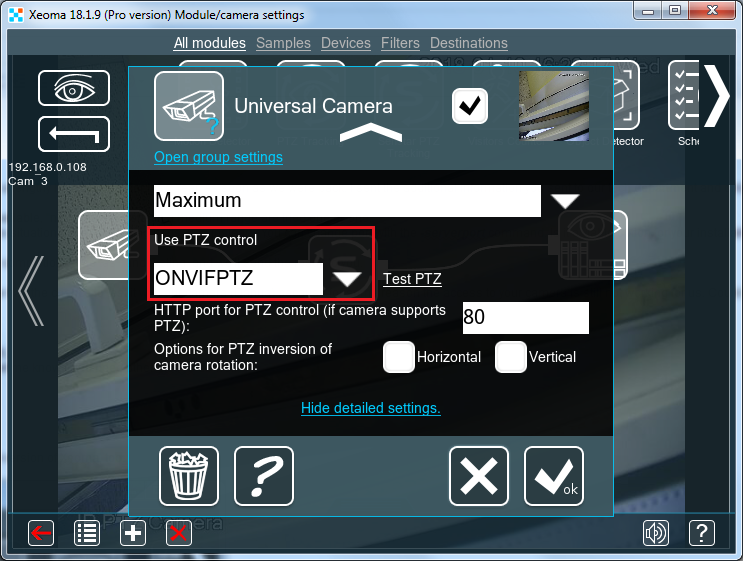
1. Let Xeoma find your ONVIF camera. It is essential for the cameras to be ONVIF-compliant. ONVIFPTZ set of controls should be found for the camera (bottom of Universal Camera module’s settings):
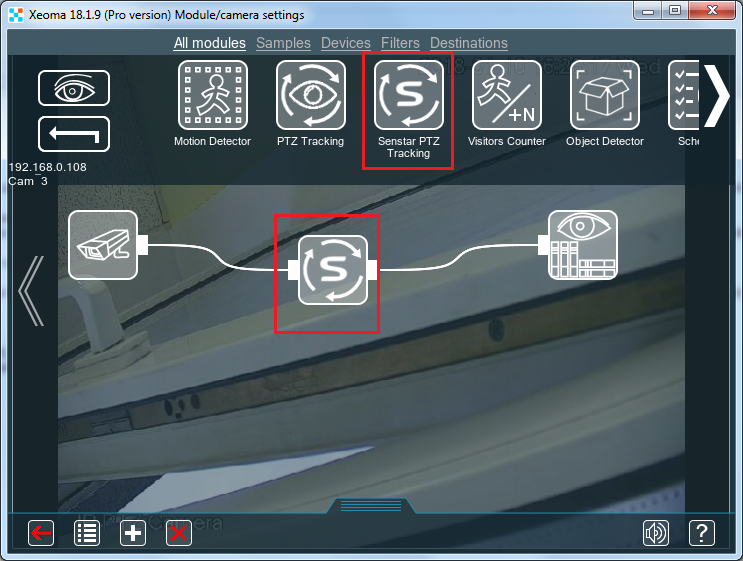
2. Find and connect the new module “Senstar PTZ Tracking” to a chain with that ONVIF camera. You can do that in a trial version of Xeoma, too.
3. You will see an interface like this:
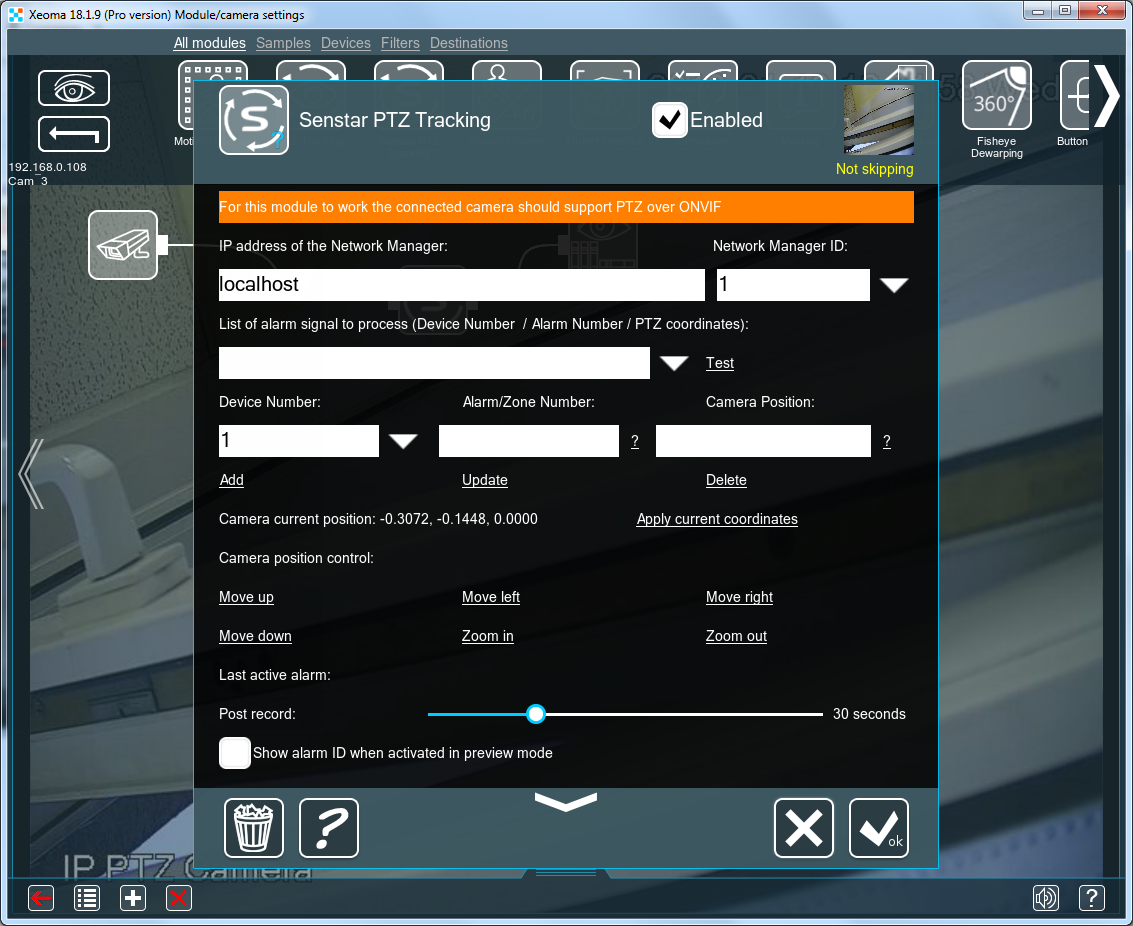
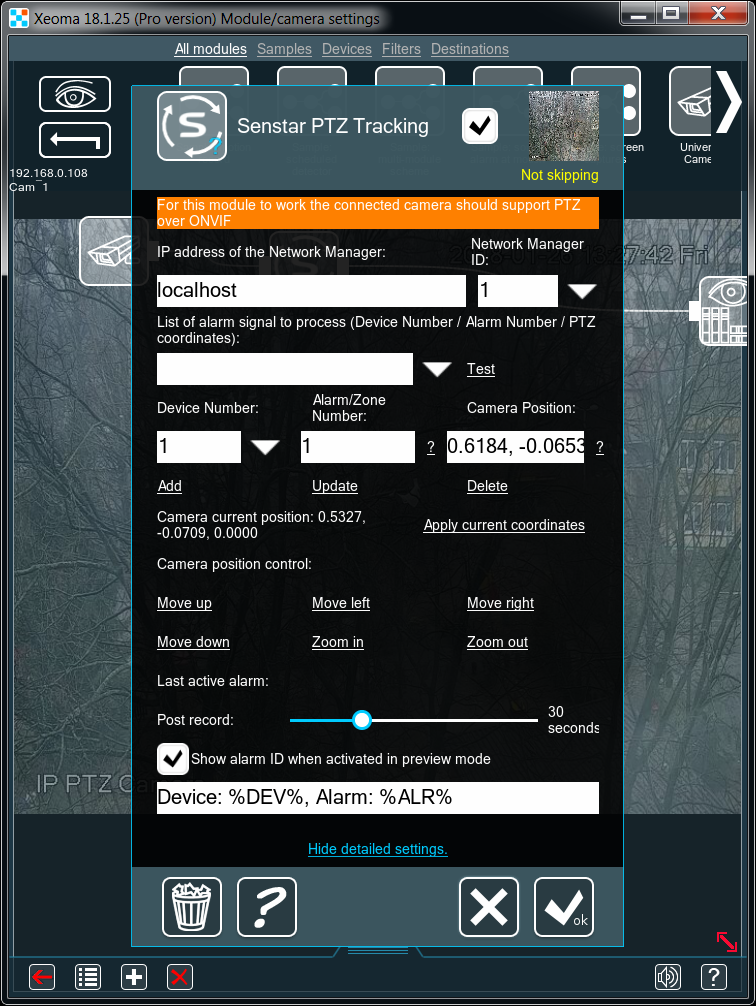
In IP address of the Network Manager please input the IP address where the controlling Network Manager is installed.
In Network Manager ID please input its unique ID.
List of alarm signals to process will be filled in as you follow the next steps.
Put in Device Number (camera ID) and Alarm/Zone Number (for more information, see the “?” next to this field). For example, for this camera Device Number: 1, for this zone Alarm/Zone Number: 1.
Turn the camera to the desired position right from this interface with the “Move up”, “Move left” etc text buttons (you can use the small preview or the background preview to check camera position ). Or you can close this dialog (don’t forget to click OK) and turn camera where you want to with the Xeoma’s usual PTZ control.
Click “Apply current coordinates”. You’ll see the List of alarm signals to process filled in with the current coordinates.
Then click the Add text button.
Repeat the steps for a few other camera positions. (Device Number still 1, Alarm/Zone Number 2, 3, etc)
Don’t forget to click OK button when you close the settings dialog.
Then go back to your Network Manager and choose the needed Device Number and Alarm/Zone number combination.
Settings up the Senstar software
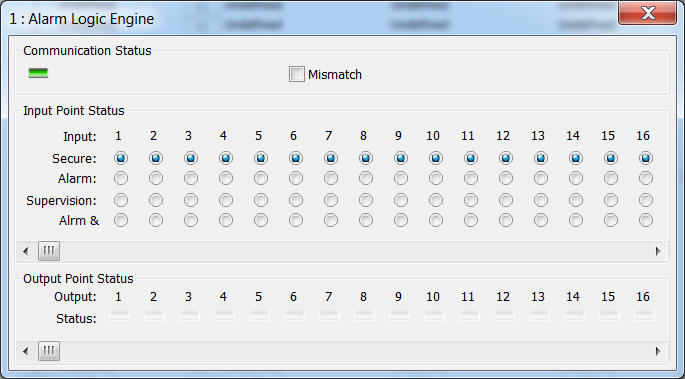
“ID” is an ID of Senstar Network Manager (or, in our case, Simulator). Simulator simulates the device (the fence). By default we’re using the “Device”/”Alarm Logic Engine” #1 with up to 16 alarm zones.
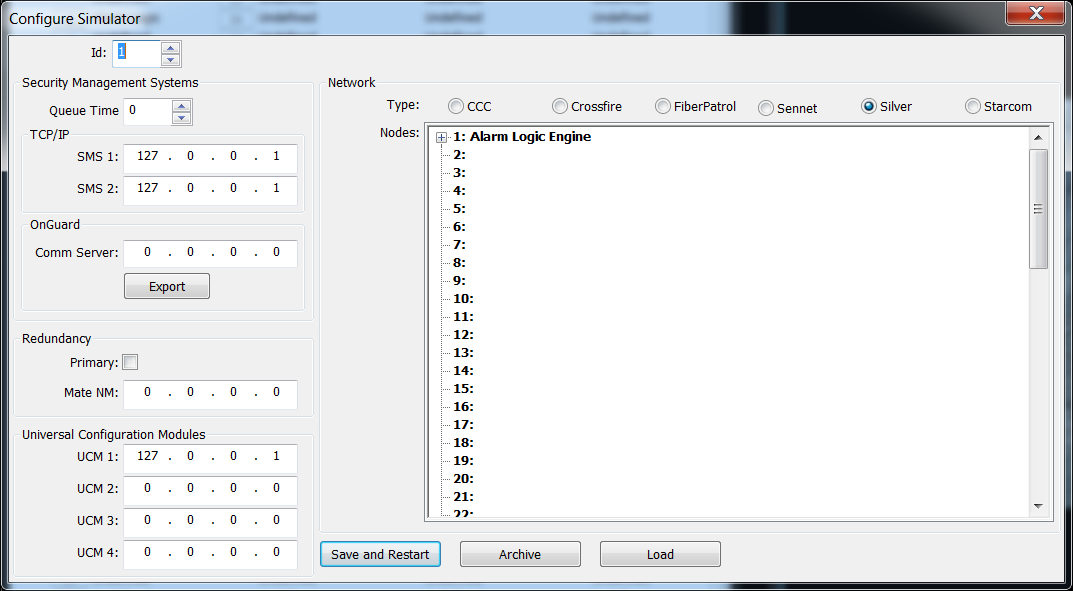
IP address can be left “localhost” as the Network Manager is in the same network with Xeoma. Network Manager ID should be left 1 (we only have 1 Network Manager/Simulator). If you have several fences, you can use their numbers to set up different fences.
Then you should set up camera positions for the incoming Zone Alarm. Move camera to the needed position, “name” the Zone Alarm number for it, click “Add”.
The “List of alarm signal” preset list will fill up as you add cam positions. Don’t forget to click OK button when you’re ready!
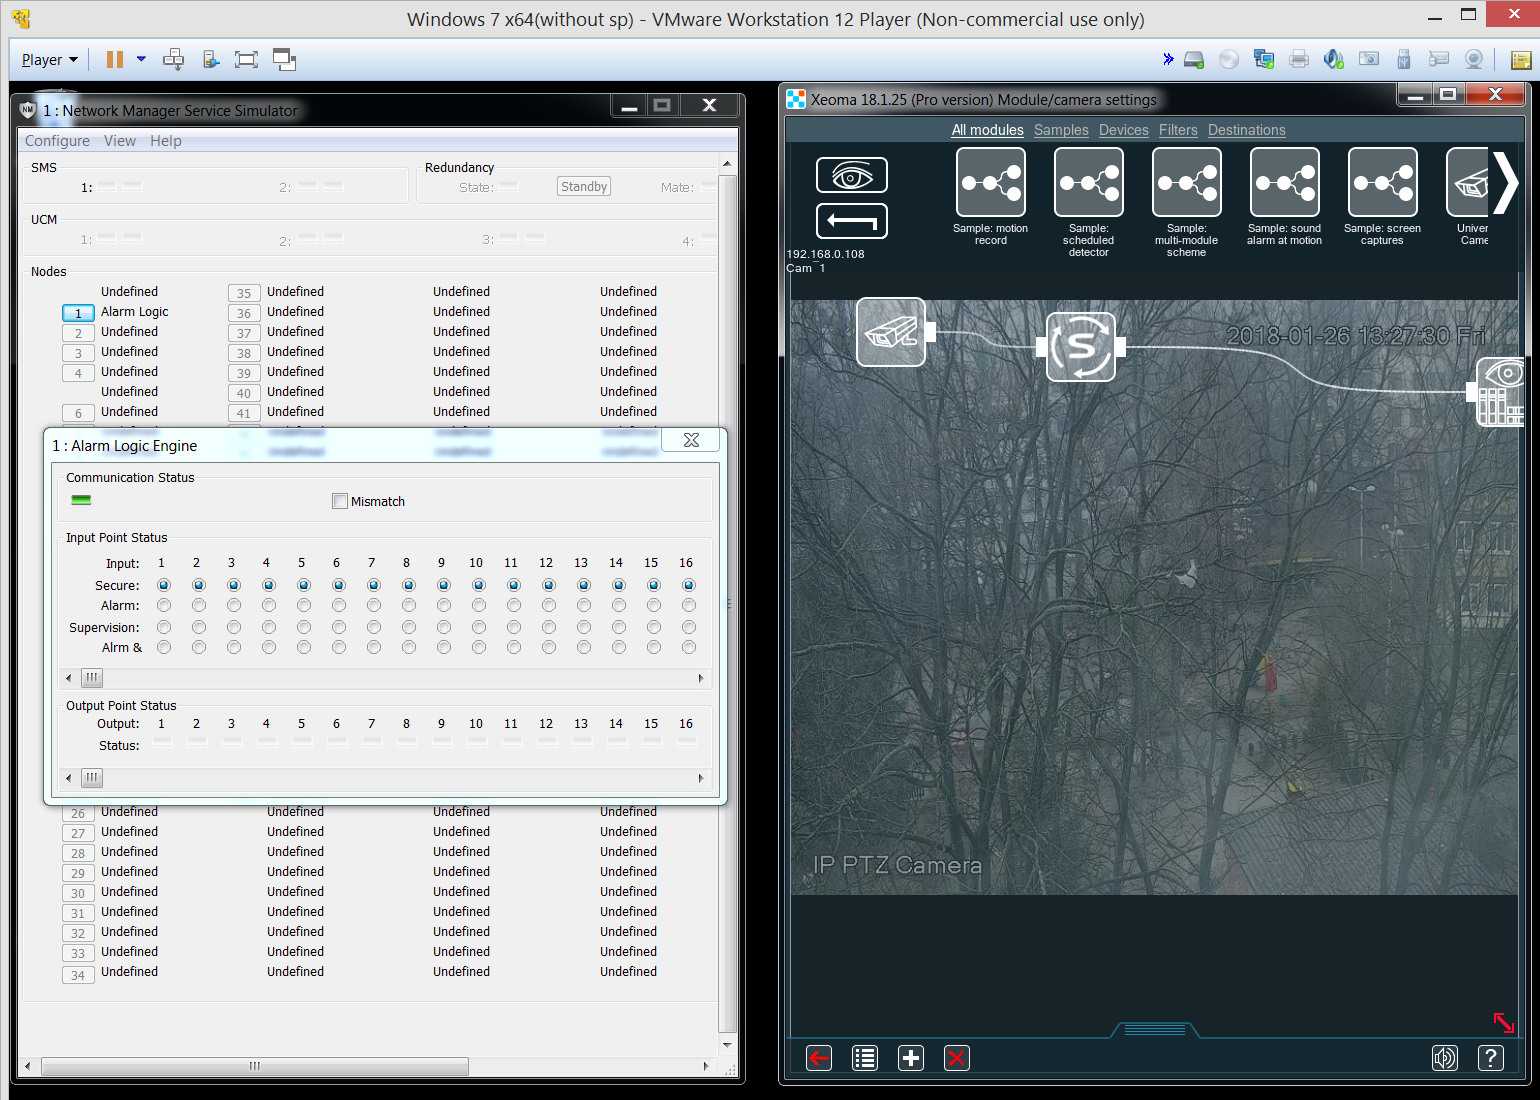
Then go to the Simulator, open the Alarm Logic Engine #1’s settings. To simulate an alarm in a zone, click with your mouse in a row “Alarm” under the needed zone. The camera will turn to the preset for alarm of that number.
Click it back to “Secure” when the “alarm” is finished (like the fence device would do in real life).
3 October 2018
Read also:
Xeoma Additional module: Moving to PTZ preset
Xeoma Pro – your professional video surveillance service!
PTZ Tracking for PTZ security cameras in video surveillance systems
Xeoma in Safe city video surveillance systems
