How to Find a Person by Photo from a Surveillance Camera: Searching in the Archive by Name, Face, and Photo in Xeoma
1. Search by Name (Menu Item “Search by Faces”)
1.1. Searching for Known People
1.2. Searching for Unknown People
2. Advanced Search by Photo (Menu Item “Search Person by Photo”)
FAQ
Want to know how to find a person by photo from a surveillance camera? Or perform face recognition in security system archives? The Face Recognition module in Xeoma goes beyond simple detection, allowing you to identify individuals by recognizing their faces in both real-time and archived recordings.
Using a snapshot of a person, Xeoma allows you to search for and identify individuals within your footage made using the ‘Face Recognition’ module. View all episodes of appearances in the frame of known people (e.g., employees of your organization) or unknown ones (e.g., strangers or simply unauthorized), as well as perform so-called “interception” by photo—that is, searching for a person by photo across all cameras and their recordings using just their snapshot (e.g., for searching for criminals or missing persons).
1. Search by Name (Menu Item “Search by Faces”)
This option is available for recordings made by the “Face Recognition” module using any recognition method—statistical image analysis or Artificial Intelligence.
1.1. Searching for Known People
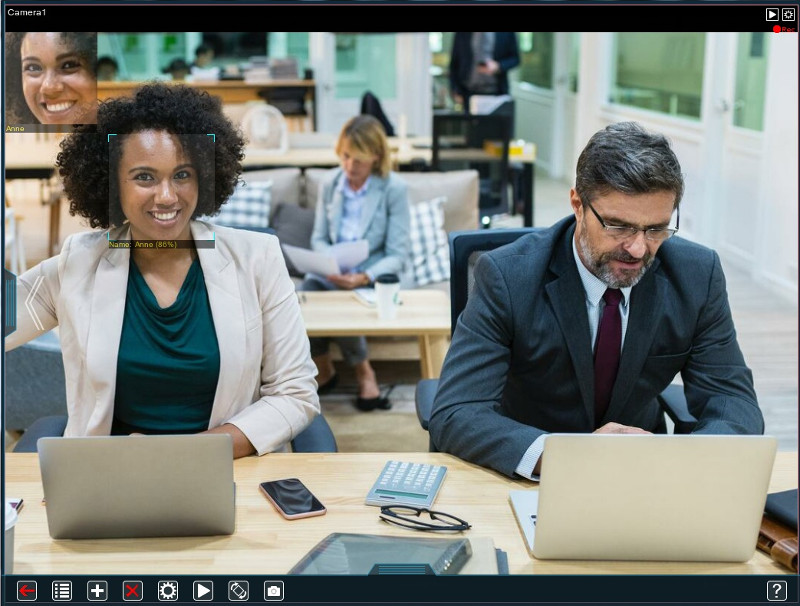
Step 1. Ensure that the Face Recognition module is added to the camera chain and trained to recognize a specific set of faces (family members, employees, authorized personnel, regular customers). Verify that the face detection and recognition accuracy suits you. Detailed information about the Face Recognizer and setup instructions.
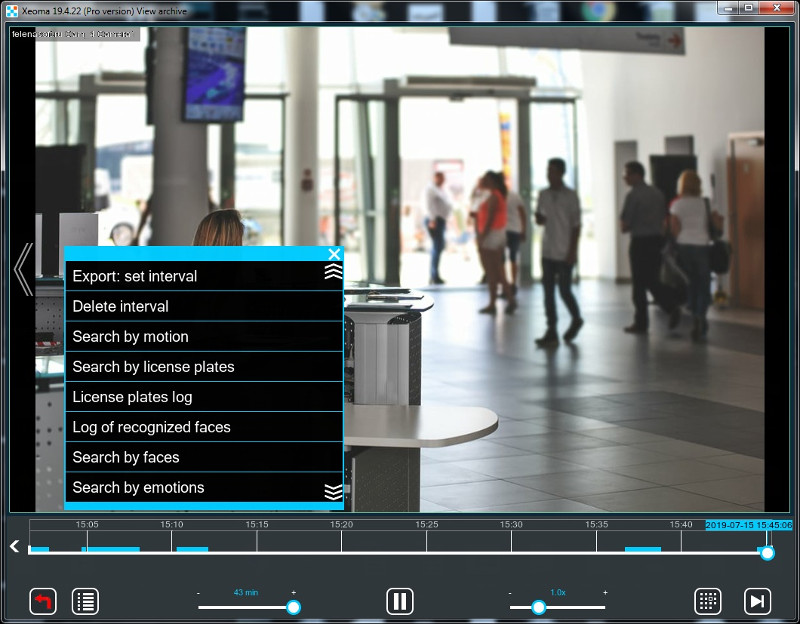
Step 2. Open Xeoma’s built-in archive player. For Xeoma versions 19.4.22 or older, the needed option will be in the Main menu of the archive viewer window, in the “Search by Faces” submenu:
(For newer Xeoma versions, this option will be available in the Main menu of the archive viewer window – submenu Archive Search – Search by Faces)
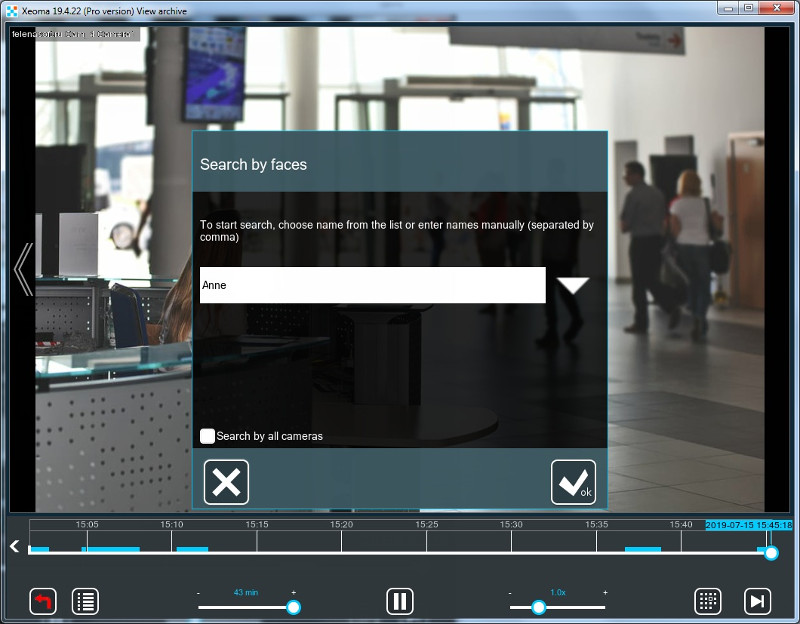
Step 3. From the dropdown list, select the person’s name whose recordings you want to view. This list is formed from all names that all “Face Recognition” modules on this server were trained on. If, for example, identification numbers were used instead of names during training, they will appear in this list in that format.
You can select a name from the list or type it manually—in the case of manual input, you can search for episodes for multiple people or faces at once, separating names with commas.
For example, let’s find all episodes involving employee Anne—this simplifies person identification by photograph in video surveillance systems:
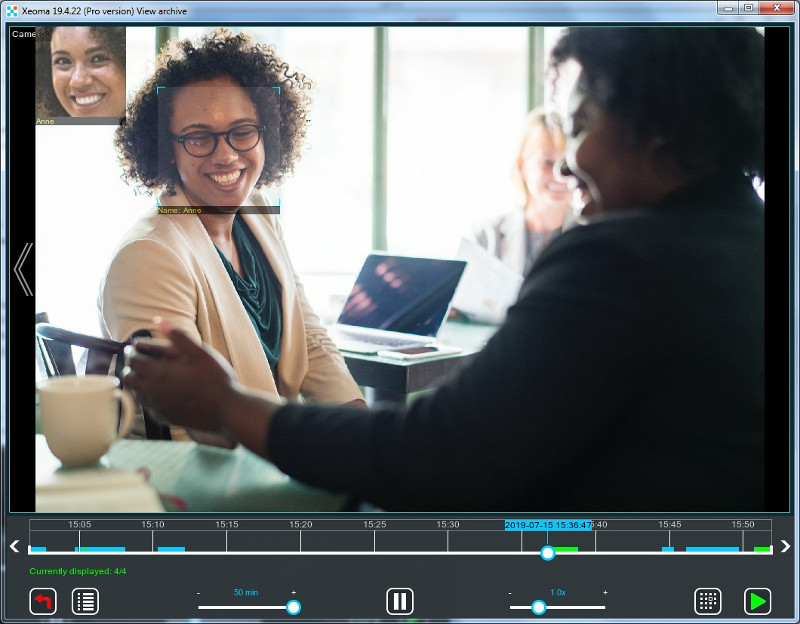
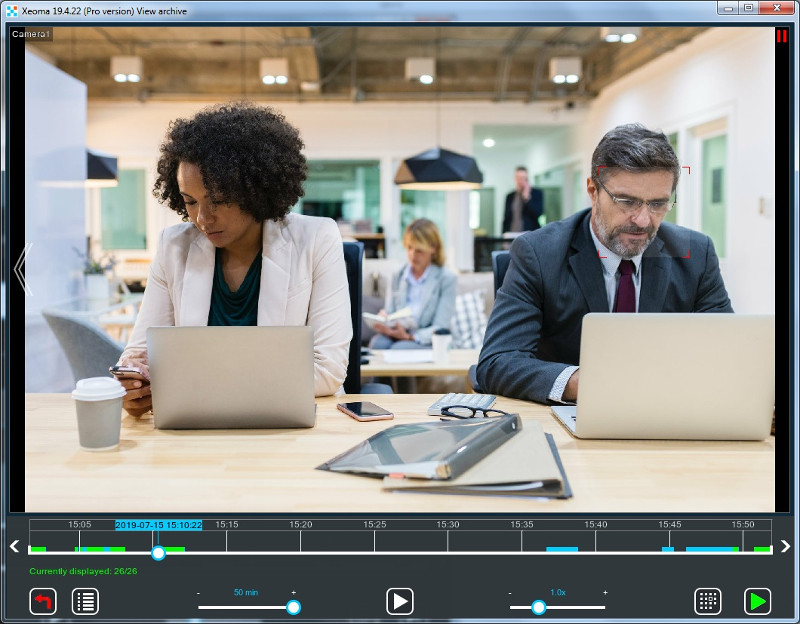
Step 4. A few seconds after entering the name (time depends on server power and number of recordings), you will see the usual recording viewer interface in a slightly different form: on the timeline, besides the usual blue bars, there will also be green bars—these contain episodes involving the searched person or people.
Next to the “Calendar” button, a new button will appear, allowing switching between playing all recordings and playing only sections meeting the search criteria. Around the searched person’s face, there will be a frame with their name, and in the upper left corner, a semi-transparent photo saved for that person during training. This way, you can quickly implement the ability to find a person by photo from a surveillance camera.
1.2. Searching for Unknown Faces
Returning to Step 3. Besides “known” faces (i.e., those all “Face Recognition” modules on this server were trained on), the list will also include the “others” option. This refers to faces that were detected but not recognized (this is possible only if at least one Face Recognizer was set to trigger on all (any) faces):
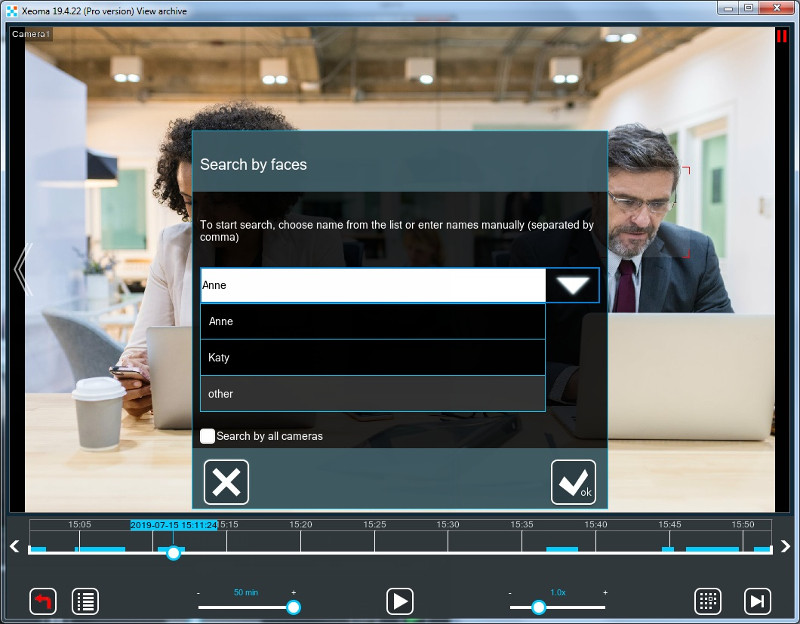
Selecting this option lets you view all episodes involving unrecognized or unauthorized intruders:
Additionally: Search Across All Camera Archives
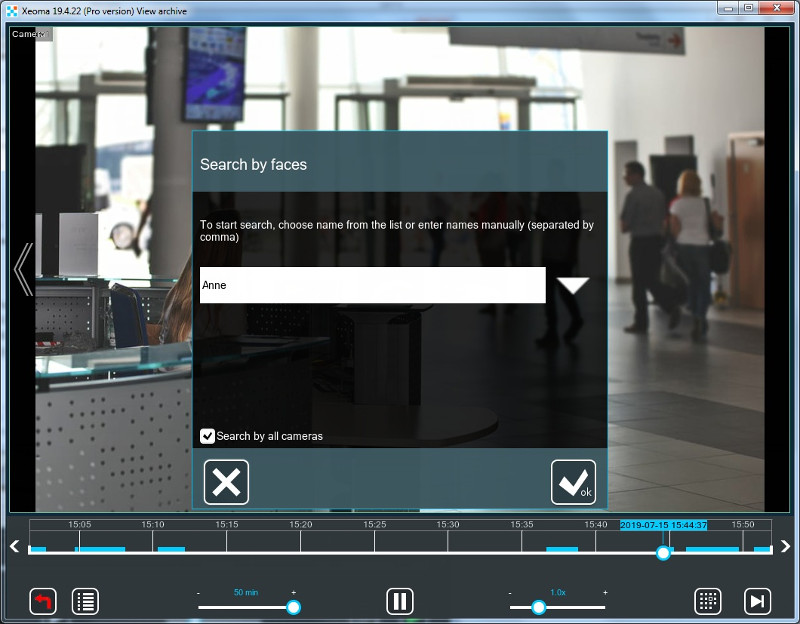
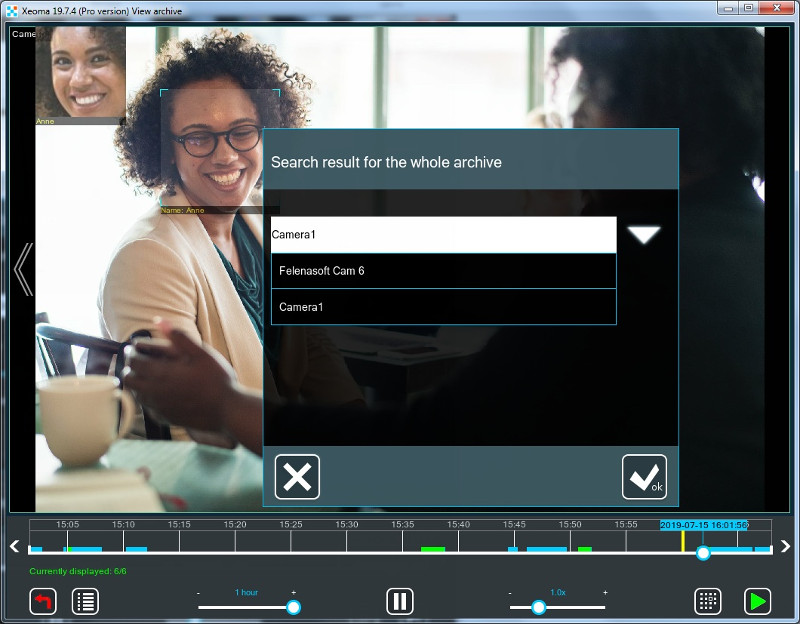
Search by faces (names) and search for unrecognized faces can be performed across recordings from all active cameras. Return to Step 3, and in the name selection dialog for search, check the box “Search across all cameras.” This is especially relevant for large facilities like shopping malls or industrial zones in Yekaterinburg.
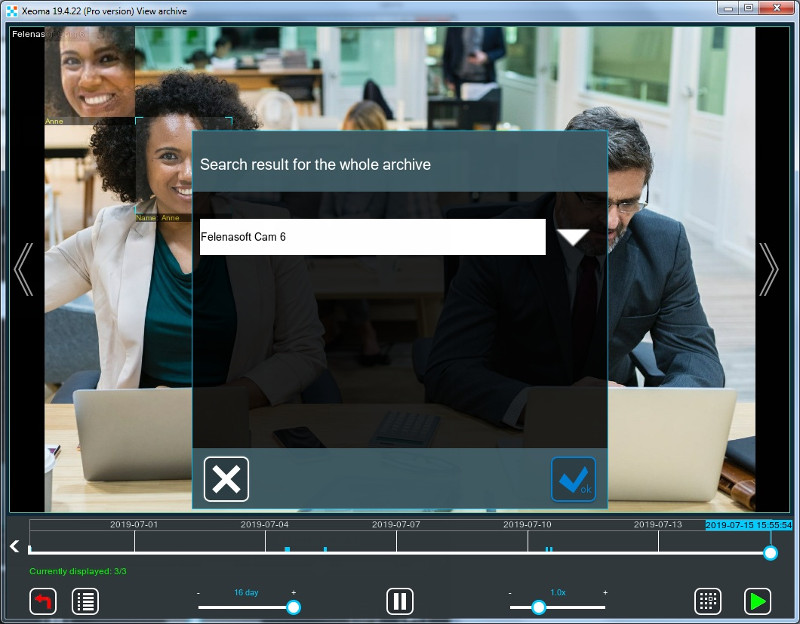
You will see a list of cameras whose recordings contain faces for the selected option. Select a camera from the list, and its archive playback will open as described in Step 4. After viewing all search-matching recordings for this camera, you can switch to viewing events from another camera.
2. Advanced Search by Photo
For recordings made using the “Artificial Intelligence” option in the “Face Recognition” module, a more advanced search is also available—searching for a person by uploaded photo.
The principle is simple: for “interception” of a person, upload their photo, and the system will display all episodes with faces similar to the searched one.

|
Search by photo is an Additional module, requiring a special separate license purchase. |
Step 1. Ensure the “Face Recognition” module is added to the camera chain and operates with the “Artificial Intelligence” recognition method. Go to the archive viewer window. In the Main menu of the archive viewer window, select the “Search Person by Photo” option (for Xeoma versions 19.4.22 or older) or submenu “Archive Search” -> “Search Person by Photo” (for Xeoma versions newer than 19.4.22).
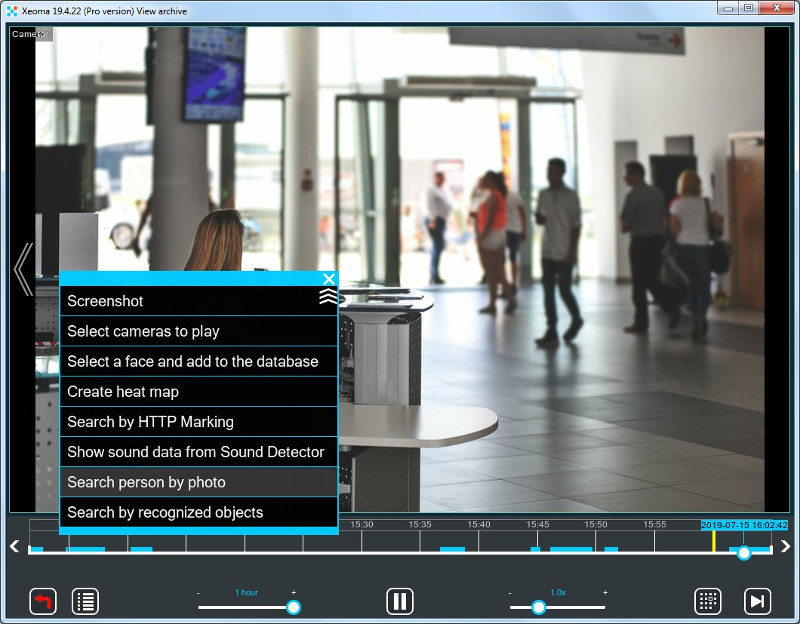
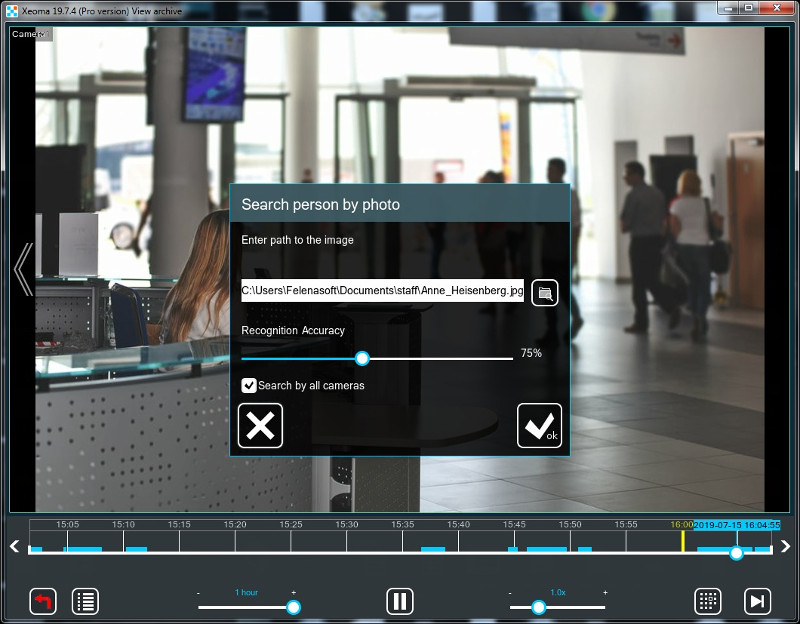
Step 2. In the opened dialog, enter the path to the photo of the person to find. The path can be entered manually, copied from the clipboard, or selected from disk using the “Browse” button. This enables person search by photo without external services.
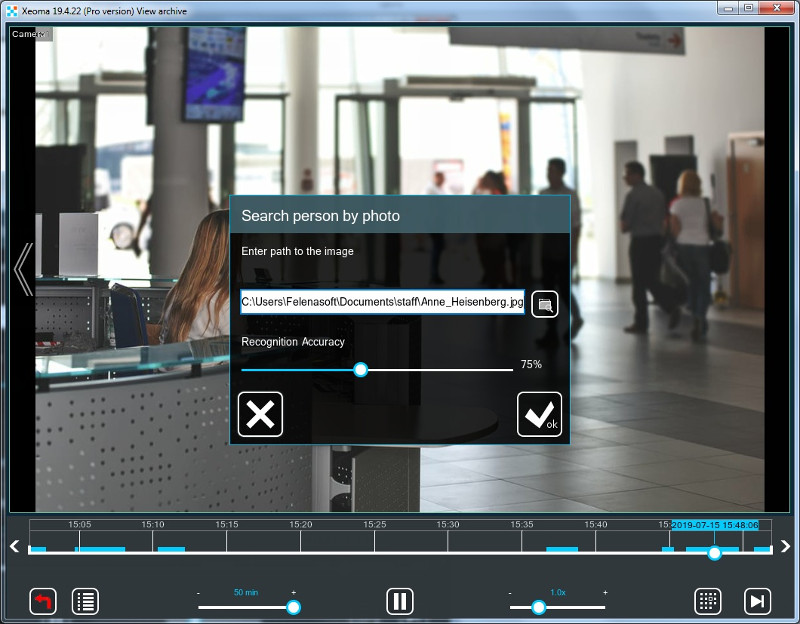
By selecting your preferred minimum recognition accuracy, you can narrow (high accuracy) or expand (low accuracy) the set of episodes where a similar face was noticed.
Note: Episodes shown will be those where a face similar to the photo’s face was noticed with accuracy from the selected value and higher.
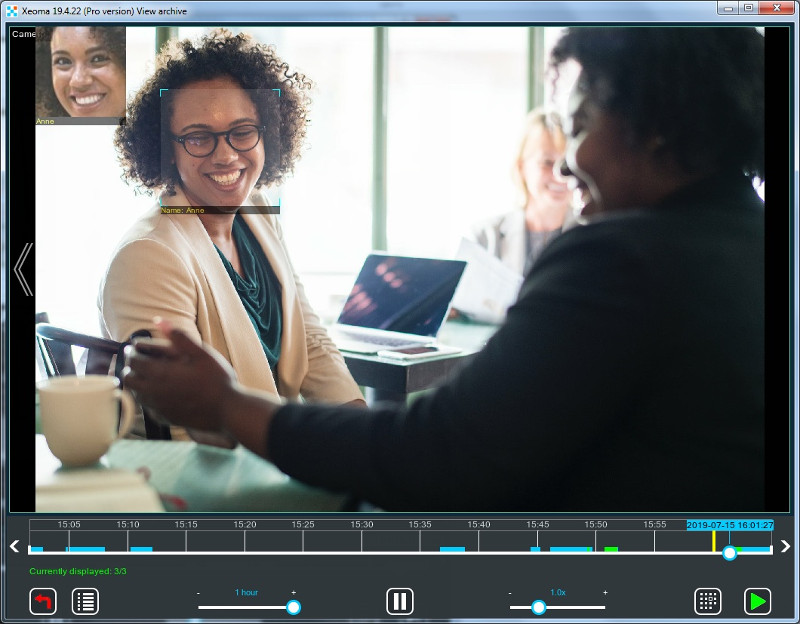
Step 3. A few seconds after uploading the photo (time depends on server power and number of recordings), you will see the usual recording viewer interface in a slightly different form: on the timeline, besides the usual blue bars, there will also be green bars—these contain episodes involving faces similar to the photo’s face.
Next to the “Calendar” button, a new button will appear, allowing switching between playing all recordings and playing only sections meeting the search criteria.
If you don’t have a license, you will get such message:

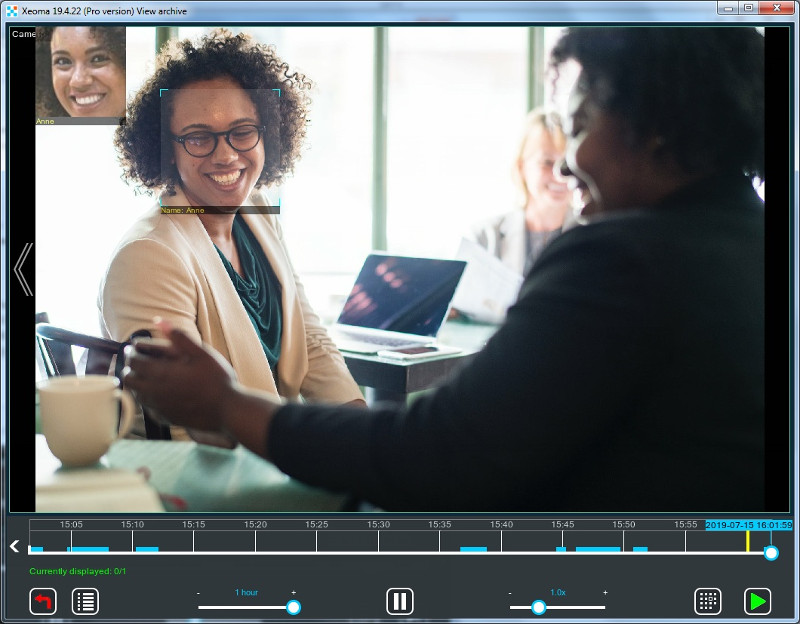
Click “Continue” to try this feature. Even without a license, you can test photo search in trial mode, where only one, the most recent detected episode with a face similar to the photo’s face will be shown:
In newer versions of the Xeoma video surveillance software, photo search can be performed across all server camera recordings at once. Return to Step 2, where you specify the photo path, and check the box “Search across all cameras.” Useful for camera networks in cities.
You will see a list of cameras whose recordings contain faces similar to the uploaded photo. Select a camera from the list, and its archive playback will open as described in Step 4. After viewing all search-matching recordings for this camera, you can switch to viewing events from another camera.
Depending on the task, budget, and system features, you can use search by face/name or photo search to find and quickly view recordings involving the searched people.
FAQ
- Can you find a person on the internet by photo?
- No. Xeoma searches your surveillance camera archives, ensuring local processing without data transfer to the network.
- What is search by name (face-to-name)?
- You link a name/ID to a face during module training and filter the archive by this data for quick episode viewing.
- Is this online search like FaceCheck?
- No. Xeoma is local CCTV analytics for business, without access to internet databases; focus on your recordings.
- Does it work with a webcam?
- Yes, if the camera is connected as a source in Xeoma; search is performed on recordings involving it.
- Can you search across all cameras at once?
- Yes, there’s a corresponding option in the search menu—check “Search across all cameras” for network-wide analysis.
- Is a separate license needed for photo search?
- Yes, for the advanced “photo search” option, a special license for the Additional module is required.
July 19, 2019, updated September 17, 2025
Read also:
Face Detection and Recognition in Xeoma
Purchasing Additional Modules
Recordings and Archives in Xeoma Video Surveillance Software