Xeoma: desktop video surveillance + backup to Cloud

Beside other advantages, Xeoma video surveillance is famous for its flexibility and immense array of features. An example of that is the high-demand feature to have Xeoma working ‘locally’ (on your desktop, smartphone, Mac, single-board computer etc.) and have backups of recordings in the safest place – Xeoma Cloud storage.
Why is it so popular? This combination allows you to have a fully standalone video surveillance system functioning 100% on your side – process cameras and do video analytics, accept remote connections, save recordings to mounted and network drives, send notifications, everything that Xeoma can do. With it, you will have the level of privacy you require since nothing is pushed to our side, and lower latency in accessing live cameras, adjusting settings, etc. Plus, a copy of recordings will be stored in a Cloud account, accessible to you in case of necessity. Such off-site storage is working with cameras directly so if your local video surveillance is destroyed or disabled, for example, due to a power outage, that won’t affect the recordings that are already in the Cloud. A sure way to keep evidence of burglars just the seconds before they vandalize your ‘main’ VSS and make sure they get what they deserved, and you get your insurance.
Here’s how you can do that:
1. Download Xeoma for your operating system
2. Purchase and activate Xeoma license via Main menu – Registration – Activate or via console
Alternatively, you can use the Free version with some restrictions, or the Trial edition for a limited time.
3. Install (if needed) via Main menu – Install or using console
4. Add your cameras via “+” menu and configure necessary modules
5. Purchase Xeoma Cloud subscription and copy credentials from the purchase email
6. In order to connect to your Xeoma Cloud account you can use either Xeoma Client or a browser:
Xeoma Cloud connection via Xeoma Client:
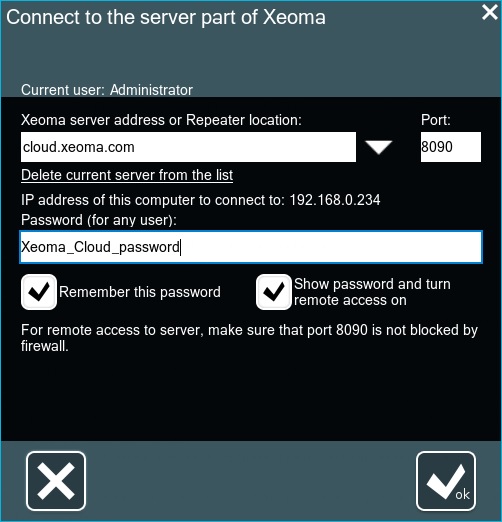
Open Xeoma and go to Main menu – Remote access – Connect to – specify server’s IP address (cloud.xeoma.com) and Xeoma Cloud password, then press OK:

Go to “+” menu and add your cameras. If your cameras do not have static IP address (purchased from your Internet provider) or dynDNS, then please use alternative methods of adding cameras in Xeoma Cloud.
Usually, when you use Xeoma Cloud as backup, you can use local Xeoma to transfer recordings to the Cloud server. In this case please follow this instruction.
Xeoma Cloud connection via browser:
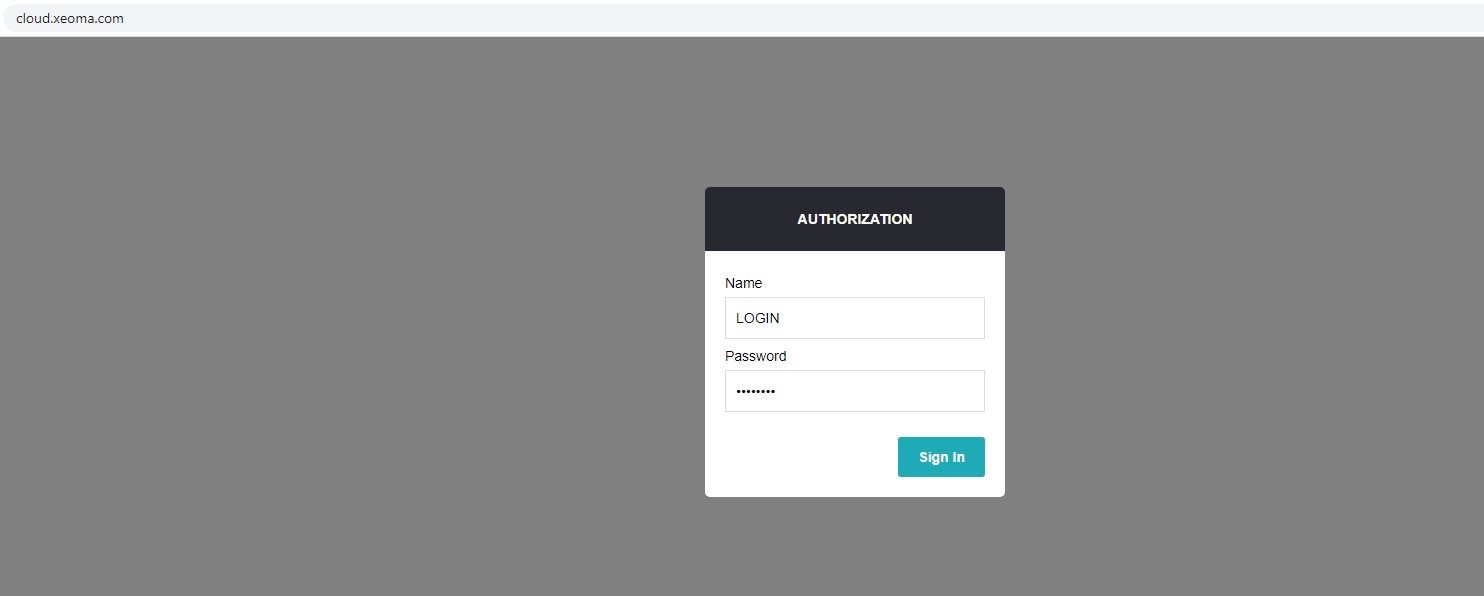
Open any browser and specify website address: cloud.xeoma.com, then indicate login and password from the purchase email and press OK:
(login/password credentials are located in the bottom part of the purchase email and look like a set of symbols)

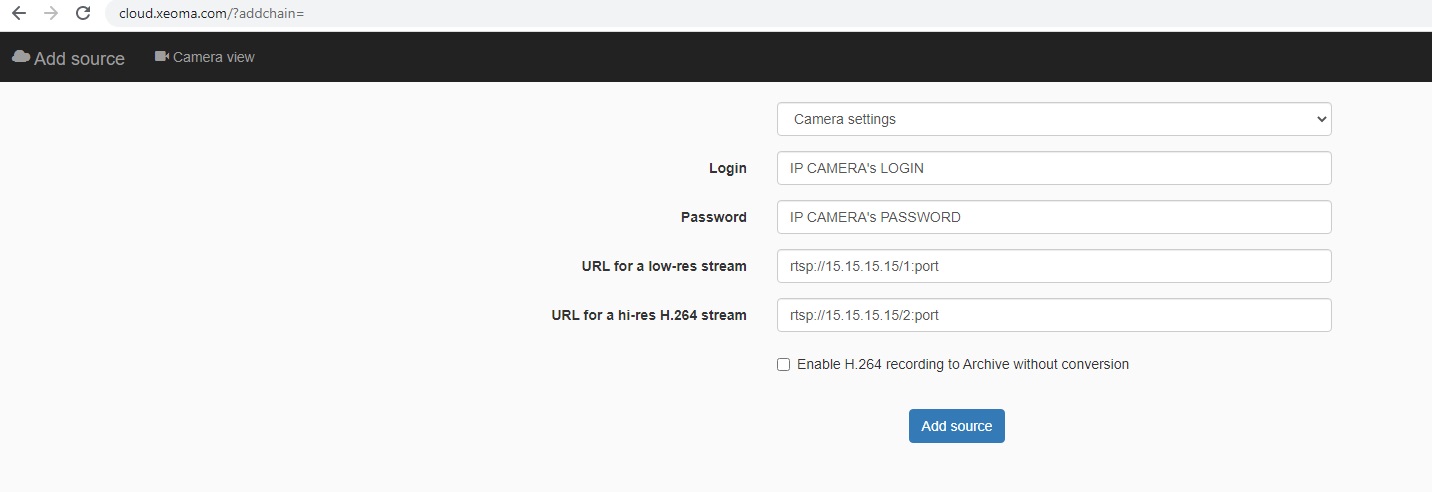
Next you can add your cameras using “Sources” – Add source


7. Now you have 2 Xeomas: 1. Desktop Xeoma and 2. Xeoma Cloud.
You can switch between Xeomas via Main menu – Remote access – Connect to – change cloud.xeoma.com to localhost (your desktop Xeoma) and vise versa.
(!) Also, please note that you can run only 1 Xeoma instance (Xeoma Client connected to Xeoma Cloud or desktop Xeoma) on 1 machine at the same time, i.e. if you install Xeoma on your desktop and then you connect to your Xeoma Cloud account using the same Xeoma (Main menu – Remote access – Connect to), then your desktop Xeoma will not be recording/working at the same time when you’re connected to Xeoma Cloud. It is best to configure Xeoma Cloud account and then re-connect to your local desktop Xeoma.
BONUS: The Xeoma Cloud account will not be only saving recordings – you can also connect to view cameras real-time for as long as you want – the time of view is not limited.
When you need them, recordings can be downloaded to your site without size or length limitations.
Xeoma Cloud account is powered by subscriptions so you don’t need another Xeoma license or Xeoma Repeater.
Xeoma Cloud is accessible from any network so the device that will be connected to it doesn’t need a static (public) IP address.
Try Xeoma for free! Enter your name and your email to send the license to in the fields below, and click the ‘Get Xeoma free demo licenses to email’ button.
We urge you to refrain from using emails that contain personal data, and from sending us personal data in any other way. If you still do, by submitting this form, you confirm your consent to processing of your personal data
16 July, 2022
Read also:
Let’s get it started, or how to use Xeoma
Our clients and testimonials
Promo leaflets, PDFs
Reseller partner program