Xeoma and Telegram

When it comes to video surveillance, it is particularly important for the alarm to reach the owner/operator in time. A lot of thefts and robberies rely on speed and surprise giving the victims less time to react. So, wouldn’t it be convenient for your mobile device to alert you immediately wherever you are? Even better, if it can be done with an already installed app without downloading anything that would clutter the space. And what gives better reaction speed than an instant messenger (IM app)? This article will show you what Telegram can do to help you keep your ears pricked up for trouble.

|
You can find instruction on how to use the “Telegram Bot Notifications” module in Xeoma here |
Telegram’s skyrocketing popularity is well-deserved: a 100% free cloud-based platform with a light-weight app and impressive protection. However, what makes it so precious for integration with third-party systems is a different service – IFTTT. It stands for If This Then That and represents a web-based platform for creating (and sharing) simple algorithms: when a condition is fulfilled (a message arrives or something is posted, etc.) – an action occurs (a message is sent or information is shared, etc.). This is by far the easiest method to set up your own system.
Telegram has a special bot to work with it, named appropriately IFTTT:
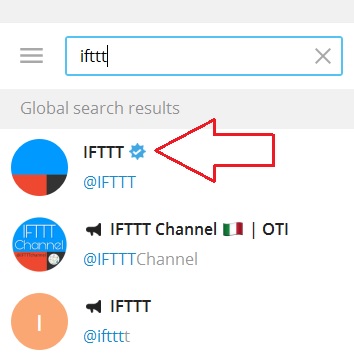
Choose him, click START and make an account for IFTTT. Now what you need is a new applet (think of it as a written order for the bot) with a condition, so click This:

It offers plenty of services that can work as triggers for IFTTT app, the one you need is e-mail:
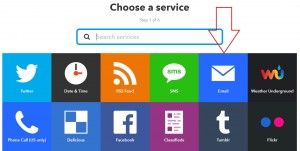
There are 2 kinds of e-mails the bot accepts, but there is no need to bother with tags, so take the first option:
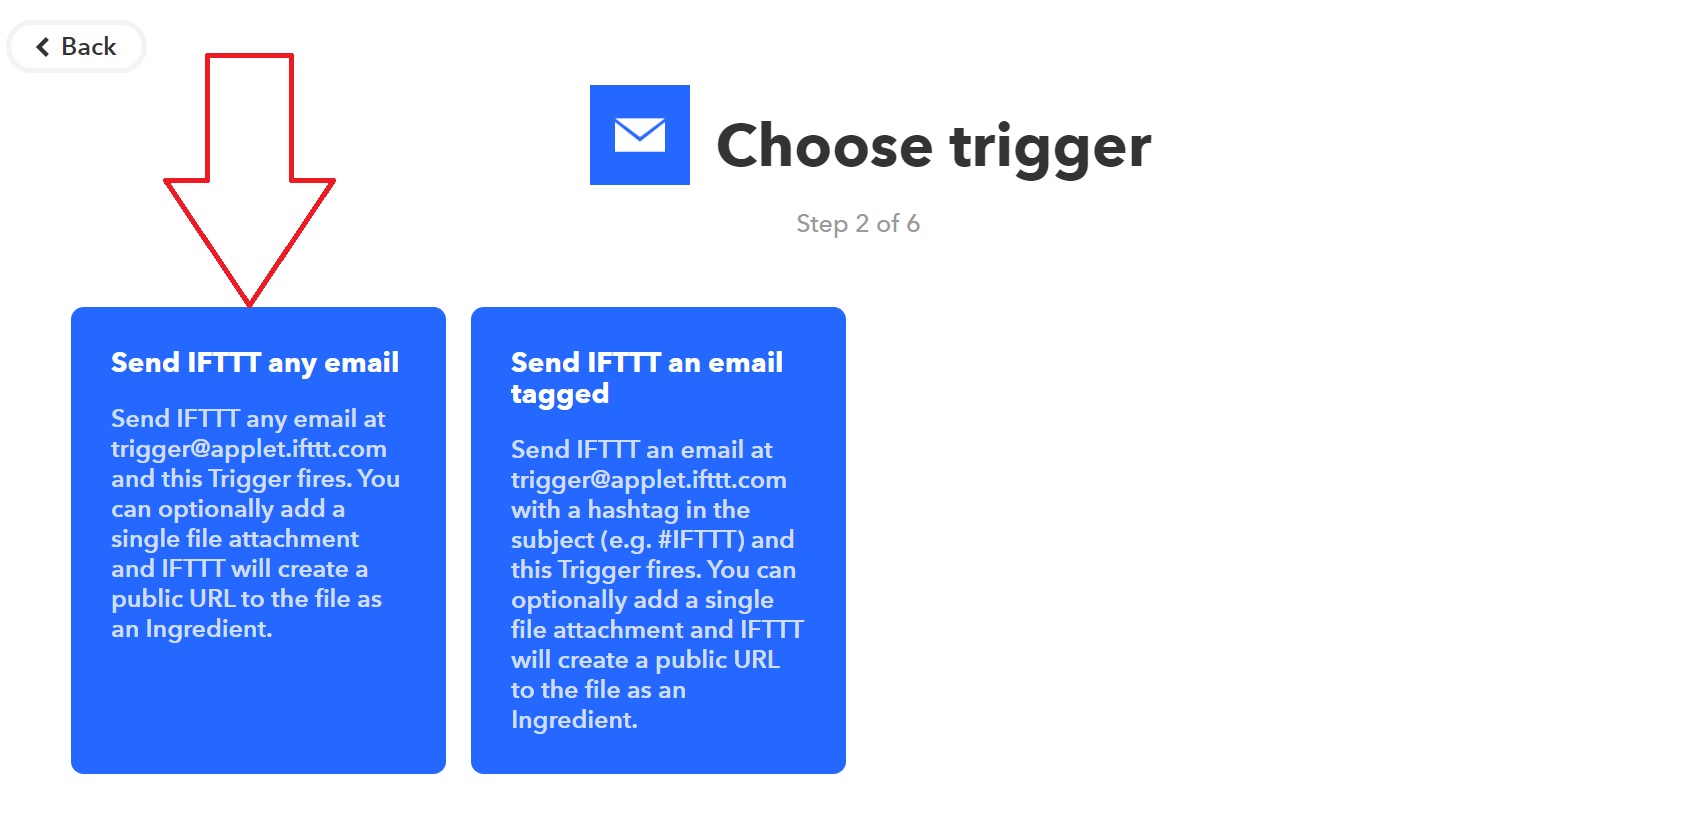
Note that IFTTT app will automatically use the e-mail associated with your account.
The condition is all set now, time to move to the action:

Since we want the bot to send us a message via Telegram, then that’s exactly what we need:
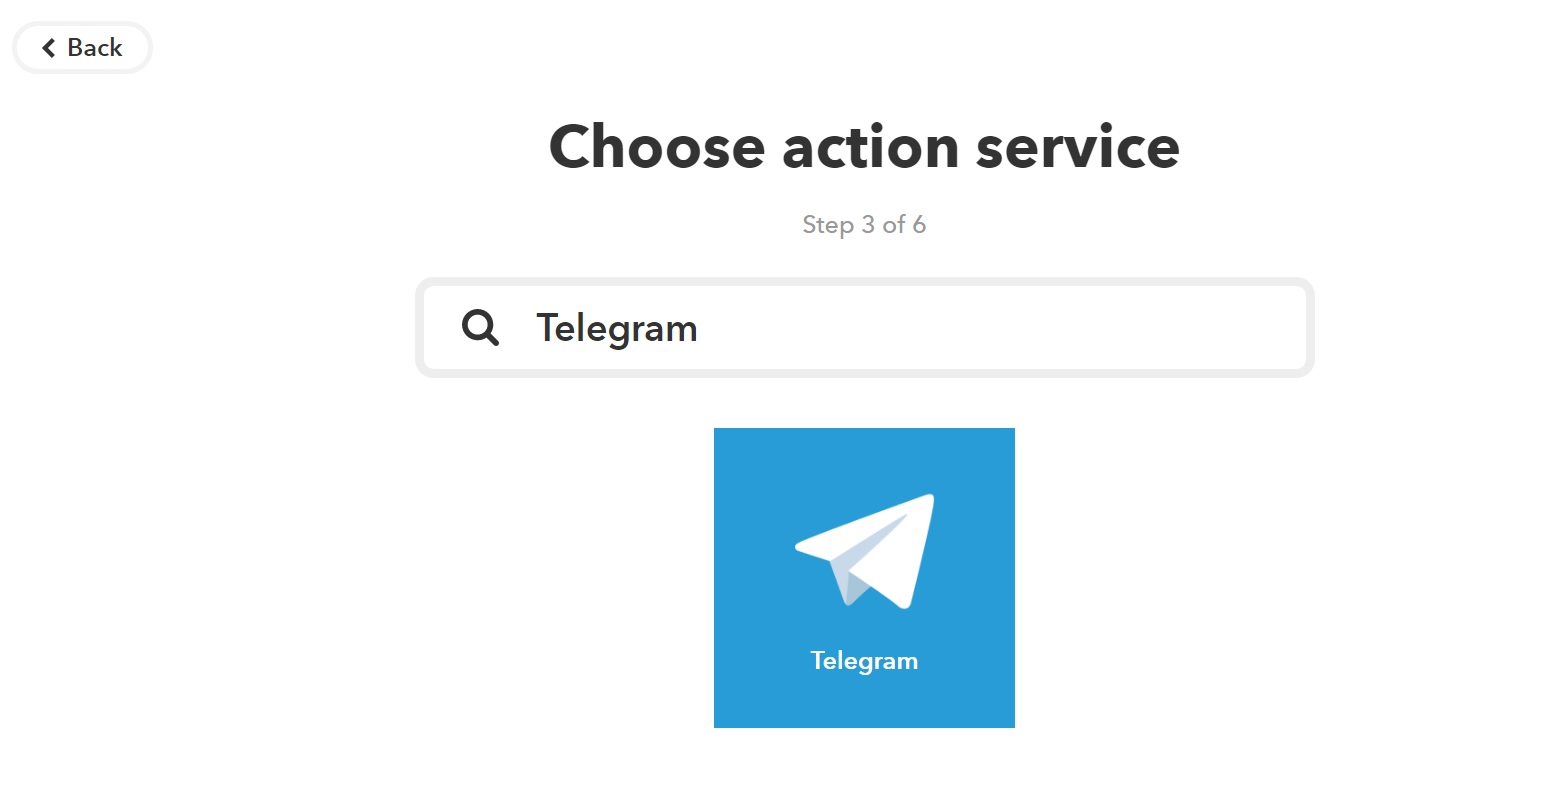
The message has to contain a picture – it should show us what was detected:
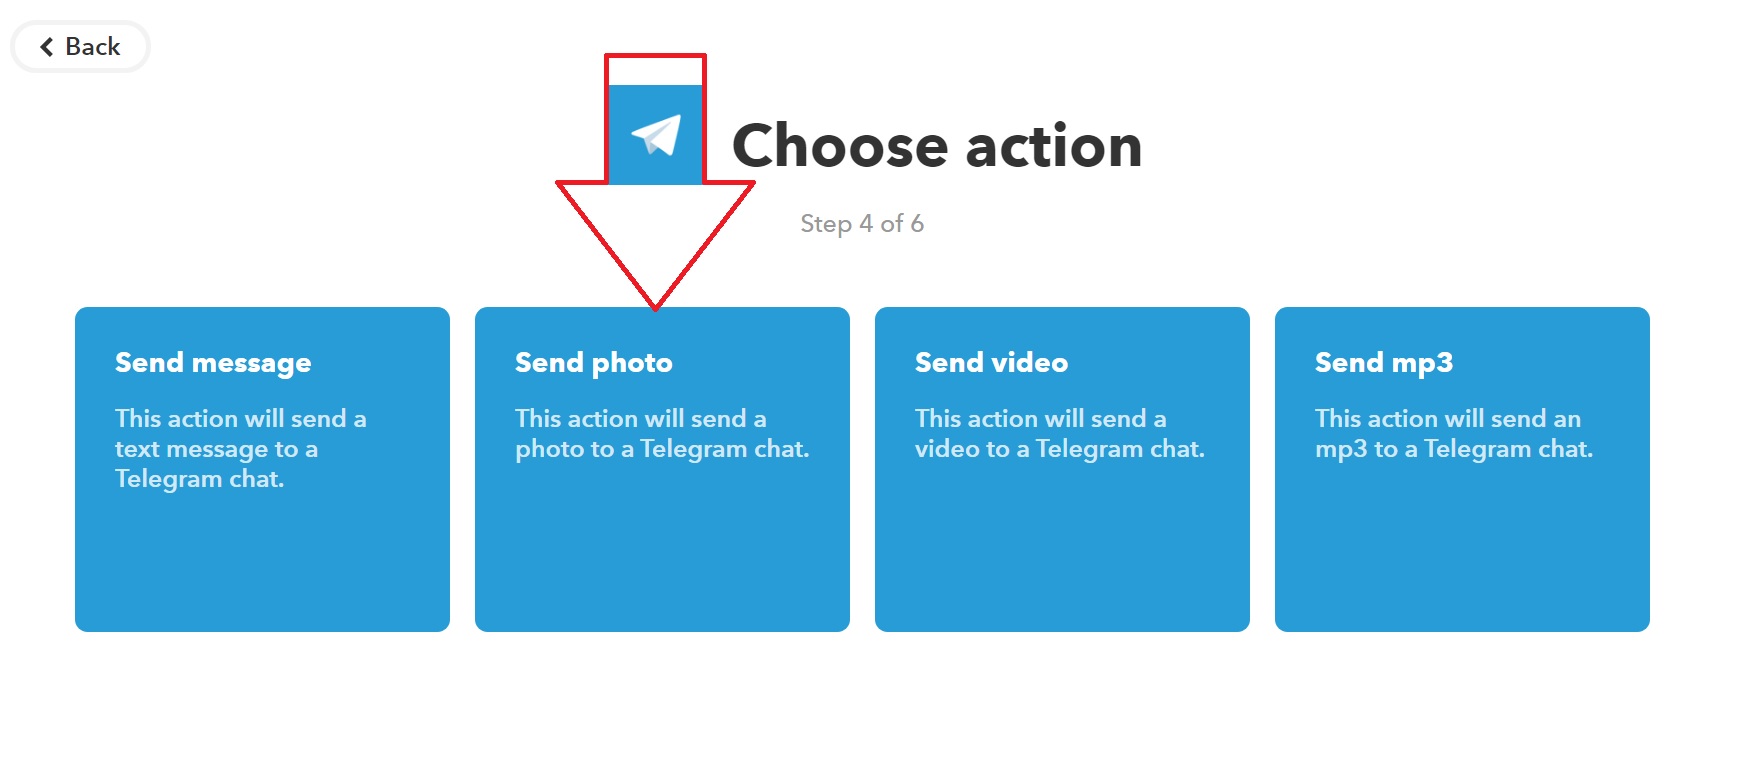
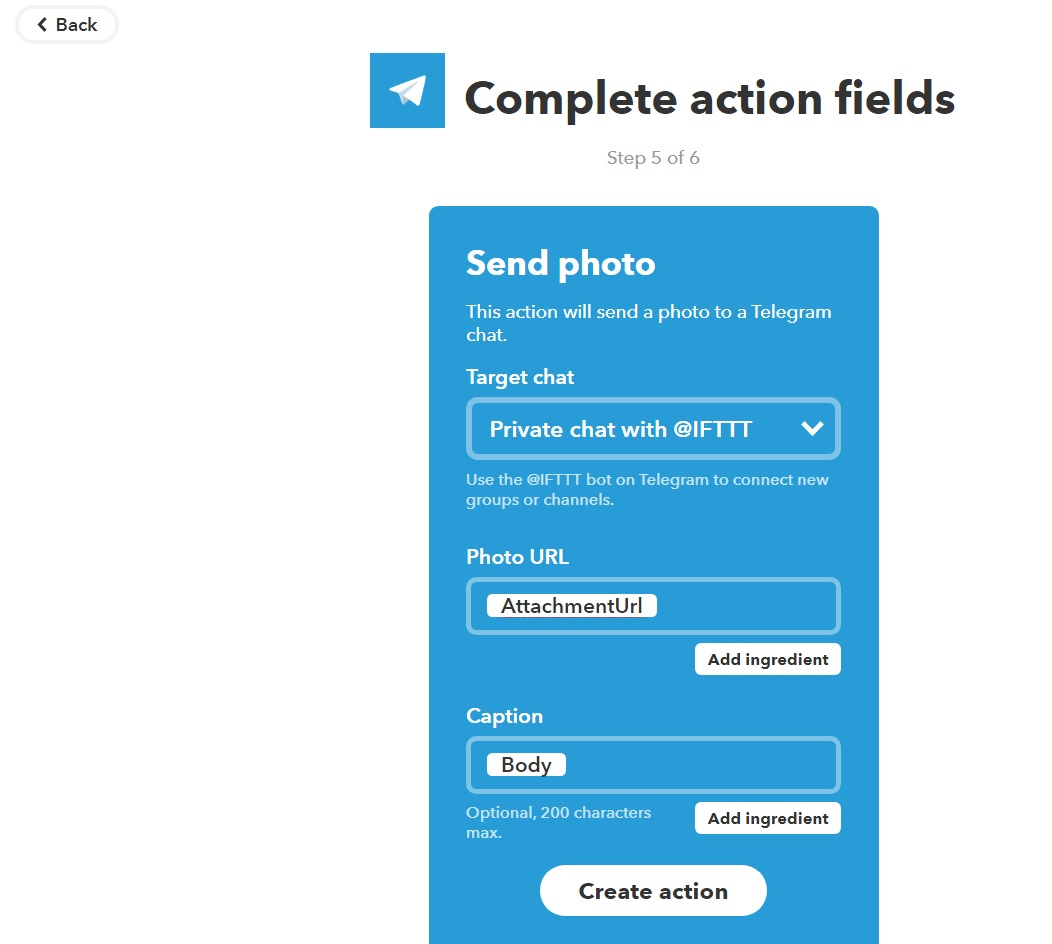
Now we can choose the exact content of the message. Since Xeoma already puts all the info into the e-mail, you can leave everything as it is:
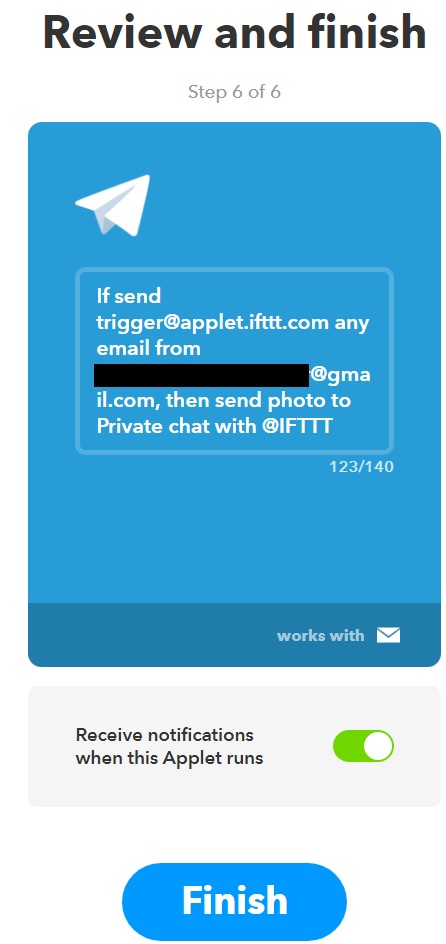
One final check that our condition and action are correct:
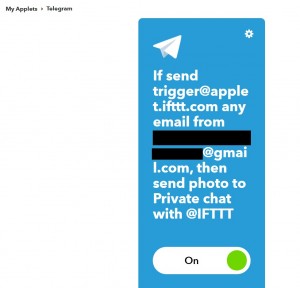
All done, IFTTT app is ready, the bot is waiting for the e-mail:
Now on to Xeoma. A simple chain for alerting you by motion looks like this:
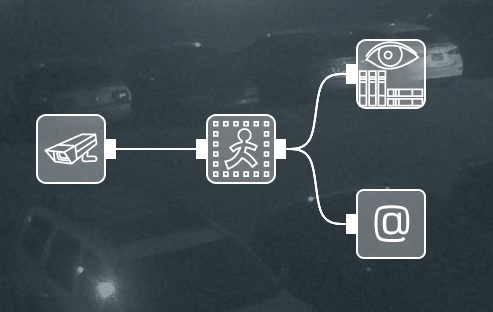
“Sending Email” can be adjusted this way:
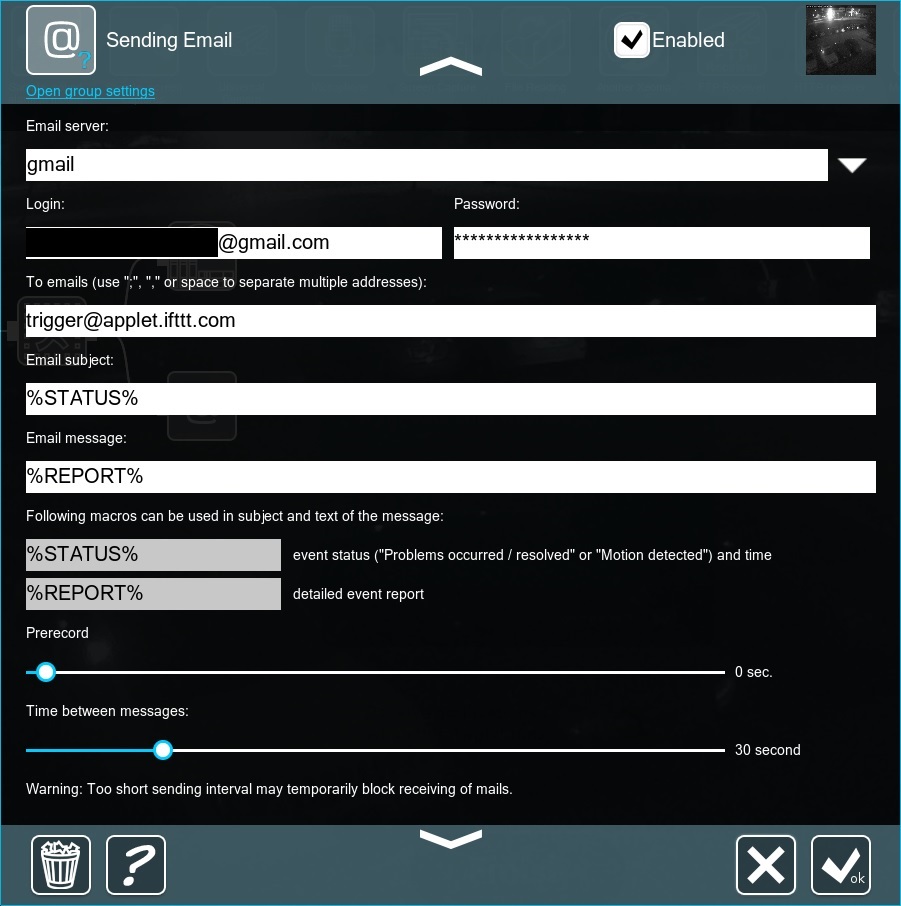
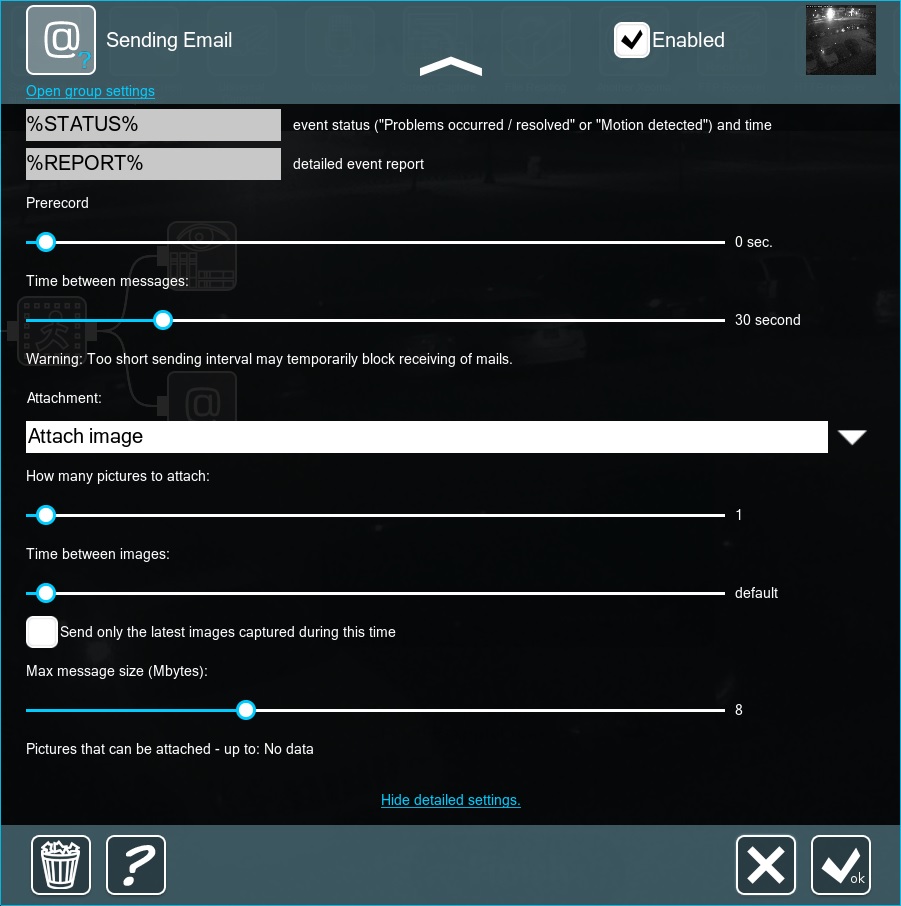
There are 2 things to keep in mind:
- The e-mail must be sent to the address IFTTT provided (see the final check);
- The attachment must have only 1 picture – the bot won’t be able to work with several.
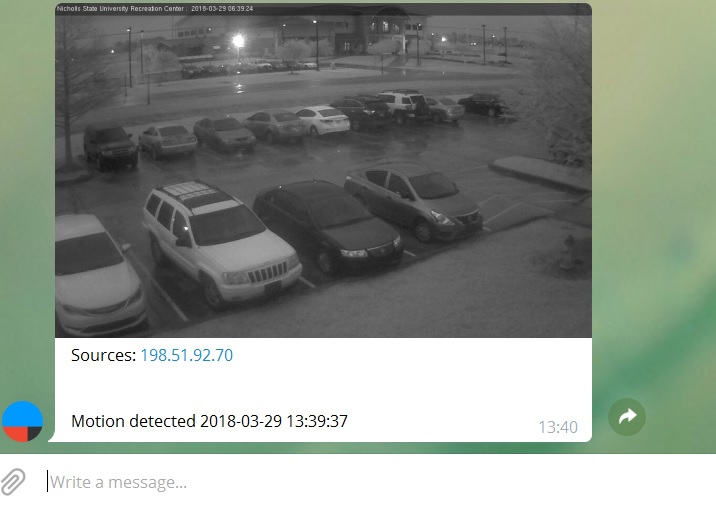
That’s it! Now every time the detector is triggered, IM app will notify you with a message containing the camera’s IP, date/time and a picture.
There is another way to connect Xeoma and Telegram, which is somewhat more complicated but direct, no third party (e-mail or IFTTT) required. Telegram allows its users to create and manage their own bots, capable of accepting HTTP-commands. @BotFather makes a bot and gives the master its credentials (token) for controlling it. Make a bot and test it with this command in any browser: https://api.telegram.org/botTOKEN/getme (where TOKEN is the full token @BotFather gave you, should look something like this: 123456789:abcdABCDabcDAbcd). If the response starts with “ok”:true, then the bot is ready to go. Just send it any message via Telegram, so that it has permission to communicate with you.
Now it’s time to teach Xeoma to communicate with the bot. Here is a sample chain:

Note the presence of “Web Server” – we’ll come back to it a bit later. Two “HTTP Request Senders” are needed to send text and pictures separately. N.B. Make sure to choose https instead of http (bots accept only the former). For the first one, input this command:
https://api.telegram.org/botTOKEN/sendmessage?chat_id=MY_ID&text=IP_OR_NAME
MY_ID is your Telegram ID (if you don’t know it, ask @MyTelegramID_bot for help);
IP_OR_NAME is the text of the message you want; if you have multiple cameras, it’s a good idea to put their IP or names, by which you can recognize them immediately, into the message.
Now on to pictures. This is where “Web Server” comes in handy – it can send you a JPG picture from a camera at any given moment upon request. The link looks like this:
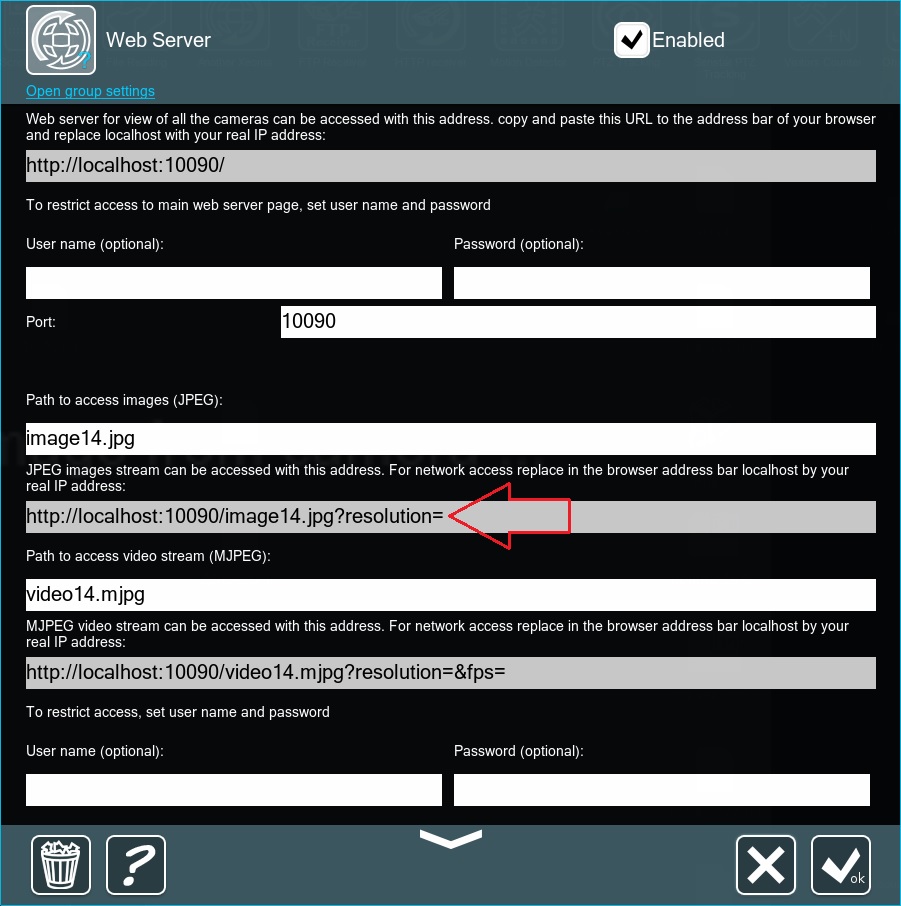
However, for the bot to be able to take that picture, it needs to be available from an external network. This means that you will need a static external IP on the server with the web server’s port forwarded (10090 by default). Once this is done, all you need to do is switch localhost in that link to your static external IP.
Now we can make a command for the second “HTTP Request Sender”:
https://api.telegram.org/botTOKEN/sendphoto?chat_id=MY_ID&photo=LINK (where LINK is the link from “Web Server” with static external IP instead of localhost).
Here is an example of the entire command:
https://api.telegram.org/bot123456789:abcdABCDabcDAbcd/sendphoto?chat_id=123456789&photo=http://115.52.44.211:10090/image14.jpg
That’s it! Now every time “Motion Detector” triggers, your own bot will inform you of that and post a picture of whatever was detected in the IM app.
April, 11 2018
Read also:
Web Server’s API
Integration with POS