Video Surveillance for Flat Buildings
When it comes to protecting your private property, there is an important distinction to be made. With a private house, security is relatively simple. A moderately sized flat building, however, is an entirely different matter. One could argue that protecting a place constantly inhabited by so many people is impossible. However, domestic surveillance technology is known for its flexibility, when handled correctly. Even arranging video surveillance for an entire flat building is no longer a particularly tall order, considering how available house cameras are nowadays. In this article we’ll investigate how it can be accomplished.
Where to Start?
When you deal with security, a phrase you are going to become VERY familiar with is “access points”. Whether it’s domestic surveillance or protecting an open territory – this phrase invariably becomes the key to everything. Needless to say, this is where you should start too. Thankfully, the main access point for a flat building is the entrance, so at least 1 camera goes there. It’s best to put it inside and make sure that its quality is good enough to see people’s faces. It’s field of view can be rather narrow, since you only need to oversee the door. If it’s not particularly well lit, you may want to install an infrared camera to make sure that nighttime visitors can be spotted too. Another point of interest is stairs. Being rather narrow, each flight is simple to monitor with a single camera. This means that installing house cameras for every floor will make for reliable security.
How to Manage?
The footage, of course, needs to be saved. Who can do it? And, most importantly, where? Usually, the most reliable of the tenants takes this responsibility. They keep a server and make sure that all the cameras are connected to it. If something happens, they check the footage and inform the other tenants of the results. However, there is a more elegant solution to that, which doesn’t require a server at all. It’s cloud storage. With this, the footage can be kept on a remote server (cloud) and accessed at any time. It usually requires a monthly subscription and its cost, divided among all the tenants, is rather trivial for proper domestic surveillance.
Setting Up Xeoma
Now let us walk through tuning Xeoma for flat buildings. First, the entrance camera. We need it to check the entrants’ faces, thus we use the module “Face Detector”. In order to keep the security tight, we should set it to React to any faces. However, some people may deliberately (or on accident) cover their faces. We need to keep track of them as well, so time to put a “Motion Detector” in the chain as well. In order to manage the footage recorded by both these filters, we need to connect them to separate “Preview and archive” modules.
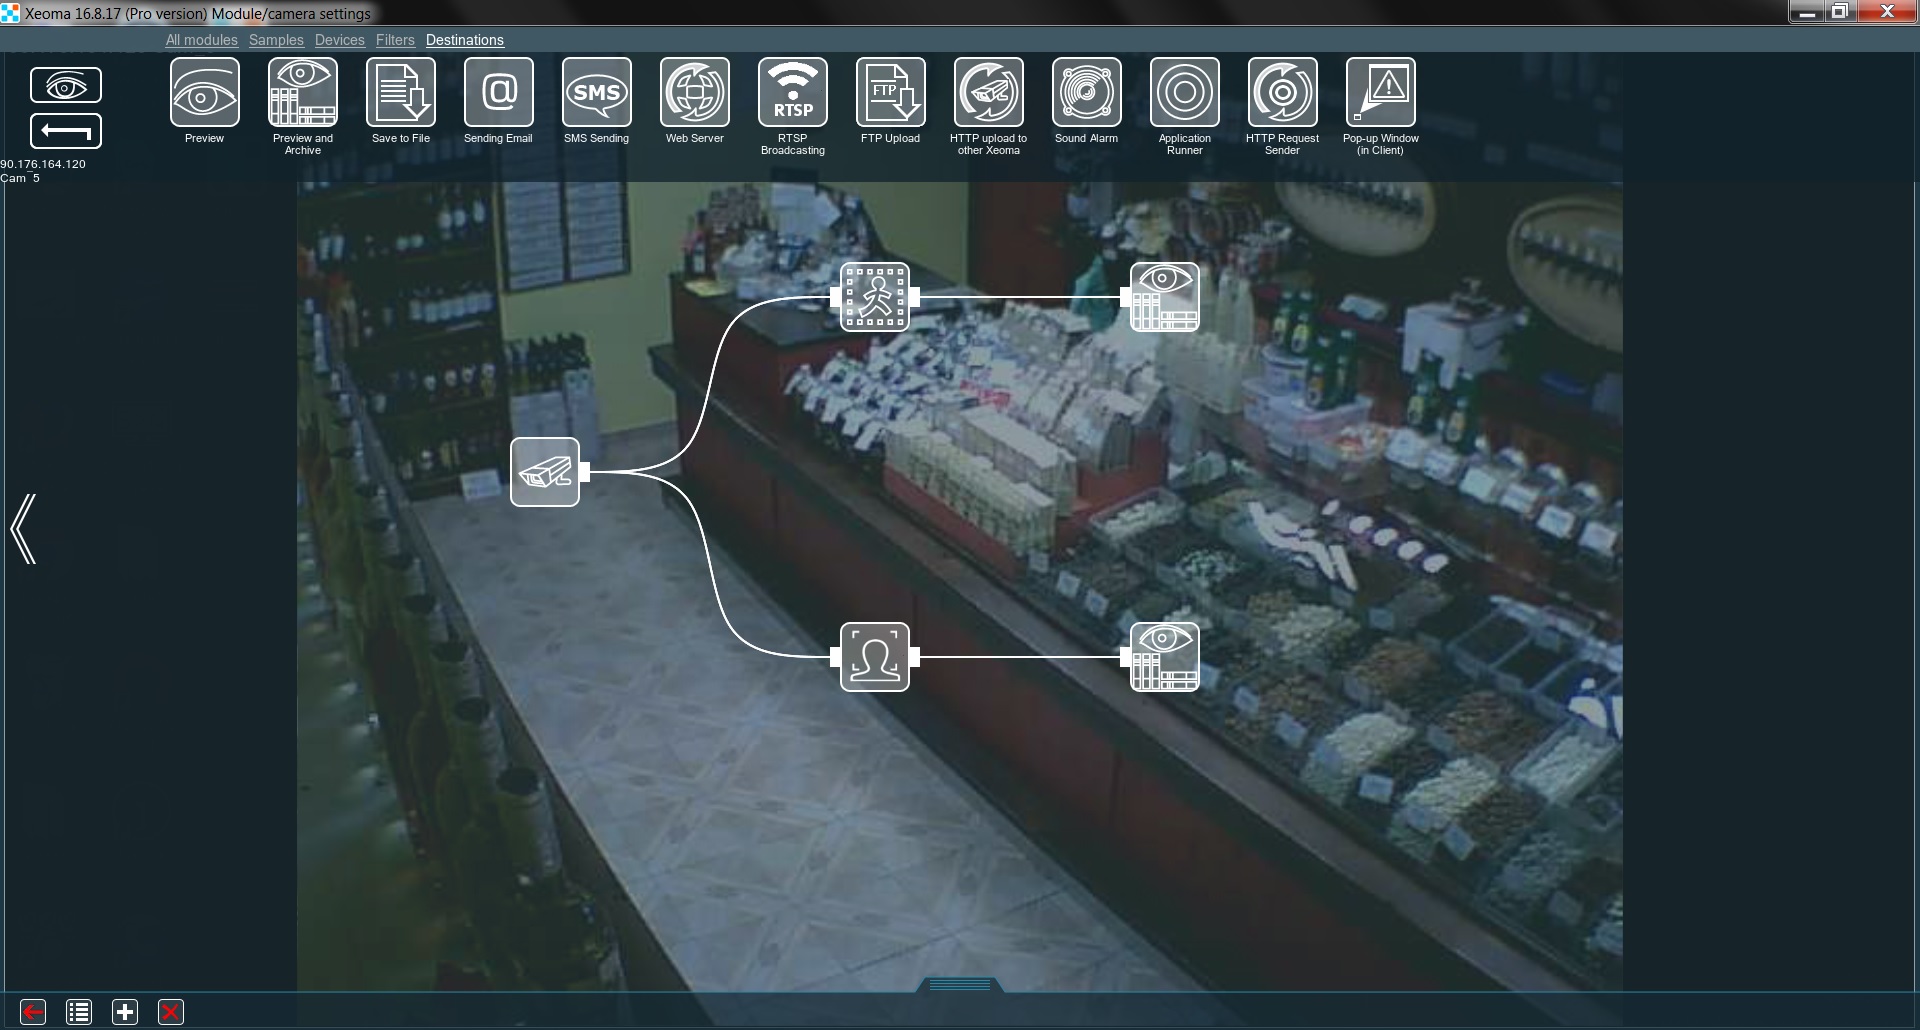
With this, we’ll have 2 identical preview screens, however, the footage will be quite different. You can check both archives simultaneously by pressing the Archive button and choosing both preview screens. You will see this screen:
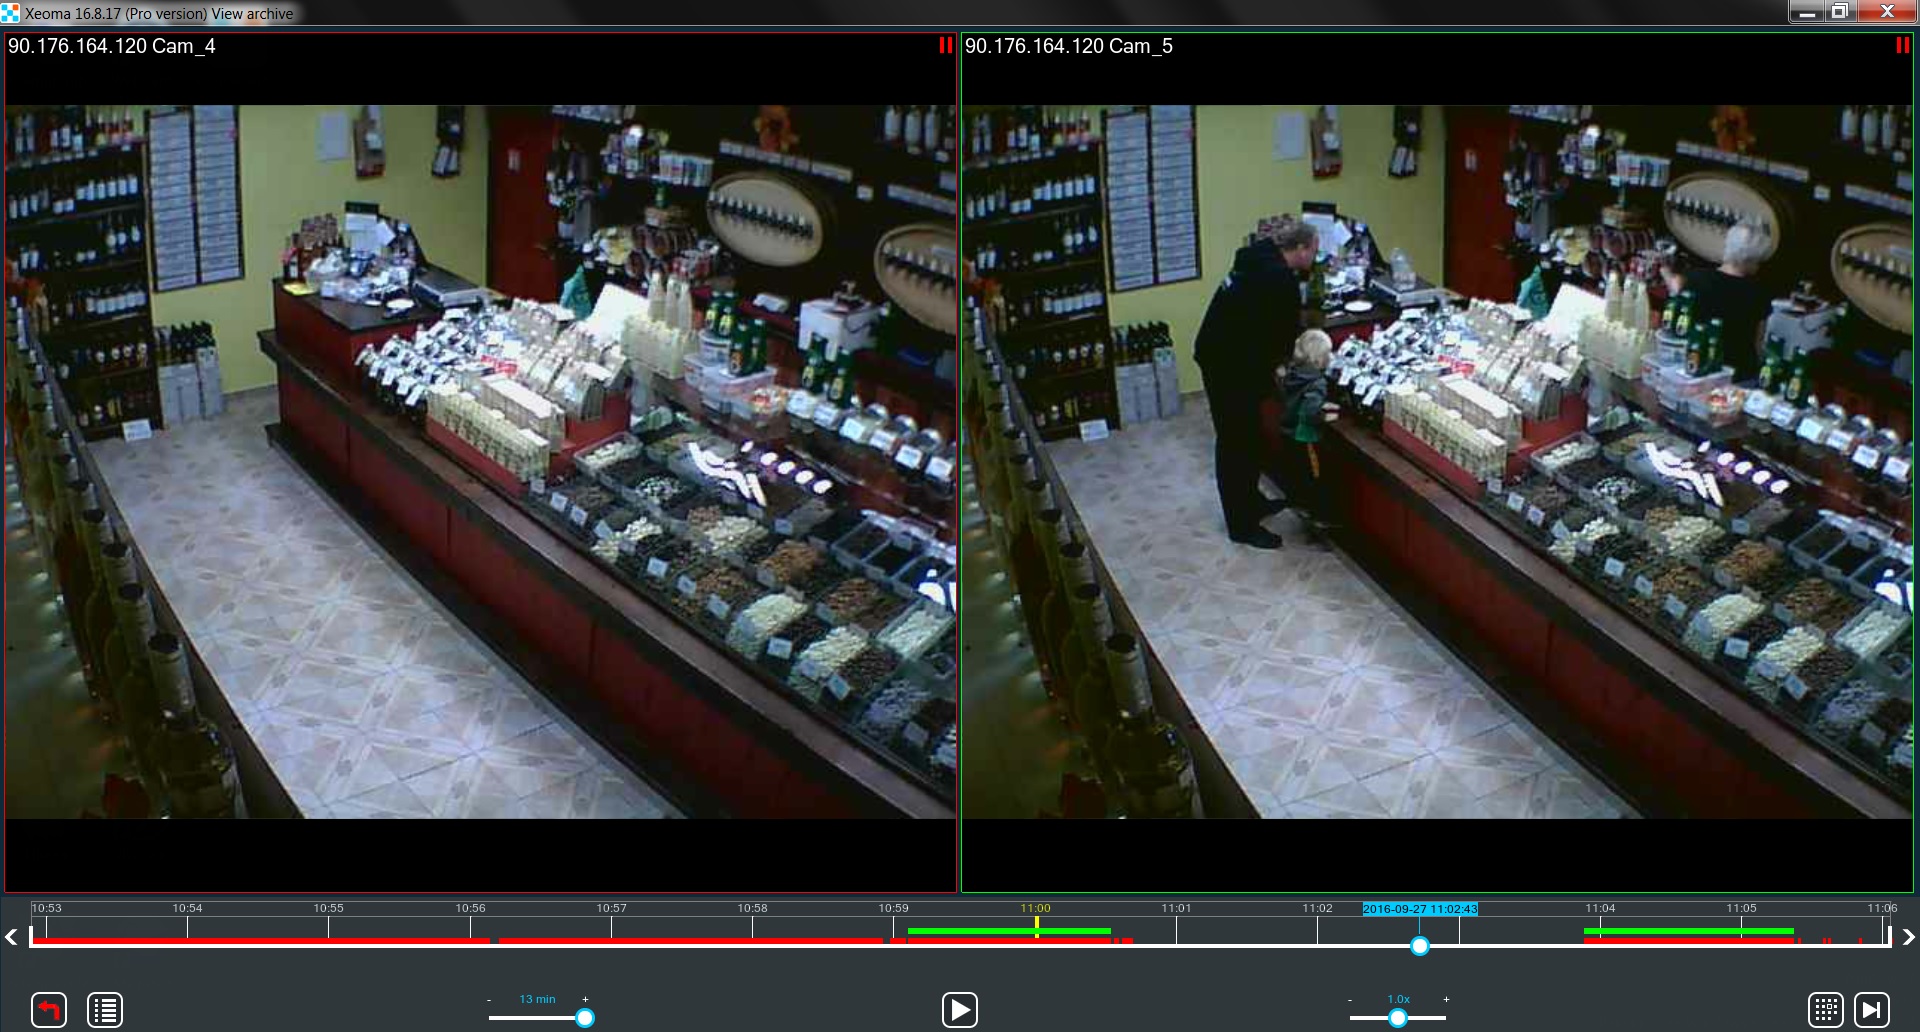
The colored lines at the bottom will guide us. The red one marks the footage recorded by the “Motion Detector”, it should be longer than the other one. The green one – the “Face Detector”. When you can see both lines over a certain interval, it means there was both a movement and a face. However, when there is only the red line, it means that no face was detected, yet something moved. These usually deserve closer inspection.
Now, the stair cameras. These only need the “Motion Detector” as the entrance camera already checks faces. To make sure that you always know what floor each camera overlooks, you can mark the feed accordingly.
Clearly, house cameras can go a long way in protecting flat buildings.
October, 18 2016
Read also:
Cheaper than DVR system? Security surveillance system with Raspberry Pi board!
How to set your private cloud security with Xeoma Cloud