Xeoma Web server module
Xeoma Web server module differs from most of the modules because of its multi-functional nature. For example, compared to the Scheduler module, that can only be used in one way – to turn the system on or off – the Web server module can be used in various ways to reach various goals.
Part 1. Remote view of cameras via browser
The most popular purpose of Xeoma Web server is to enable live view of a camera or cameras from almost any device with access to the Internet and webcam streaming, even on a non-supported operating system. After you connect this module to the camera, you will be able to view the camera remotely in a browser (for access from outside of local network, you will need to have static fixed IP address.
Simply connect the Web server module to the camera in chain.
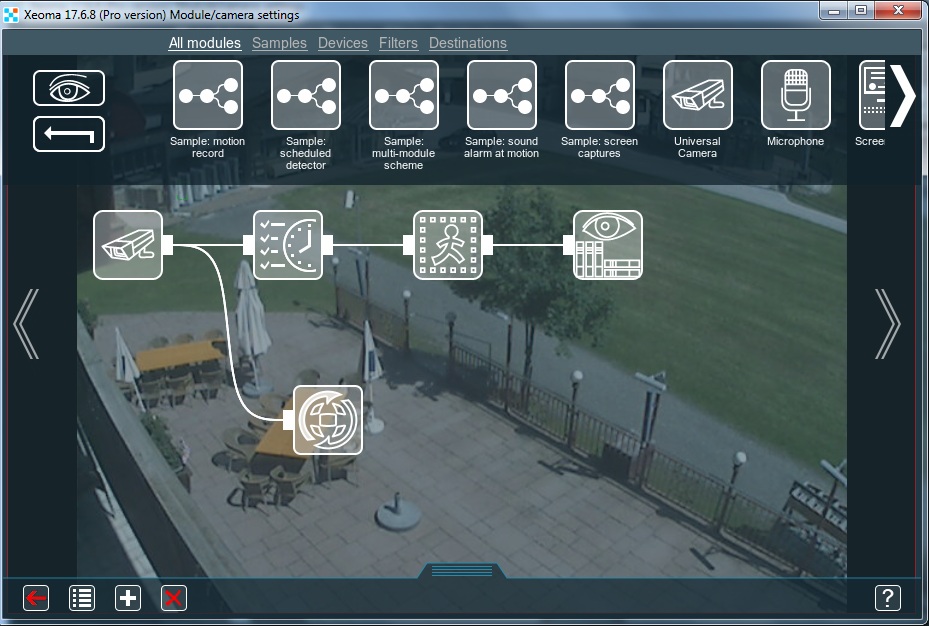
The same rules of module connection applies here: if you connect the Web Server after a filtering module like Motion Detector, the image will get to be displayed in a browser only when the module will let it through. As permanent access is usually required for browser view, you are advised to connect the Web Server straight to the camera.
Tip: if you’ll need to view archive recordings in a browser as well, please make sure that there is a Preview and Archive module connected, and that has recordings.
Enter its settings, where you will find the links (URLs) to access various streams – JPEG images, MJPEG video, Flash video with sound, web server general page to view all cameras that have a Web server module connected to them on this computer.
If authorization is required for web browser access, set the username and password here.
Please note that by default the links are for view from within the same network; that’s why they contain the localhost word. For remote view from outside of this network you need to replace ‘localhost’ with the computer’s real static/fixed IP address. The links can be edited outside of Xeoma. Copy the link and paste it into a browser.
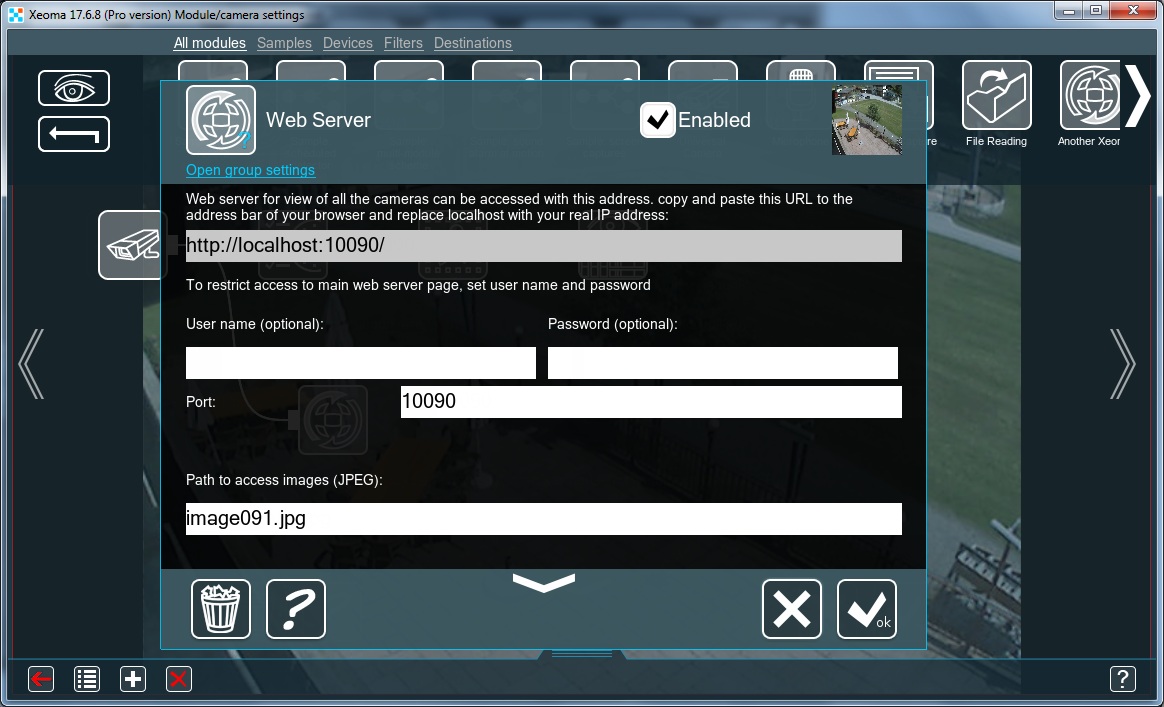
Tip: Pay attention to the name in the Path to access… boxes. Images from cameras in browser page follow in alphabetical order according to those names. For example, if one camera has “image1”, and another has “image 99”, first in web browser page will be the one with “image1”.
Attention! If you’re using direct saving to the archive in your Universal camera module, please note that Web Server gets and displays the preview stream only.
Attention! Not all browsers support live view of MJPEG streams.
If your browser doesn’t support MJPEG, you can either use another browser or use dynamically updated JPEG pictures instead of actual MJPEG videos.
Multi-camera web page. With http://IP:10090/ you can access web server main page and view all cameras altogether that have a Web server module connected to them on this computer.
Attention: if a camera is unavailable or stopped working for some reason, you’ll see an empty box instead of camera image in web browser.
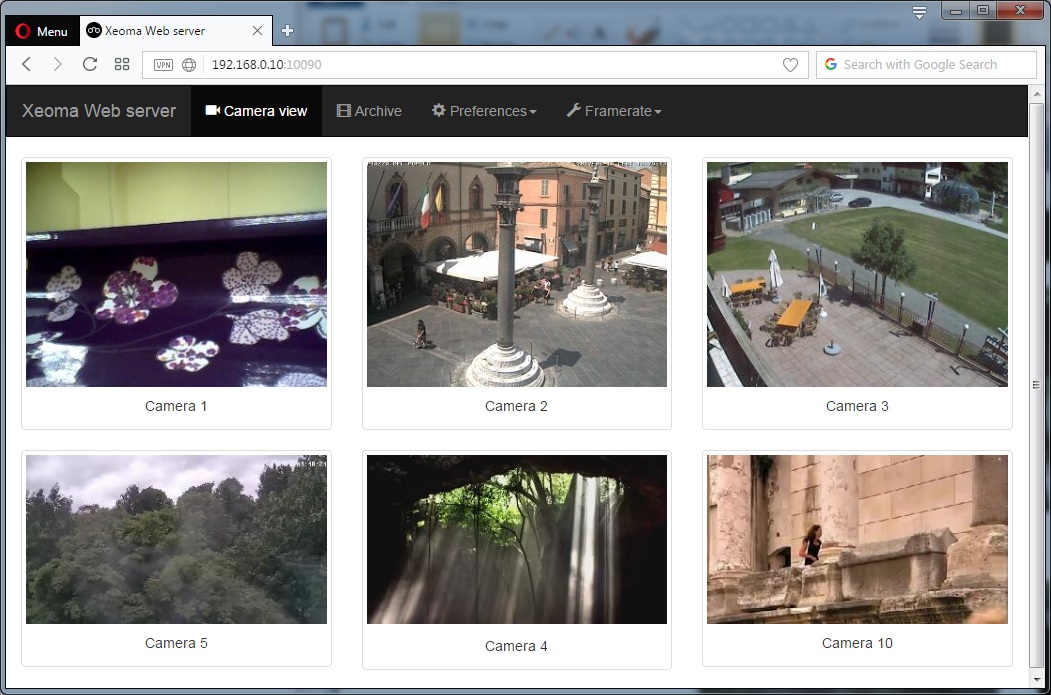
In the browser you can view cameras that have Web Server modules connected and turned on live, their archived recordings, and control PTZ functions (if cameras have PTZ functions and they were detected in Xeoma). The PTZ control will appear in the Single Camera View Screen of web interface (PRO license is required to enable PTZ in browser).
You will see the following tabs in the web page: Camera View (the default landing page), Archive, Preferences, Framerate.
Camera view is the page for view of multiple cameras you have Web Server connected to on this server (default landing page, also called Multi-Camera View page), or view of a single selected camera (also called Single Camera View page).
Archive is the page where you can view archive recordings for a camera. If you got to this page from the Multi-Camera view, you will need to select a camera to view archive for.
Preferences is a dropdown list with 2 options: adding/removing a camera, or auto search for cameras (see details here).
Framerate is a dropdown slider with which you can reduce the maximum refreshing speed of all camera images in web page. This option is applied solely to the browser view and does not affect framerate in Xeoma server part. Framerate cannot be higher than that of a camera stream.
Single-Camera View. While in Multi-Camera View page, click on a selected camera image, and you’ll get to the Single-Camera View page of this camera. If you only have 1 camera, click on it to open it in Single-Camera, for larger view.

In Single Camera View page’s top panel you’ll see the same tabs except for Framerate which here is replaced with Fullscreen View option.
Framerate and image quality can be selected below the image instead (both parameters are applied solely to the browser view and do not affect framerate in Xeoma server part).
Archive. To view a camera’s recordings go to the Archive tab.
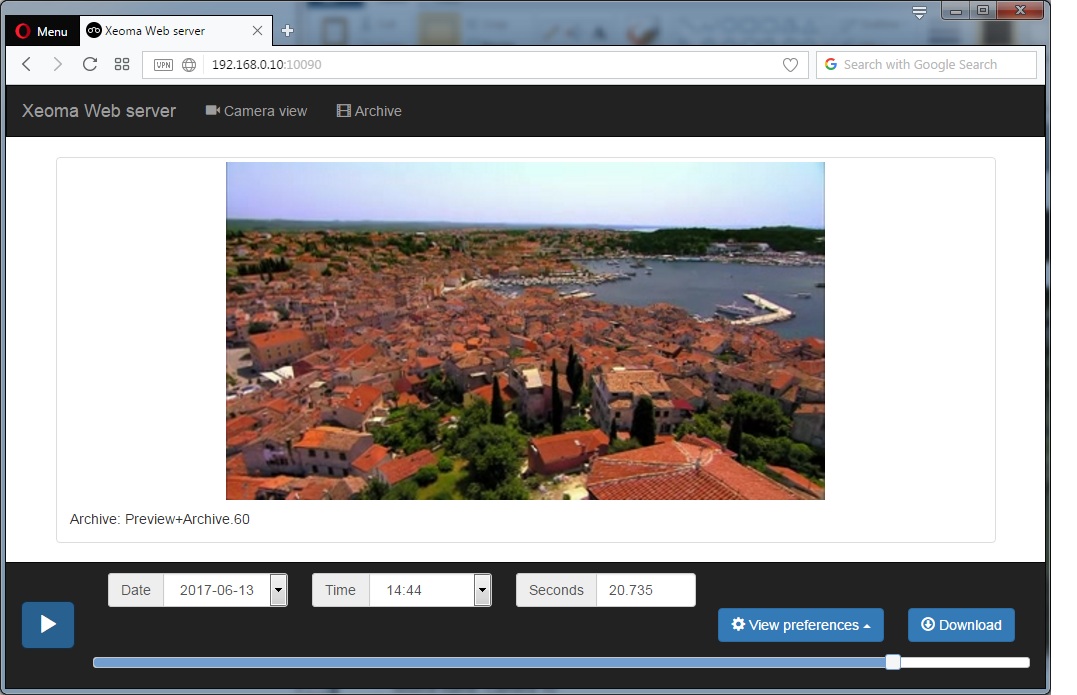
Here you will see name of folder for this archive in Xeoma, and timeline where you can select a certain piece of archive with a slider or with the list of time and date.
You can change playback speed and reduce video’s quality to reduce network bandwidth load, in the View Preferences box. Again, this parameter is applied solely to the browser view and does not affect framerate in Xeoma server part.

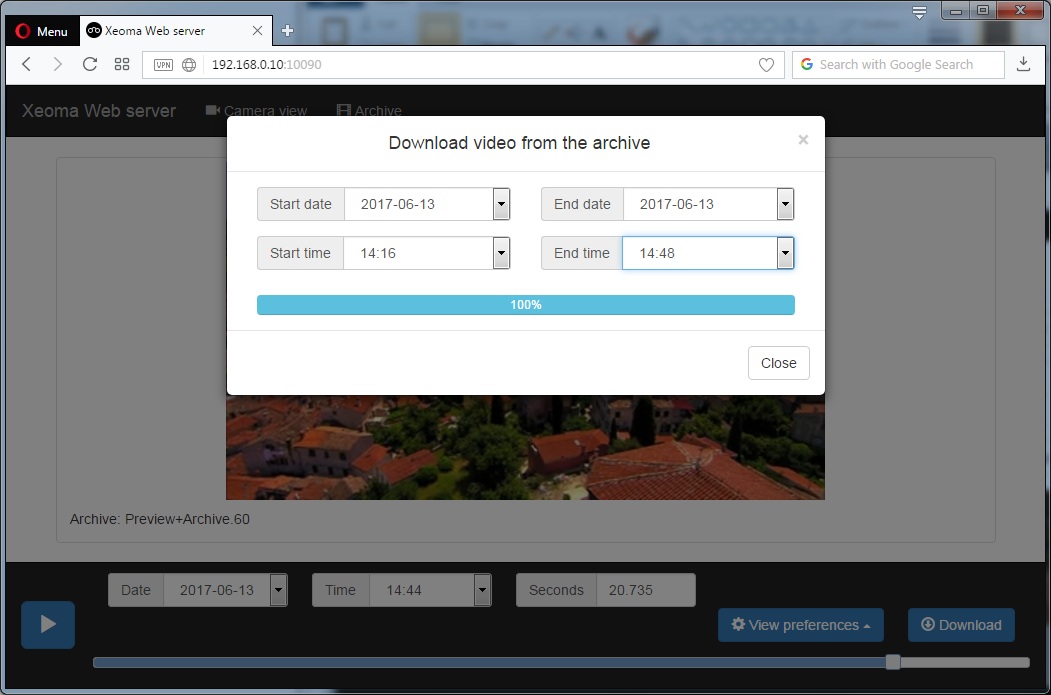
Export. In web page you can also download a piece of archive records onto this machine. To do that, click the Download button, and select the needed piece’s start and end date and time.
Browser view of camera stream with sound.
Option 1: WebRTC (contemporary, Xeoma Pro only)
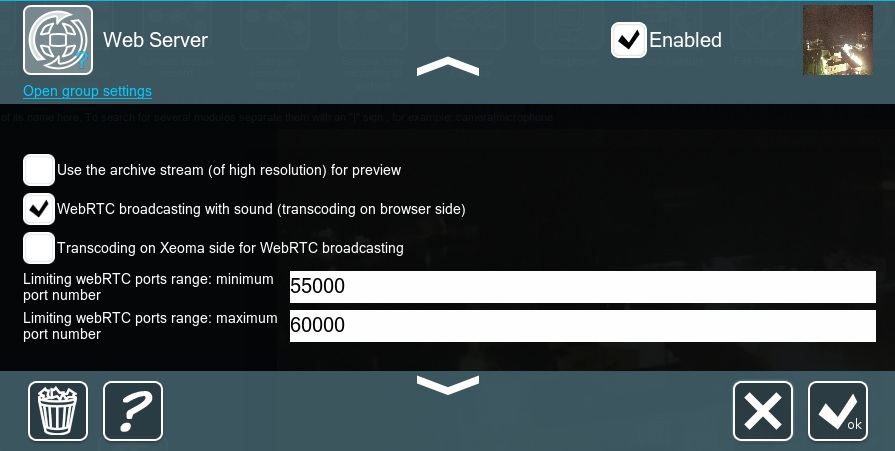
webRTC is the modern streaming-optimizied technology that enables live view with audio and even sometimes allows to use the browser’s capacity to take up some of the load from processing streams.
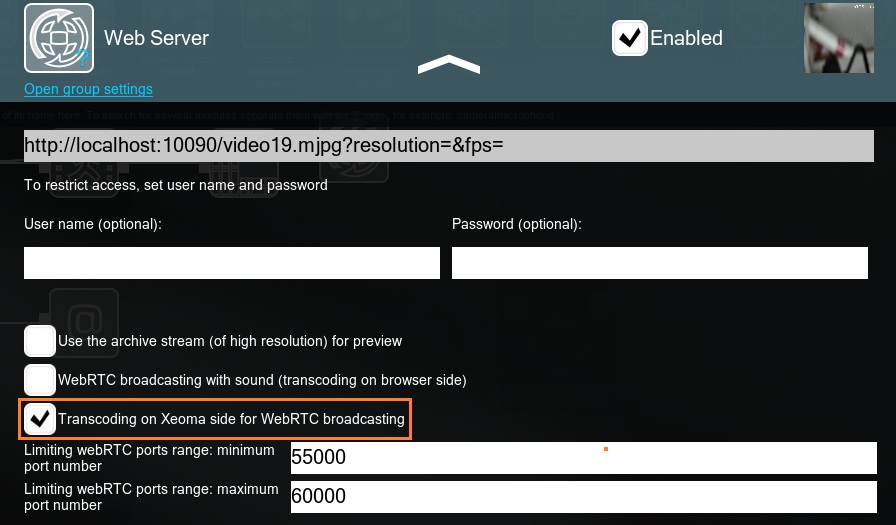
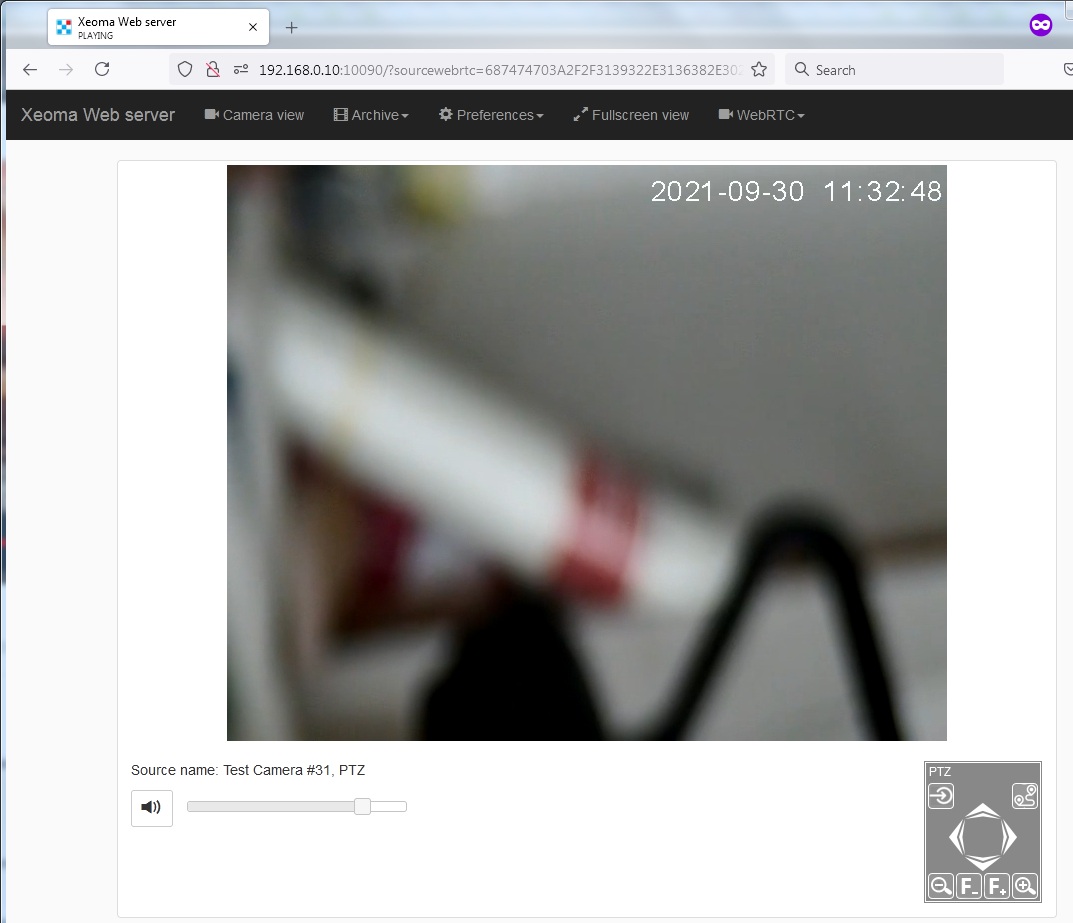
To do that, enable either the “WebRTC broadcasting with sound (transcoding on server side)” (for the server machine to take up the load from live view processing) or the “Transcoding on Xeoma side for webRTC broadcasting” option (for the load to be shifted to the browser when supported) in the Web Server module setting dialog (options are only available in Xeoma Pro).
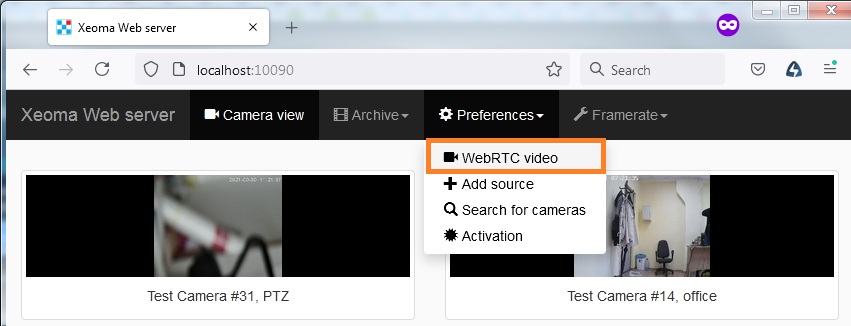
Afterwards, when logged into your web interface you will have a choice of whether to view video feeds in MJPEG (default) or webRTC.
The choice is available for both multi-cameras view page, and for the single camera view page.
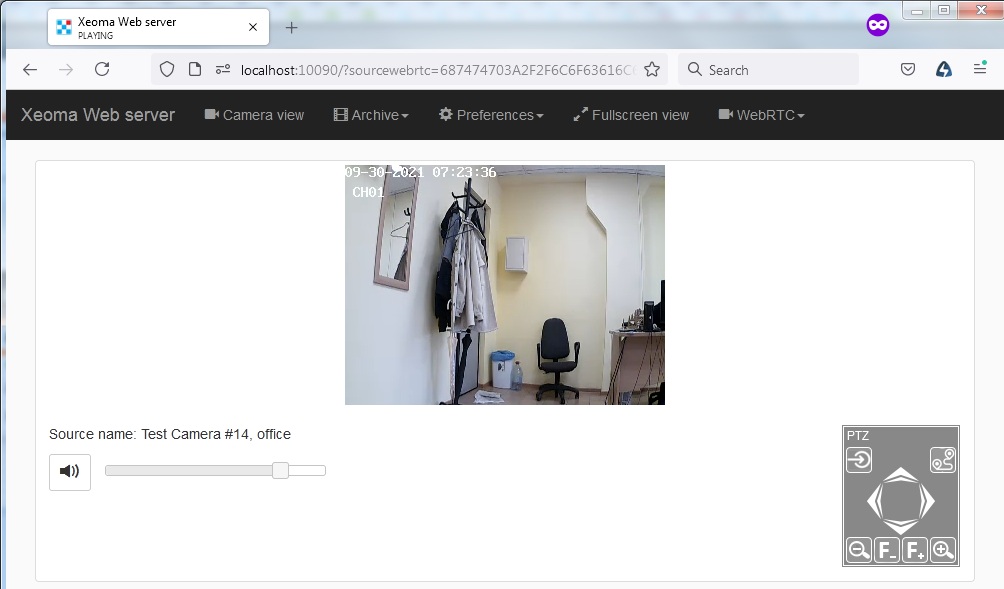
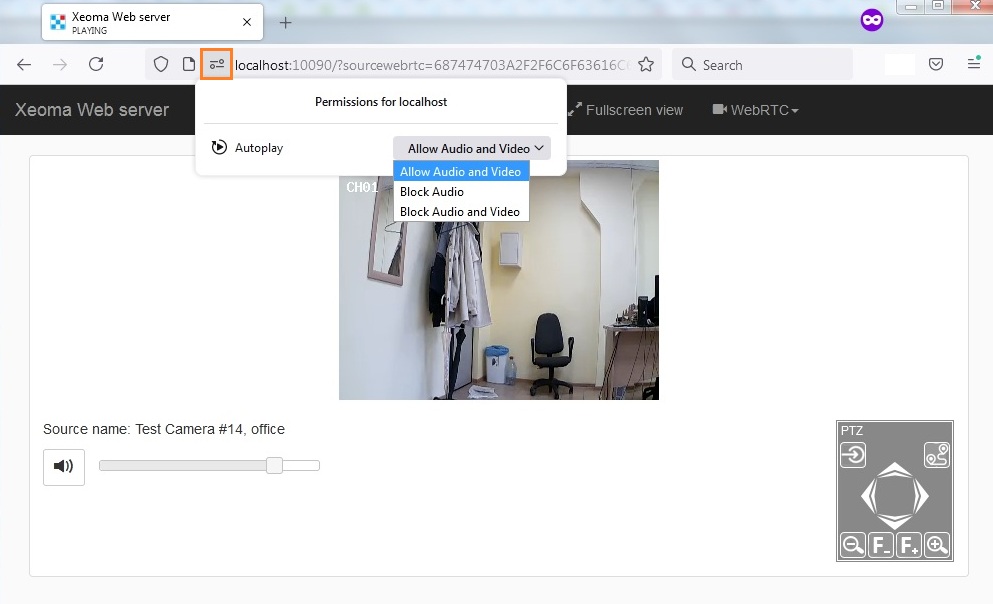
At the first launch you might see a warning that the live playback with sound is not allowed in the web browser settings. In that case you need to either move the cursor in the Volume slider to a value other than 0, or enable sound in the browser settings, for example:
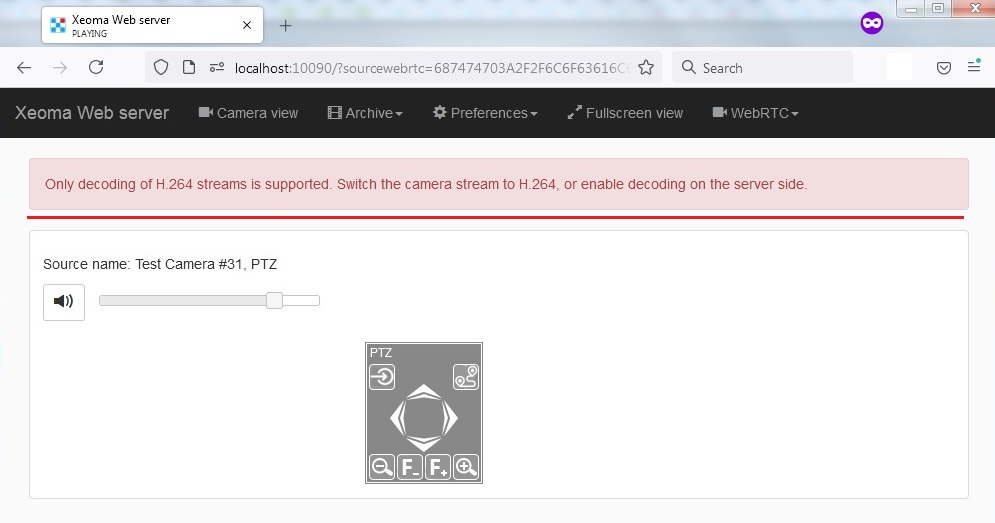
The “WebRTC broadcasting with sound (transcoding on browser side)” option is only available for the H264 streams. If H265/H265+ streams are used, you are recommended to switch to the “Transcoding on Xeoma side for webRTC broadcasting” option in the Web Server module setting dialog.
Option 2: Flash (outdated)

|
Adobe discontinued support for the Flash Player on December 31, 2020 which means that Flash might not be supported in modern versions of browsers. However, it might still be working in version of browsers released before that end-of-life date. |
To watch Flash video with sound via an Internet browser, tick the box and use the corresponding link (or go to Flash video broadcasting right from the web server general page):
+ Unlike client-to-server connection, browser view of cameras can be performed from any device with access to the Internet, including tablet, cell phones, even those with non-supported operating system.
– But then again, unlike client-to-server connection, browser view is not available if the computer with Xeoma and cameras does not have static fixed IP address.
Part 2. Saving footage to another computer
Web server module will be also of help if the objective is to save video surveillance footage to another computer, for example, to create backup footage on a central monitoring station.
In this case you will need to connect the Web server to the cameras. On another computer, where you need to store footage (in our example, that is the central monitoring station) you will need to use Another Xeoma instead of the camera module:
+ On both computers you will be able to store footage and work with camera.
– You might need an additional license (if total of modules in use on either of the computers is higher than 3).
Tip: you can use the combination of HTTP Upload to other Xeoma and HTTP Receiver to transfer not just video, but also sound and all meta data. See the HTTP upload to other Xeoma article for details.
Part 3. IP camera emulation
If you’d like to transform your web camera (USB camera) into an IP camera that will be accessible to other computers and Xeoma Cloud. In this case, you need to connect the Web server to the camera. Other computers will ‘see’ it as an IP camera.
Part 4. Having live broadcasting on your site
You can broadcast your camera to your site or blog. Embed the link from web server’s settings into your page’s code to put a weather radar or traffic demonstration on your site or blog without installing Xeoma client. Broadcasting dynamically updated images or video streams – up-to-date and high-quality snapshots and videos (weather radar emulation, useful traffic information) – will make it more attractive and useful to your site’s guests.
API
You can control your web server using http-commands as well. Here are all of them:
http://IP:10090/video0.mjpg?resolution=1027×768&oneframe=0&waitTimeoutMs=1000&login=USERNAME&password=PASSWORD returns a real time video or a single frame in MJPEG
video0.mjpg is the URL for the MJPEG-stream in the “Universal camera”
resolution is the resolution for the frame (not necessary, doesn’t work with the video)
oneframe is whether you need a video (0) or a single frame (1)
waitTimeoutMs is the waiting time for the server’s response (usually between 100 and 1000)
login is the username (not necessary)
password is the password (not necessary)
http://IP:10090/image0.jpg?resolution=1024×768&login=USERNAME&password=PASSWORD returns a single frame in JPEG
image0.jpg is the URL for the JPEG in the “Universal camera”
resolution is the resolution for the frame (not necessary)
login is the username (not necessary)
password is the password (not necessary)
http://IP:10090/?archive_minutes=&archive_date=2015-11-26&archive=PreviewArchive.9 returns a list of time codes for the specified date, format hh:mm, each one on a new line
archive_date is the date, format year-month-day
archive is the name for that archive in the module “Preview and Archive”
http://IP:10090/?archive_frame=&archive=Preview+Archive.9&archive_date=2015-11-26&archive_minute=13:19&archive_millis=45435&maxResolution=&scaleFactor=100 returns a single frame for the specified time and date in JSON
archive is the name for that archive in the module “Preview and Archive”
archive_date is the date, format year-month-day
archive_minute is the minute, format hh:mm
archive_millis is the milliseconds (between 0 and 59999)
maxResolution is the frame’s resolution, format widthxheight
scaleFactor is the compaction scale (between 0 and 100, where 100 is the highest quality, less than 80 is not recommended)
http://IP:10090/?archive_start_export=&archive_id=Preview%2BArchive.24&start_date=2017-03-09&start_hour_minute=13%3A00&end_date=2017-03-09&end_hour_minute=13%3A02 exports the specified interval from the archive
archive_id is the name for that archive in the module “Preview and Archive”
start_date is the date for the beginning of the interval
start_hour_minute is the time for the beginning of the interval
end_date is the date for the end of the interval
end_hour_minute is the time for the end of the interval
http://IP:10090/?login=LOGIN&password=PASSWORD&getsessionkey= quick authorization
login is the username
password is the password
http://IP:10090/?addchain=&cameraSettings=&cameraLogin=LOGIN&cameraPassword=PASSWORD&previewUrl=PREVIEWURL&archiveUrl=ARCHIVEURL&enableH264ArchiveId=false adds a camera
cameraLogin is the username for the camera
cameraPassword is the password for the camera
previewUrl is the preview stream’s URL
archiveUrl is the archive stream’s URL
enableH264ArchiveId is direct H.264 recording without conversion (true enabled, false disabled)
http://IP:10090/?addchain=&ftpReceiverSettings=&ftpReceiverServerAddress=ADDRESS&ftpReceiverServerPort=FTPPORT&ftpReceiverLogin=LOGIN&ftpReceiverPassword=PASSWORD adds “FTP Receiver”
ftpReceiverServerAddress is the address for the server
ftpReceiverServerPort is the FTP port
ftpReceiverServerLogin is the username
ftpReceiverServerPassword is the password
Now you can customize the web server pages! Learn how to do that in our article Web server customization!
Read more in our overview of remote access options
You can also watch Web server video tutorial.
Last edited: 13 June, 2017