Video Surveillance for Newbies
 There is nothing wrong about having trouble with electronics. Generally, the more functionality modern technology provides, the harder it gets to navigate through all that and find the one thing you are looking for. Video surveillance in particular (being inherently complicated) is considered by many to be an unsolvable puzzle. However, there is something that enables us to be a bit more optimistic – ergonomics. The idea is to make any technology as easy to use and user-friendly as possible, so that no special training is required to operate it effectively. This is achieved in a wide variety of ways, from visual design and comfortable structures to human kinetics and movement patterns. Software is, of course, no exception. Thus the questions is: can it be easy to use a video surveillance system with no prior experience in the field? Let’s look at Xeoma and find out.

|
As of Xeoma version 24.7.9, the interface for Xeoma’s window is a bit different from what it used to be. This article will soon be updated to reflect these changes, please stand by. Alternatively, feel free to contact us if you need guidance through the new interface. |
When you launch Xeoma for the first time, this is what you’ll see:
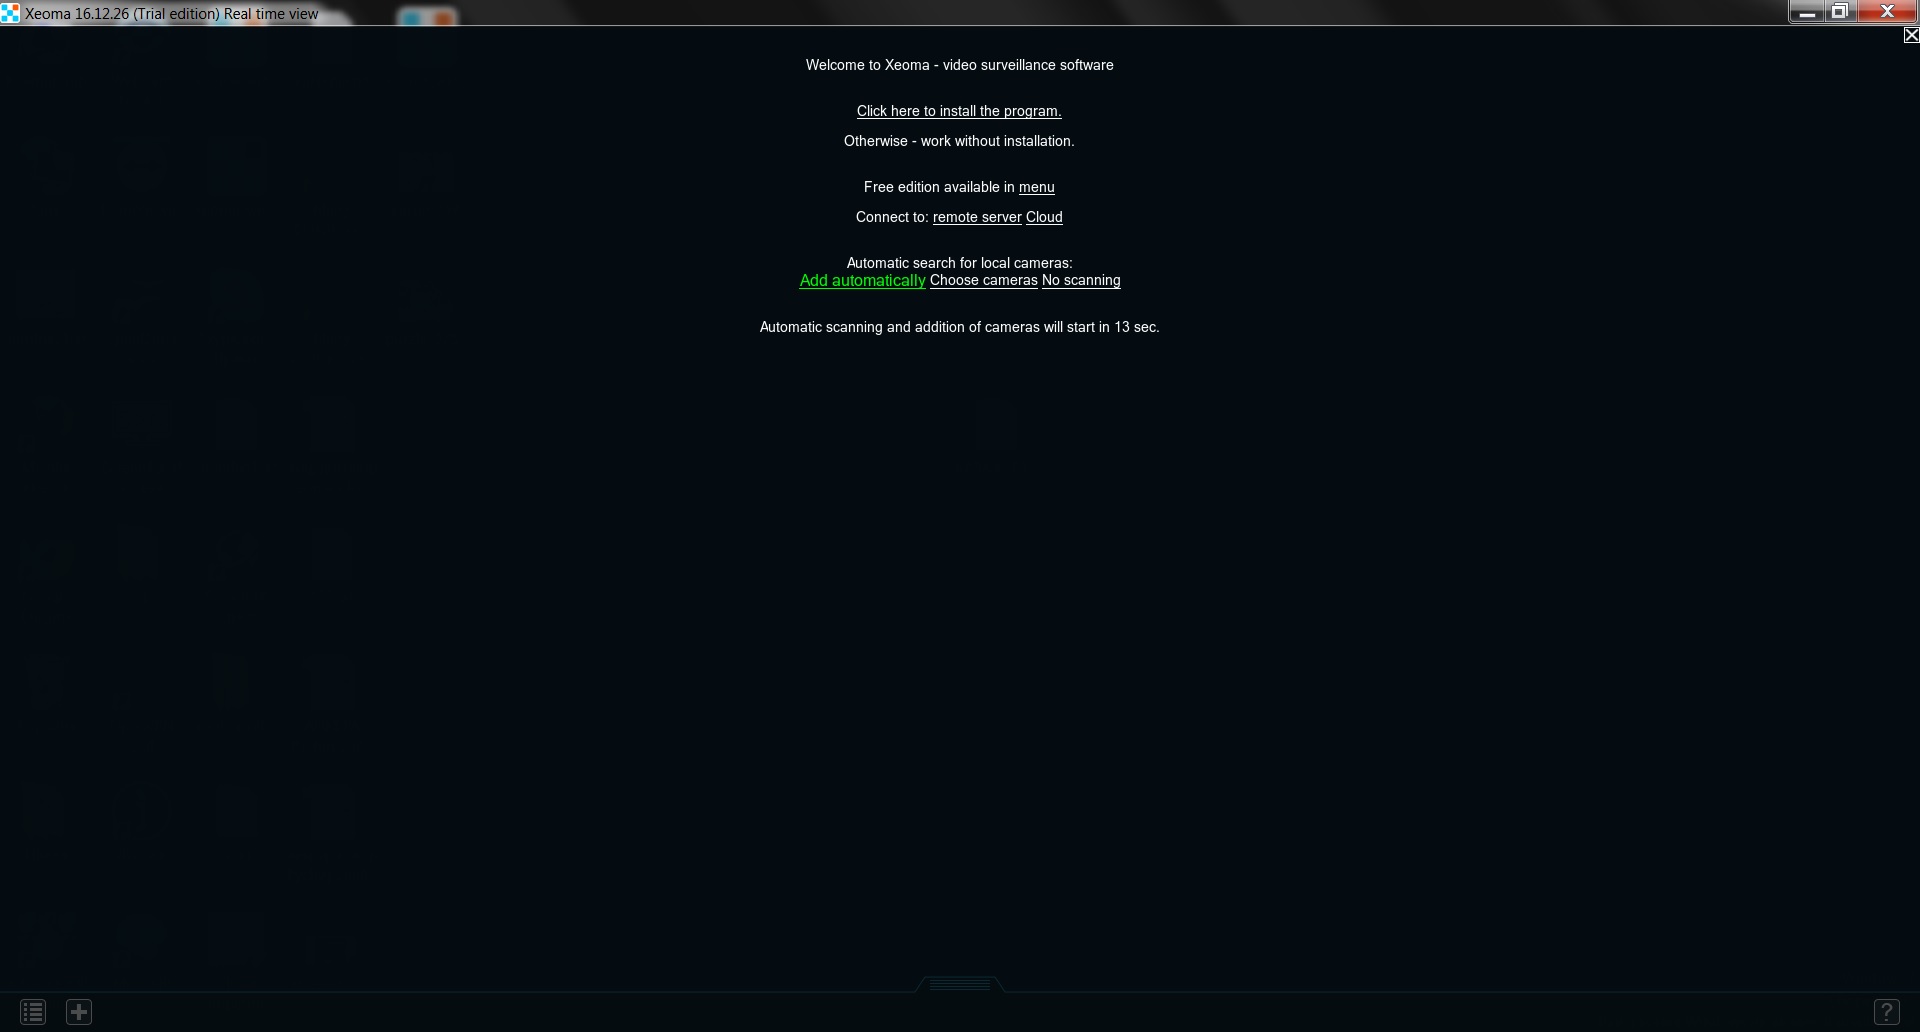
The Click here to install the program button allows you to install Xeoma on that machine (this is not required, Xeoma works with just one file as well).
The menu button opens the Registration menu, which will help you switch to a different mode as well as activate a license.
Clicking remote server will give you access to the remote connection to another Xeoma server while cloud connects you to Xeoma Cloud.
Add automatically will immediately launch the search for local cameras and add them to Xeoma, once it is done (you’ll see the progress report in the lower right corner of the window). Alternatively, you can wait for 15 seconds – Xeoma will launch the search when the timer hits 0.
Choose cameras will also perform the search for that network, but it will add only the cameras you specify – highlight their previews and click Ok.
Finally, No scanning skips the search entirely.
You can click a couple of times on an empty space to skip all the messages and start working. If your cameras are within the same local network-
– Hold on! How do I know whether they are or aren’t?
Local network is the one created by your router. Basically, any device within its reach is part of that network. So, if the cameras are not particularly far from that router, you can safely assume they are in the local network. The easiest way to check is to access the router’s admin page in a browser: it should contain a list of all connected devices. Note the IP addresses for those devices – they should look something like this 192.168.0.5, 192.168.0.3. These are local IP addresses, so you can’t use them outside.
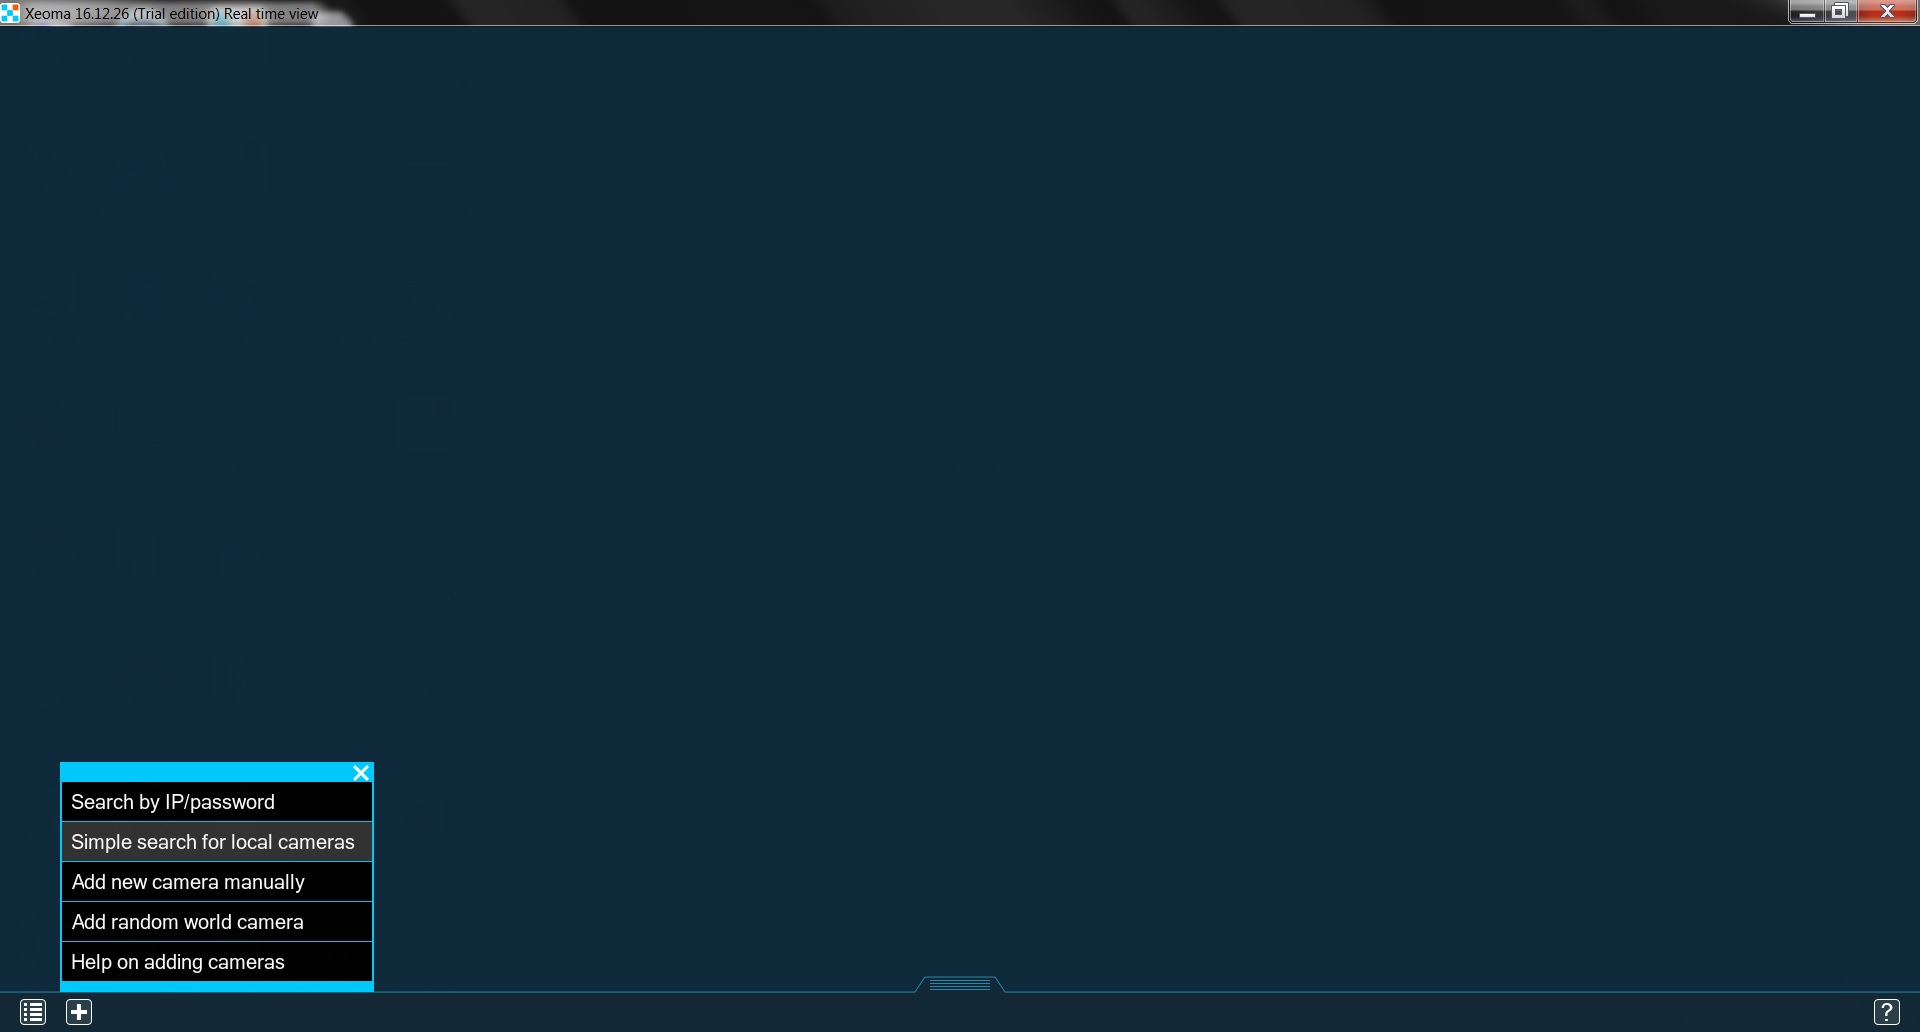
Adding these cameras is simple: “+” → Simple search for local cameras:
Soon enough you’ll see the cameras:
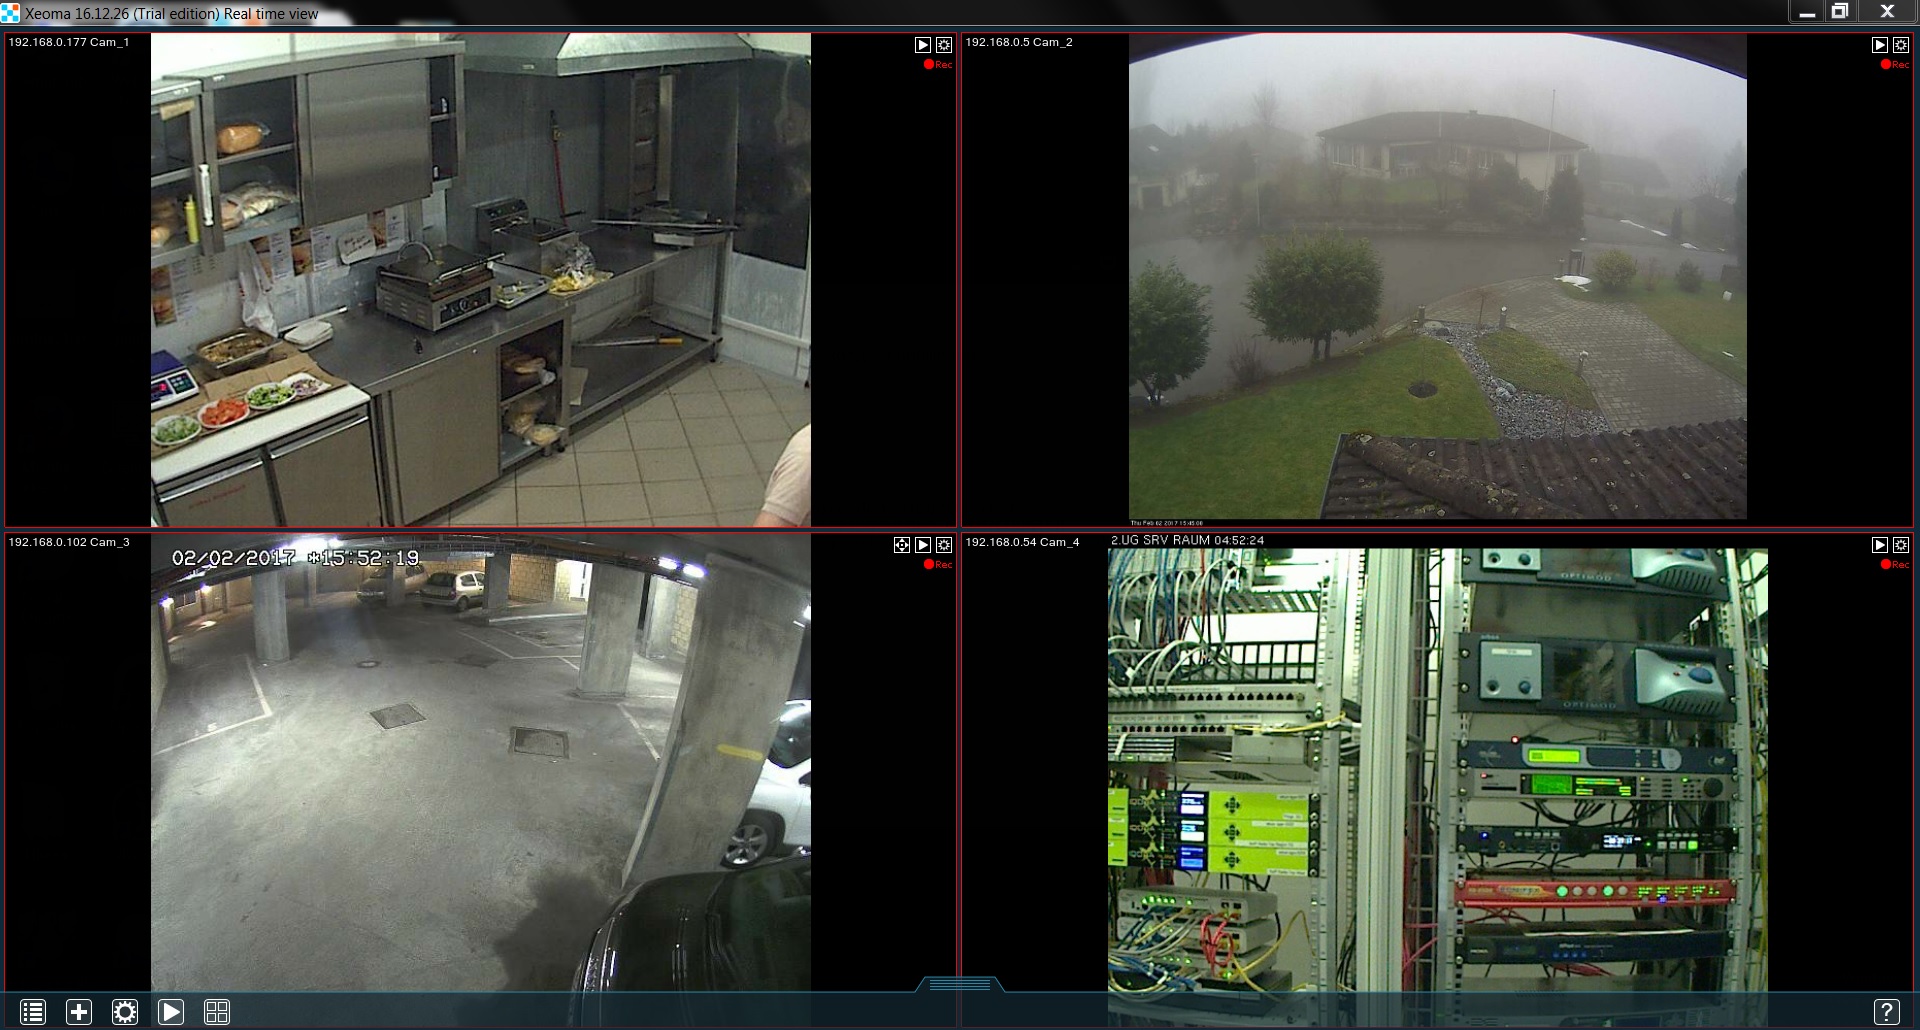
A simple system, isn’t it? You may see this message during the search:
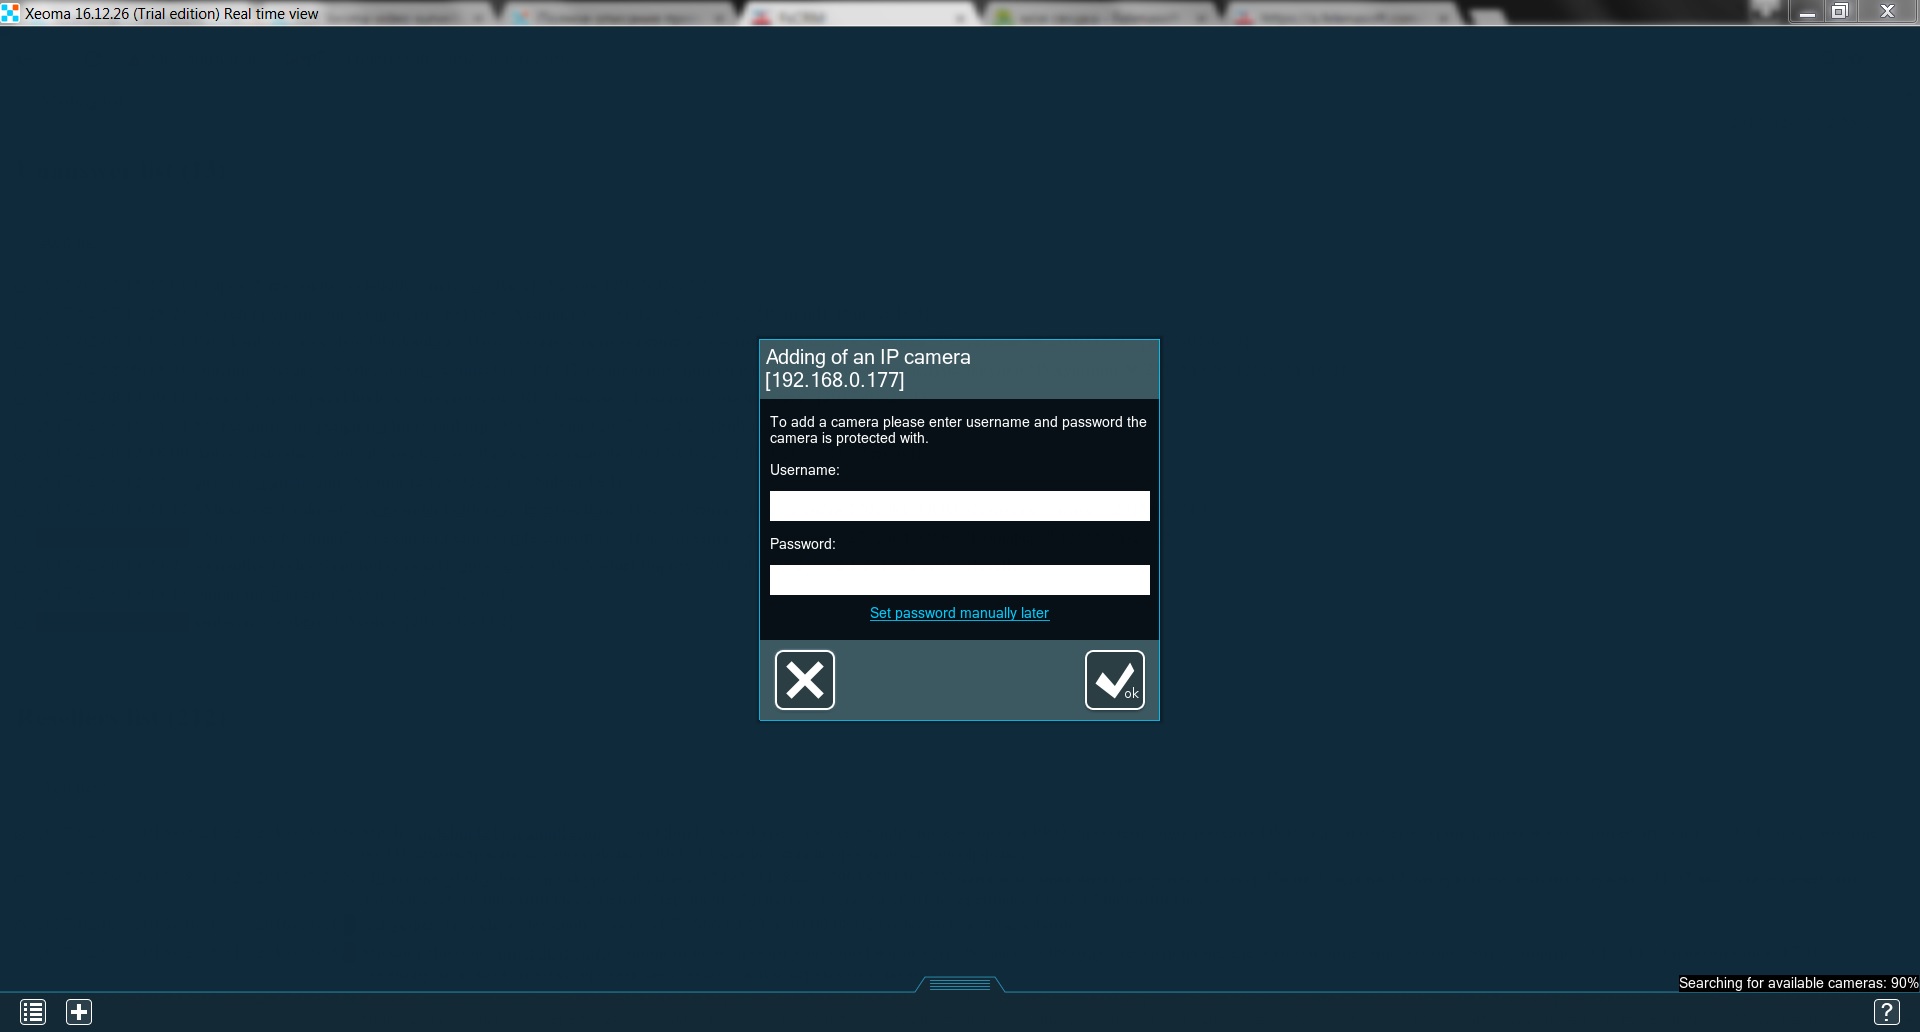
The information needed here should be mentioned in the cam’s manual (if it’s standard admin/admin, then you won’t even need to input anything yourself – Xeoma will use these credentials automatically).
Now, if the cameras are in different networks, then they’ll need static IP addresses. You can get those from your Internet provider (they’ll instruct you on how to use it as well). When the camera has the static IP, you can add it in Xeoma by going “+” → Search by IP/password. You’ll see this window:
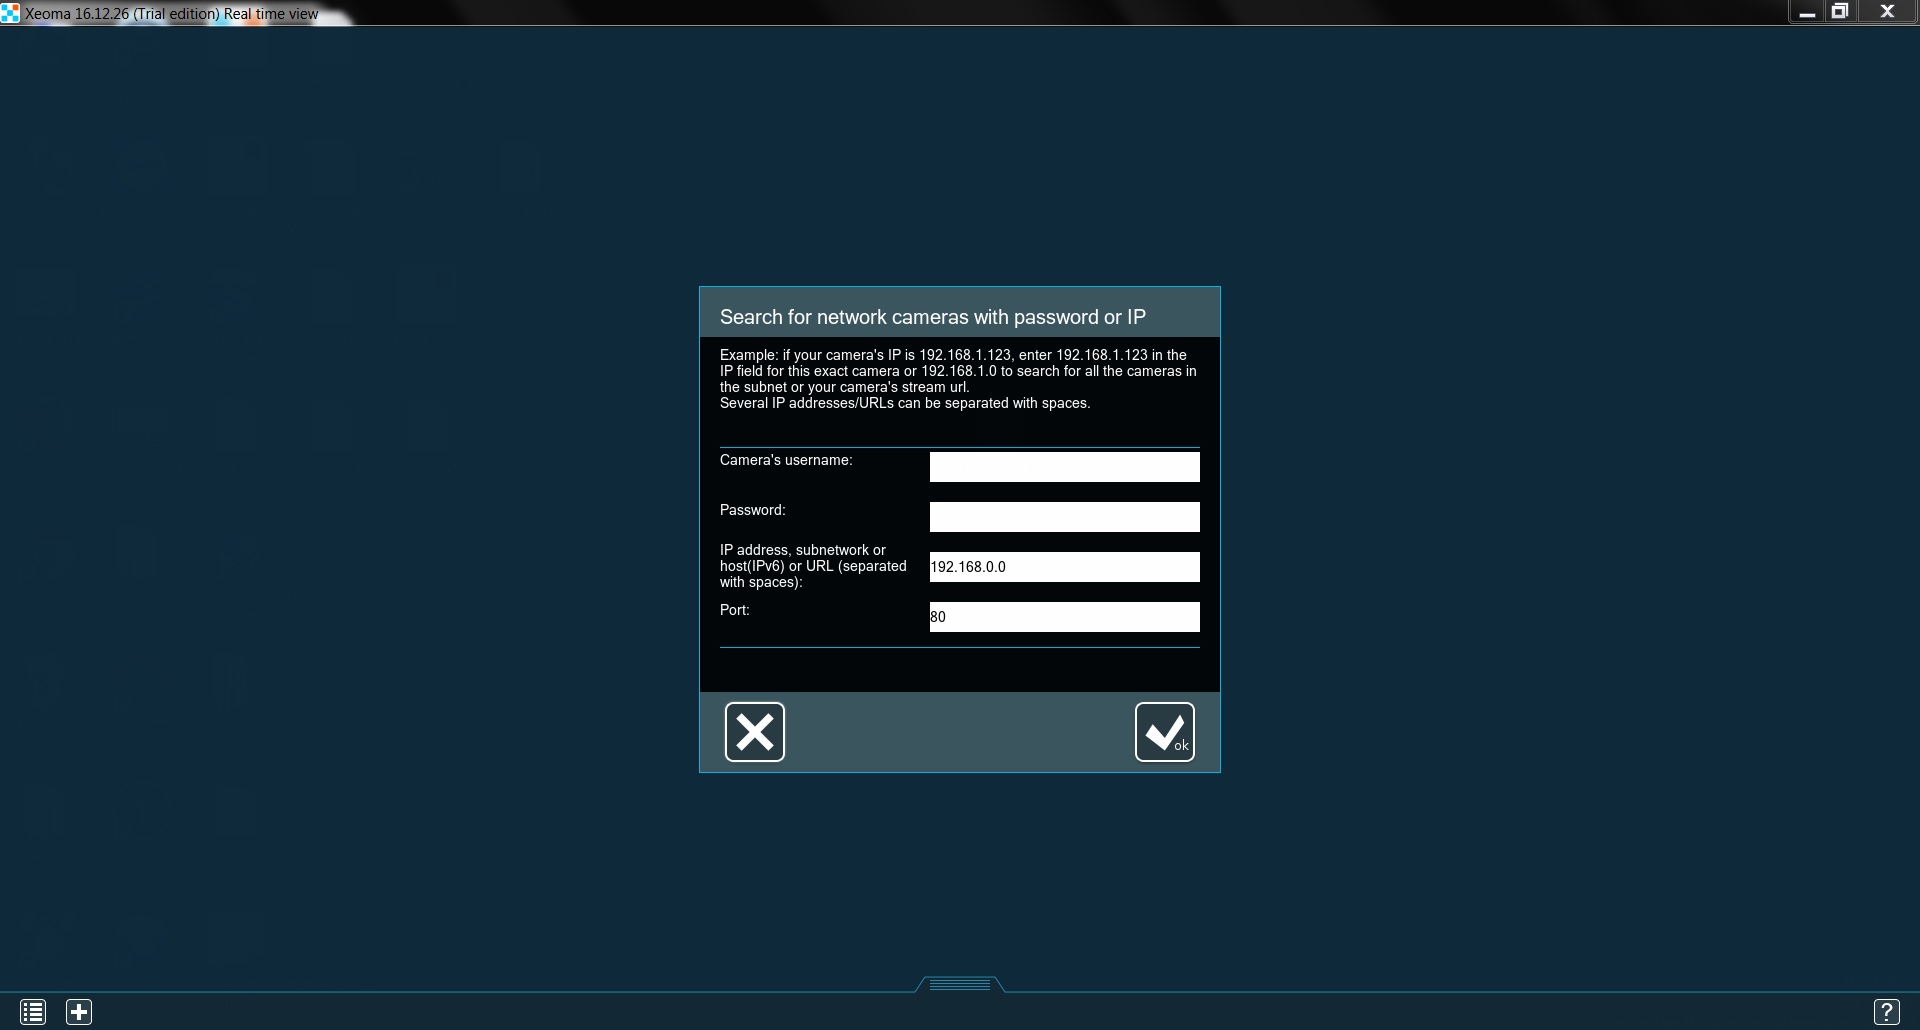
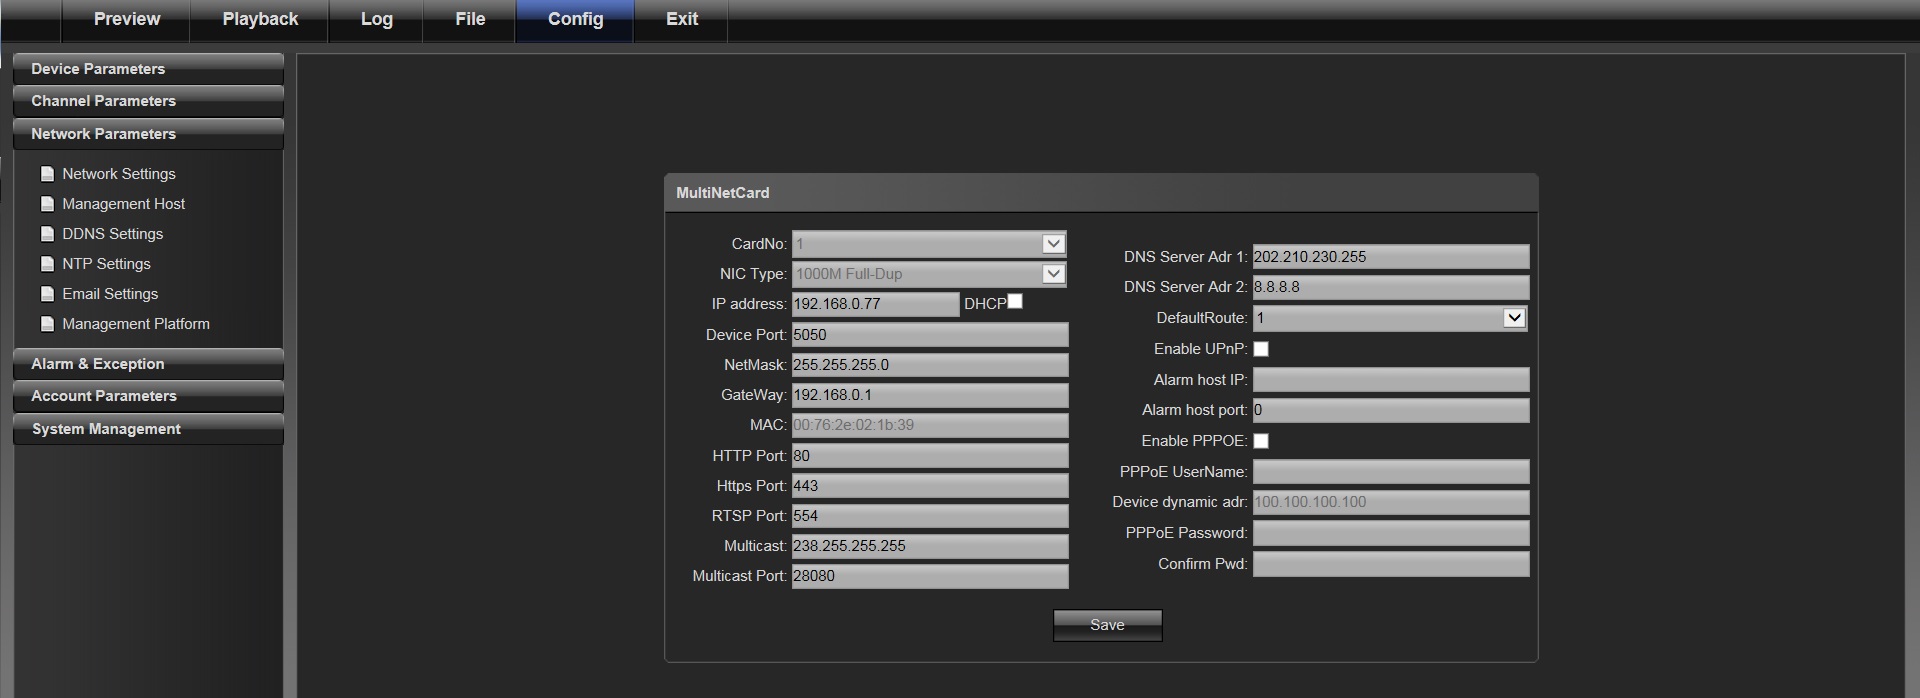
You should know the username and password, the IP is the one your Internet provider gave you, the port is typically 80. Sometimes cameras can have unusual ports, you can check the admin page to make sure. The right page should look something like this:
Once the cameras are added, you can consider this machine your server. You can take a look at the settings by pressing the gear button. As you can see, Xeoma uses a simple system of chains. This is the standard chain of modules Xeoma creates for every camera:
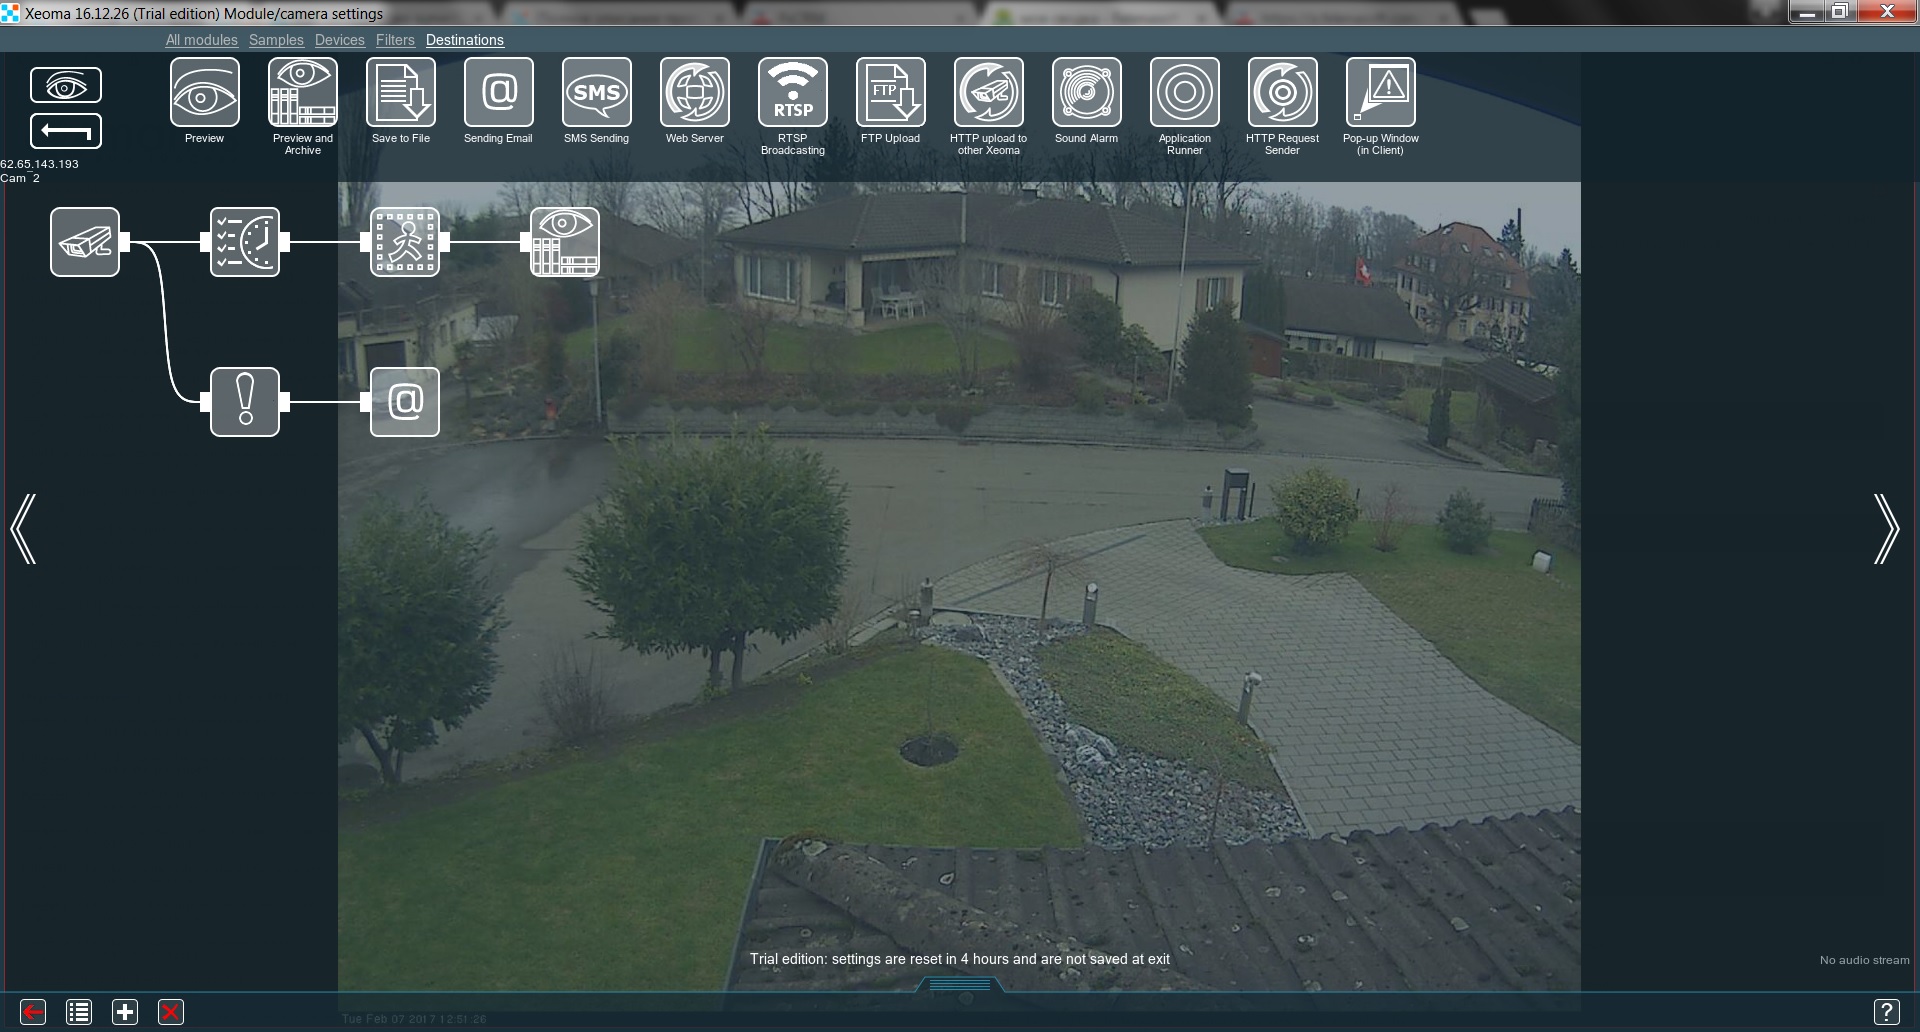
It works in 2 ways simultaneously:
- during the right time (the one set in the “Scheduler”) the “Motion Detector” switches on and stores all the motion in the “Preview and Archive”;
- if something happens with either the camera or the server, the “Problems Detector” informs the “Sending Email” module, which will notify you about the issue.
Your surveillance system is pretty much ready, you just need to spend a bit of time setting up the “Motion Detector” and “Sending Email”. Every module in Xeoma has this button:

Pressing it will show you detailed info about the module and teach you to use it.
If you’d like to check your server from a different device (e.g. your Android or iPhone), you can connect to it remotely. Any of these devices will be your client. This a simple system called “client-server architecture”. Just download Xeoma app for them and go Main menu → Remote access → Connect to. You’ll see this window:
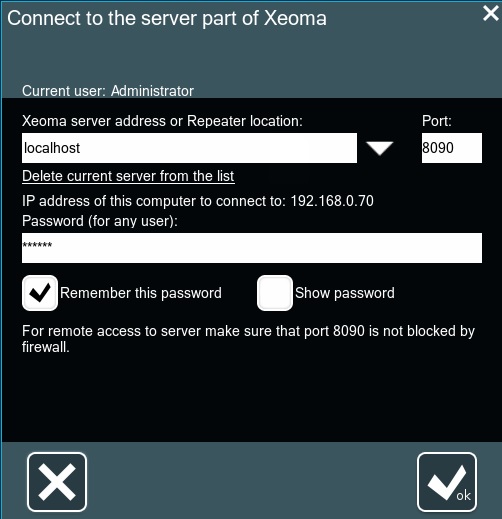
You’ll need to put your server’s IP in the first bar. If both the server and the client are in the same network, the server’s local IP (192.168.x.x) will be sufficient. You can learn your server’s IP by checking this same window on the server – it will show you the exact IP in the IP address of this computer to connect to. If not, the server will need either a static IP or an activated Repeater (an easy to use solution for that problem).
There is one more step left to make your system independent. In case your server reboots, you want Xeoma to launch automatically, so that you don’t lose any footage. This is easy to set up by going Main menu → Install → Install and CHECK the box Autorun the server part of Xeoma as service.
All done! You can now boast a full security system protecting that which you value.
February, 17 2017
Read also:
Hotel Security
Multilayered eMap in Xeoma