How to Install Linux Yourself – Detailed Instructions
Guide for beginners: quick path to Debian 12. If your goal is video surveillance, at the end — express installation of Xeoma on Debian
Set up the Xeoma server right after installing Debian — it will take a couple of minutes.
Due to its versatility and enhanced security, Linux-based operating systems are often the choice of professionals when creating servers for video surveillance. In this article, we will explain how to install Linux using Debian 12 as an example—one of the most stable Linux distributions, which we often recommend to our users.
For installing Debian, you will need:
- A PC/laptop with 25+ GB of storage on the drive (SSD, HDD, etc.)
- A flash drive with 8+ GB of storage
- Internet access during Debian installation (possible without it if you plan to install the OS without a graphical interface)
Glossary:
Drive – storage device – an external or internal device that stores data. In this guide, we will focus on devices like SSD (solid-state drive), HDD (hard disk drive), and flash drive.
ISO – a compressed OS image used for installation.
ISO Recording Utility – a program that allows writing an ISO image to a drive, making it bootable.
Graphical Interface – graphical desktop environment, such as icons, windows, menus, etc.
Drive Partitions – isolated storage segments on the drive. Your PC will see them as separate drives.
Instructions
Step 1. Create a Bootable Flash Drive
A bootable flash drive contains the OS image and allows booting the system for installation. To make the flash drive bootable, we need to write the Debian ISO image to it. Writing the ISO erases all previous information from the media.
You can use any type of external drive and any ISO recording utility, but in our example, we will use a flash drive and the Rufus program, respectively. Rufus is supported on Windows 8 and above.
- Prepare your flash drive: ISO writing to the drive does not work with multiple partitions, so if your drive has them, merge them into one by deleting partitions in the Disk Management window.
- Download the latest Debian image (ISO file) from the official website.
- Download the latest version of the free ISO recording utility Rufus from the official website. Open it (no installation required).
- Insert the flash drive into your PC/laptop.
- In Rufus, select your flash drive name in the “Device” field from the dropdown list.
- In Rufus, select “Disk or ISO image (Select image)” in the “Boot selection” field. Click “SELECT” and find the ISO image you downloaded in step two (2).
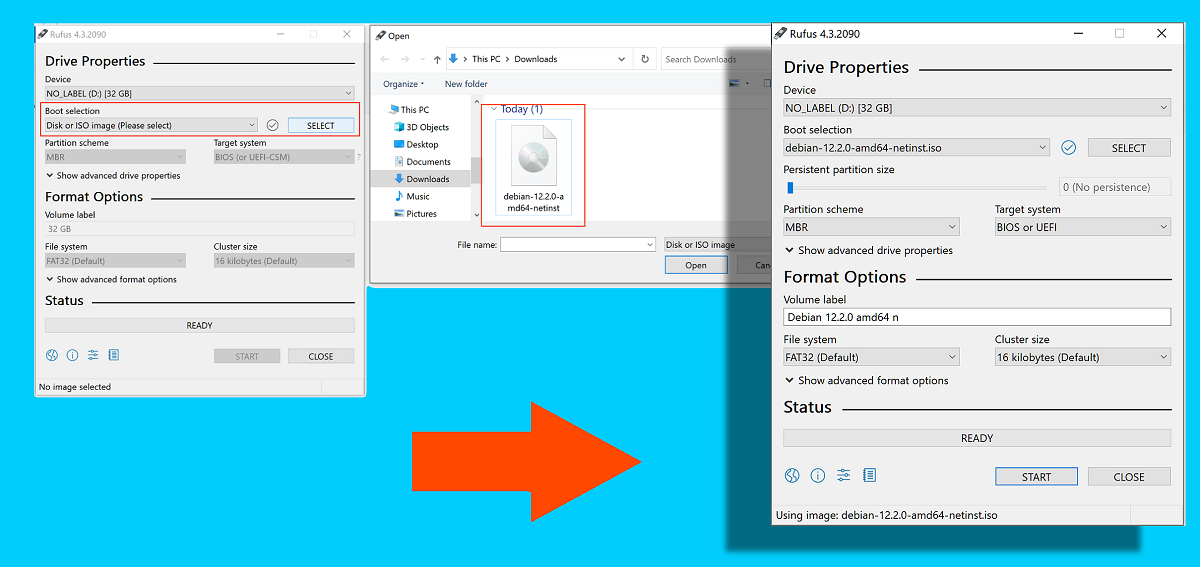
- Click “START”.
- In the opened window, select “Write in ISO Image mode (Recommended)”. Click “OK”.
Step 2. Booting Debian from USB Drive
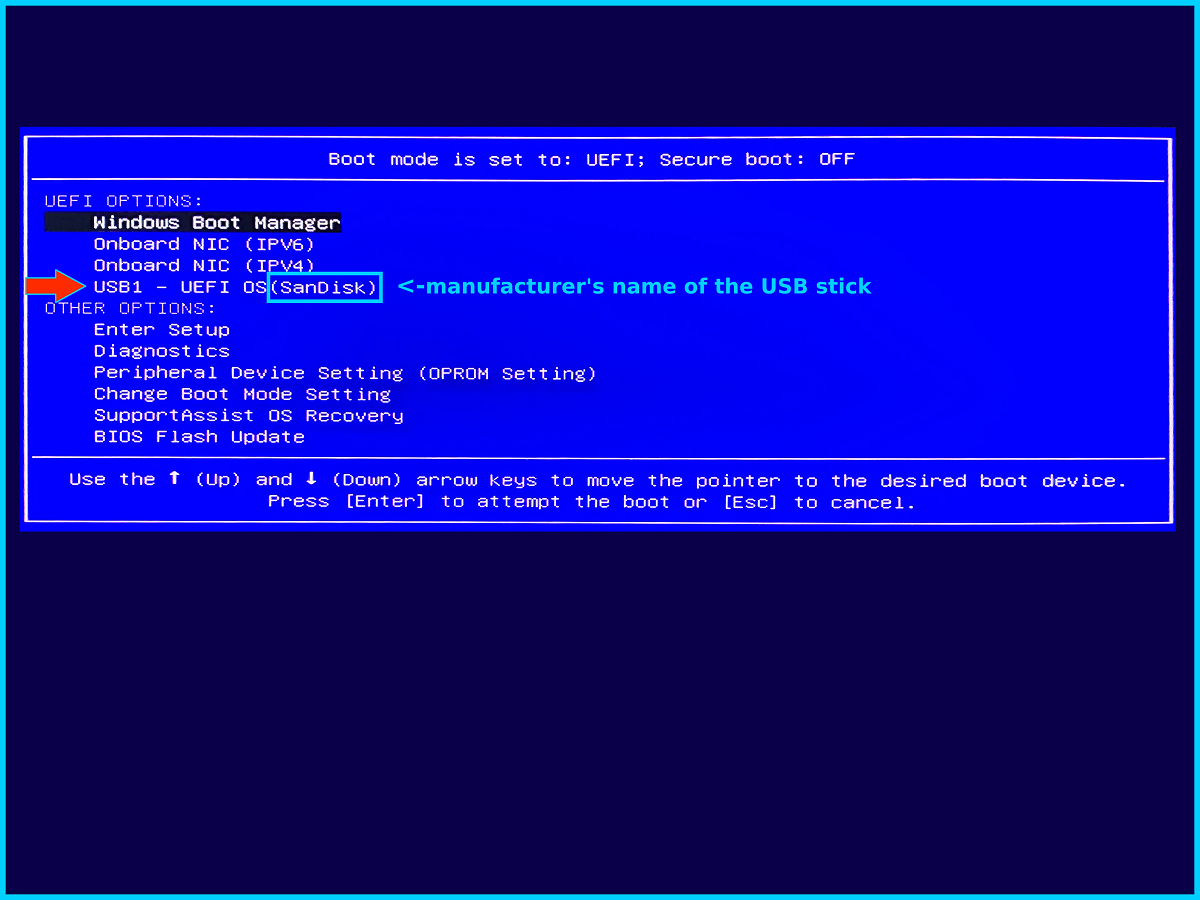
- Search online for information on which keyboard key is responsible for invoking the boot menu (Boot menu) on your PC/laptop/motherboard model. This key is pressed during system startup and allows opening the boot menu (BIOS) to choose between installed operating systems. Usually, this key is F2/F9/F10/F12/Del/Esc.
- Insert the USB drive into your PC/laptop and restart it. During system startup, immediately press and hold the boot menu key to open the BIOS menu before Windows automatically loads.
If your PC still loads Windows, restart it and try again. If it continues to select Windows, try other boot keys or insert the flash drive into another USB port. - Inside the BIOS menu, use the arrow keys to navigate to the “UEFI OPTIONS” section. In this section, select the name that looks like your USB drive’s name. Press ENTER.
Step 3. Install Debian
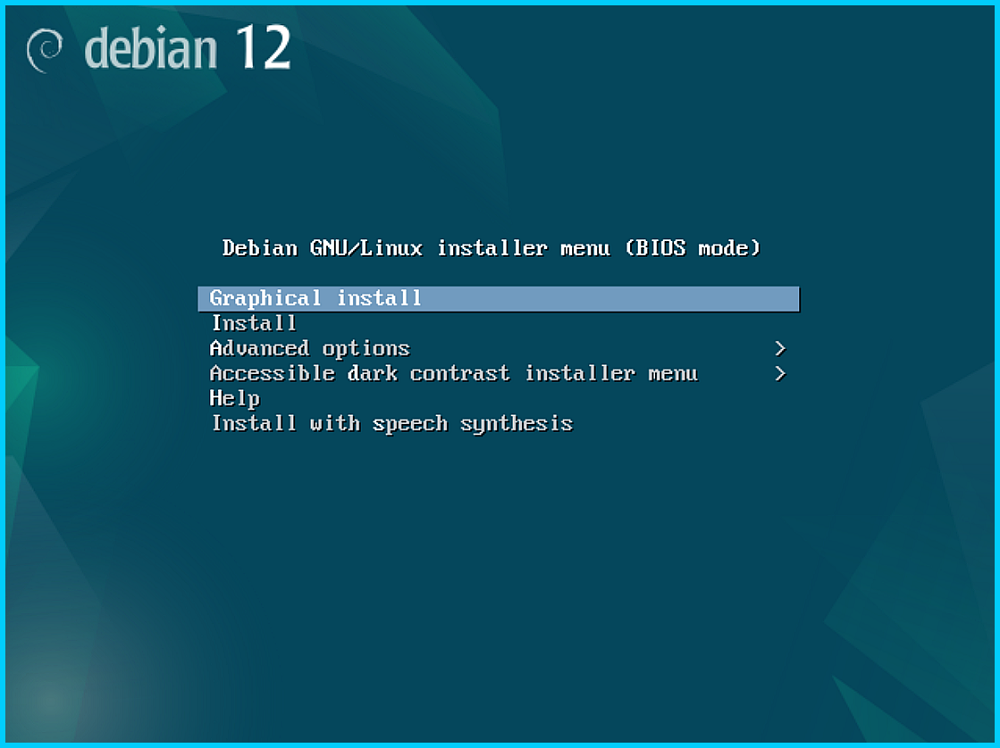
When the Debian image loads, you will see the installation menu. Select the “Graphical install” option and then configure the basic OS parameters.
Basic Settings:
Language – select “English”.
Keyboard Configuration – select “American English” so you can immediately enter commands in the terminal. Optionally, you can select a Russian layout.
Hostname – choose a name by which your PC will appear on the network. Used for PC identification during remote connections (local network, via ssh, etc.). Leave it as is if you don’t plan remote connections over local or global networks between PCs/laptops/servers, etc.
Domain Name – leave empty if you don’t plan remote connections over local or global networks between PCs/laptops/servers, etc.
Root Password – root password – these are the most important settings. Remember this password, as you will likely use commands as administrator in Debian (or any other Linux OS), typing “sudo” before the main command in the Console/Terminal and confirming it with the root password.
Disk Partitioning:
Partitioning Method – select “Guided – use entire disk”, otherwise you will have to regularly configure the standard /home path when working with programs.
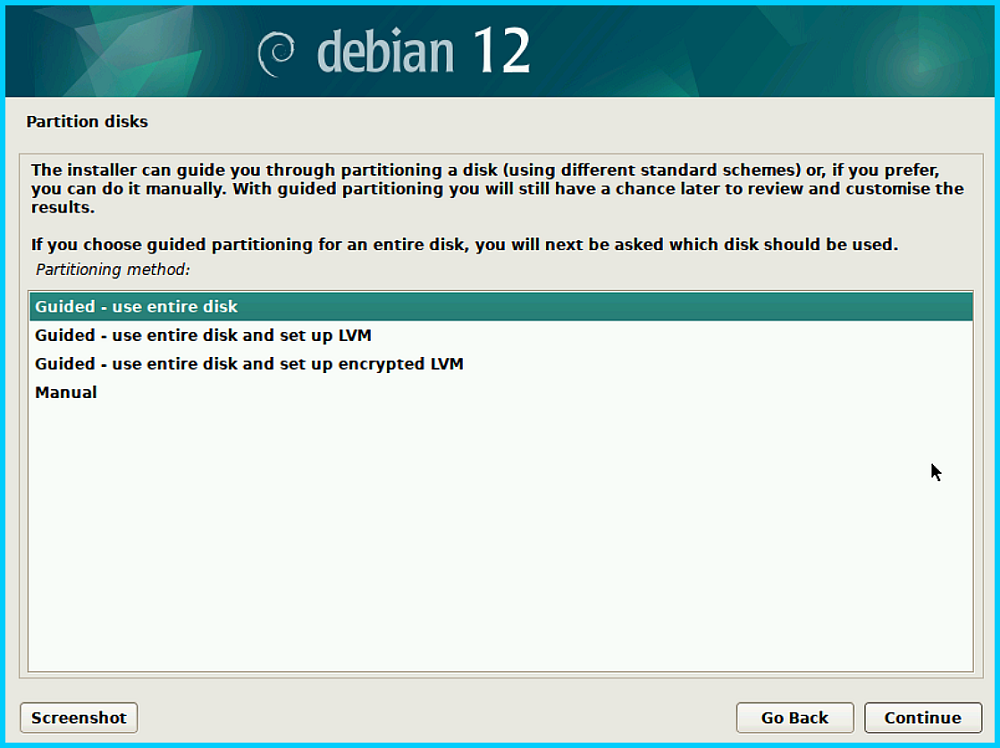
Partition Overview Window – select “Finish partitioning and write changes to disk” and click “Continue”. The window should look something like this (except for the drive name and storage sizes):
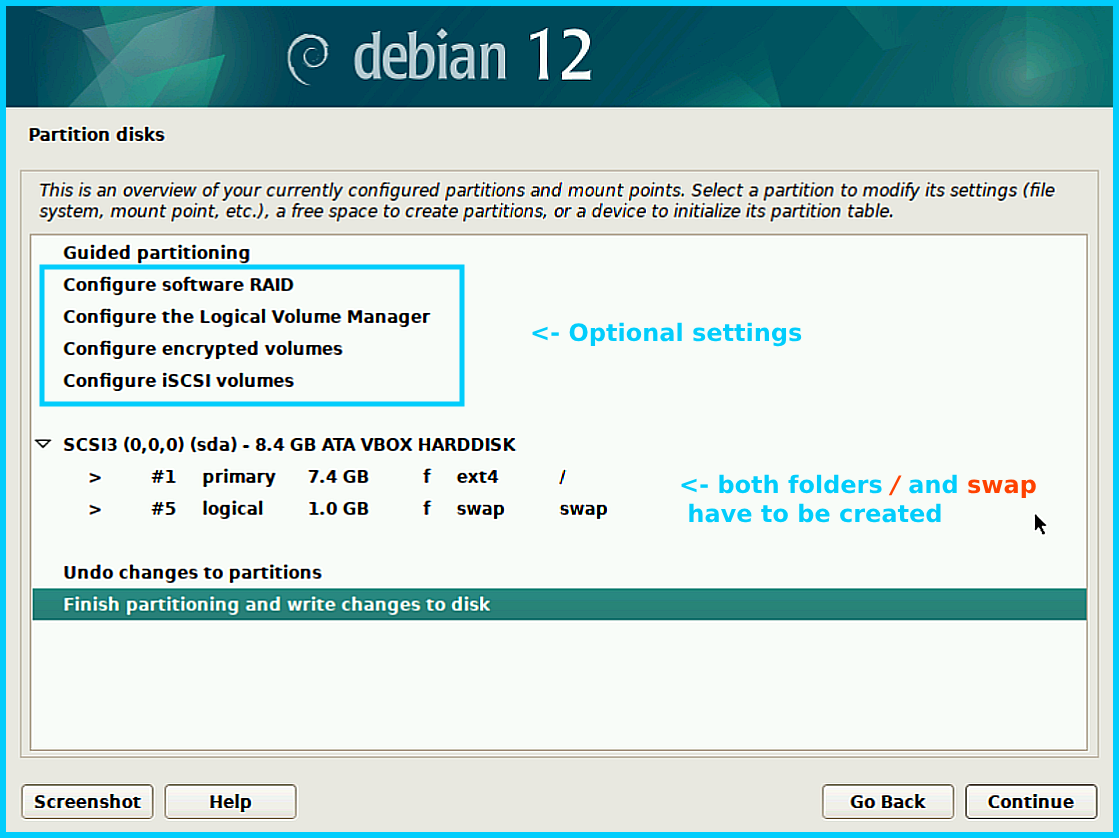
If the “/” and “swap” folders were not created, do the following:
Click on the drive name – “Continue” – Create a new empty partition table on this device? – Yes – “Continue” – Click on “FREE SPACE” – “Continue” – Automatically partition the free space – “Continue” – All files in one partition (recommended for new users) – “Continue”. Select “Finish partitioning and write changes to disk” and click “Continue”.
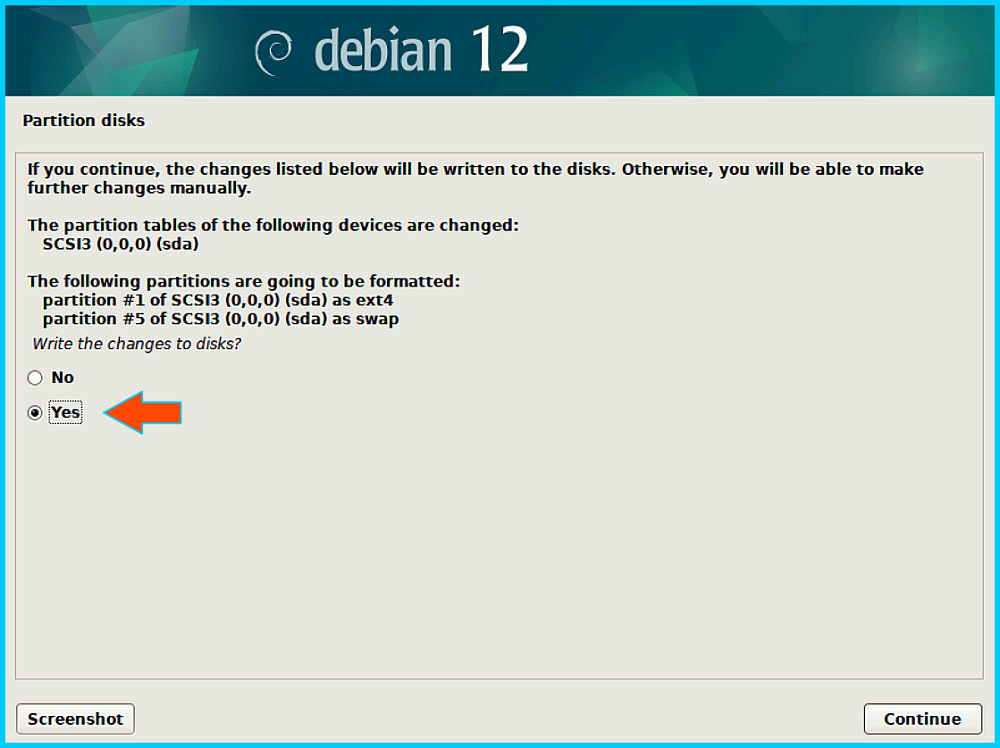
Write changes to disks? – “Yes”.
If the installer requires selecting the root folder, try repartitioning the disk again, starting from the “Guided partitioning” section (first line of settings in the screenshot above). If that doesn’t help, open the “/” folder settings and select ext4 format. After that, select “Finish partitioning and write changes to disk” again and click “Continue”.
Configuring the Package Manager:
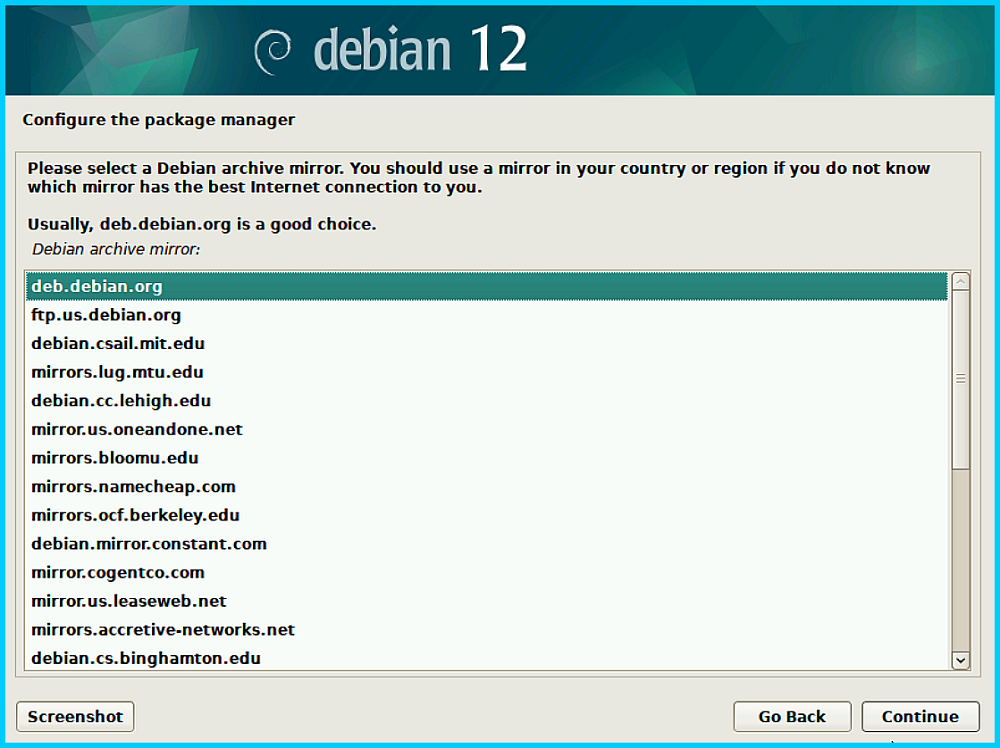
Country where the archive mirror is located – select your country or USA.
Debian archive mirror – deb.debian.org
HTTP proxy information – leave empty if you don’t plan to use it.
Software Selection:
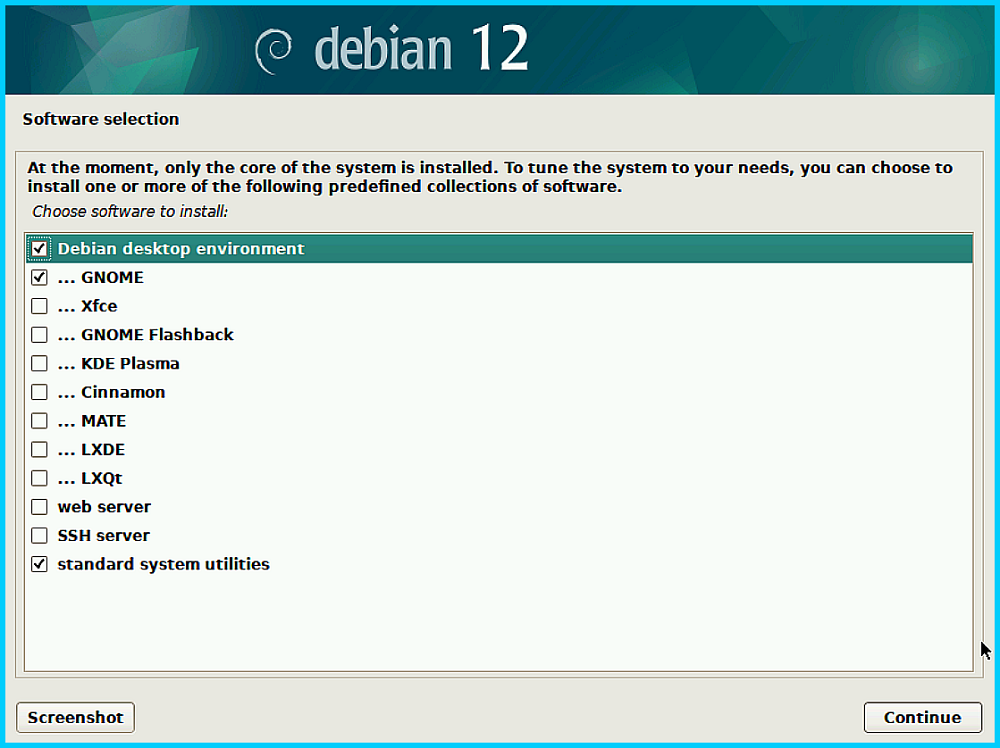
In this section, you can add various software to Debian. Some settings may already be default depending on the PC/laptop you’re installing the OS on.
The fields between the “Debian desktop environment” and “web server” options are called desktop environments (graphical interfaces). They differ primarily in appearance and pre-installed software. Some are easy to use and more suitable for beginners, others are more flexible, and some are fast and minimalistic. Please research desktop environments online and choose the most suitable one or leave the settings as is. If you don’t select any environment, the OS will install without a graphical interface, as a console.
Debian is usually installed on servers with these settings: web server – apache2; SSH server – openssh.
Installing GRUB System Bootloader
GRUB is the operating system bootloader. The installer will attempt to automatically detect other supported installed OS and add them as boot options to the GRUB menu, which will appear every time Debian starts. If for some reason one of the OS was not added, please look for a solution in the GRUB documentation.
Install the GRUB boot loader on the primary drive? – “Yes”.
Device for boot loader installation – select your device from the list; do not select “Enter device manually”.
Step 4. Working with Installed Debian
Now you can remove the flash drive from the USB port.
If you installed Debian alongside Windows, not over it (e.g., you have 1 SSD with Windows and 1 HDD with Debian), you can switch between installed OS either through the GRUB menu in Debian or using the boot menu key during system startup (as in Step 2).
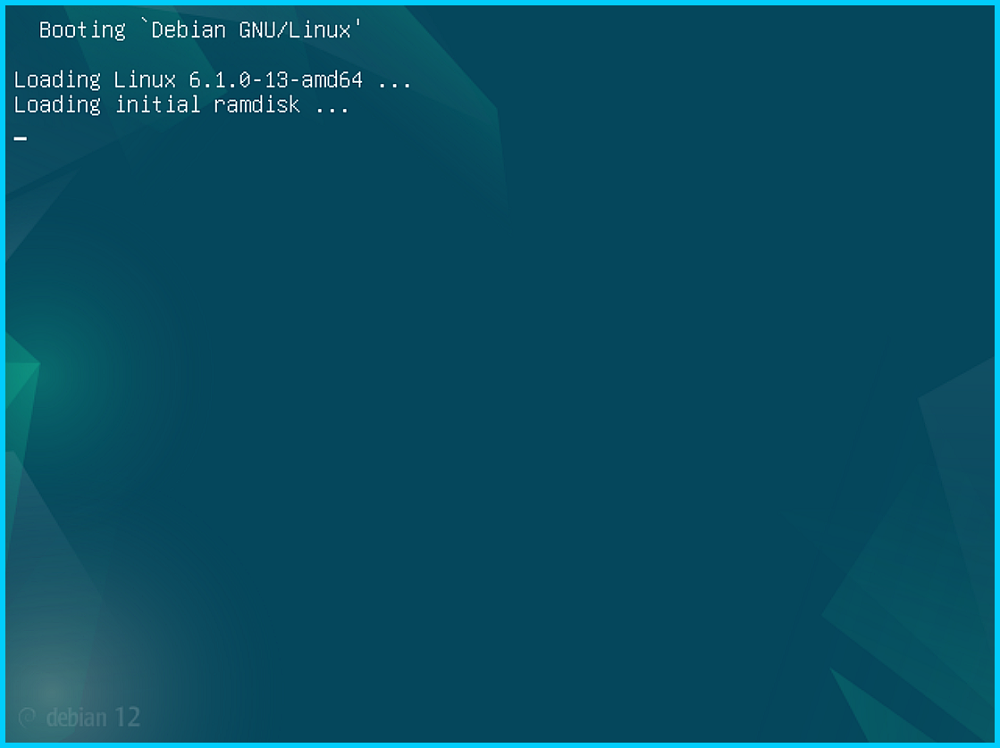
Installed Debian will boot like this:
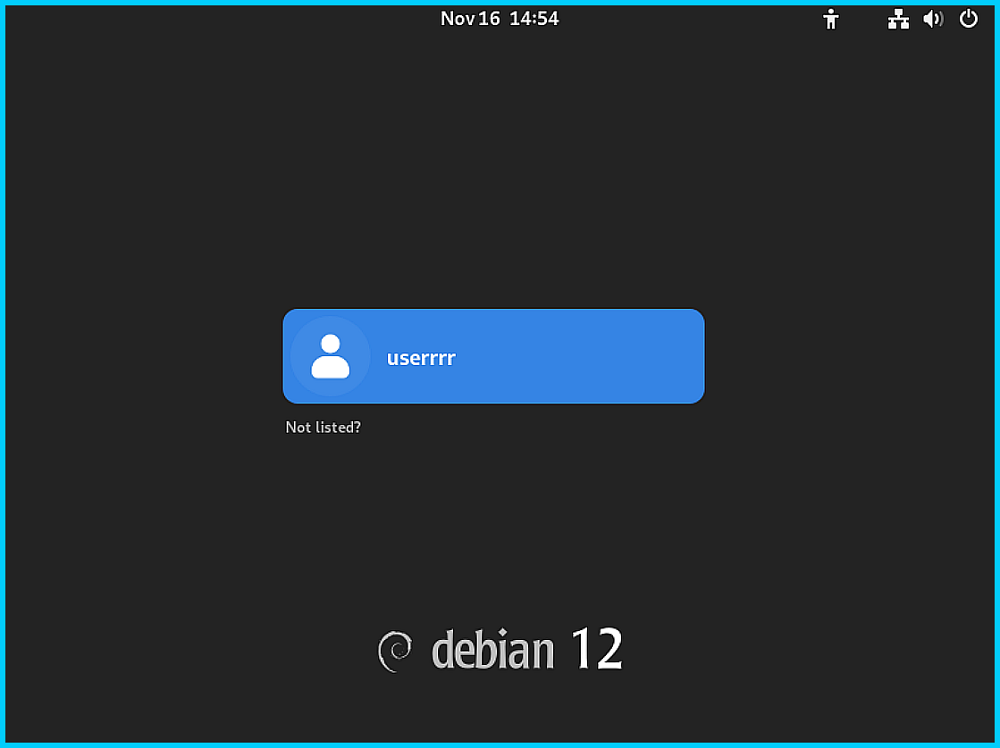
Authentication Menu:
Debian Desktop:
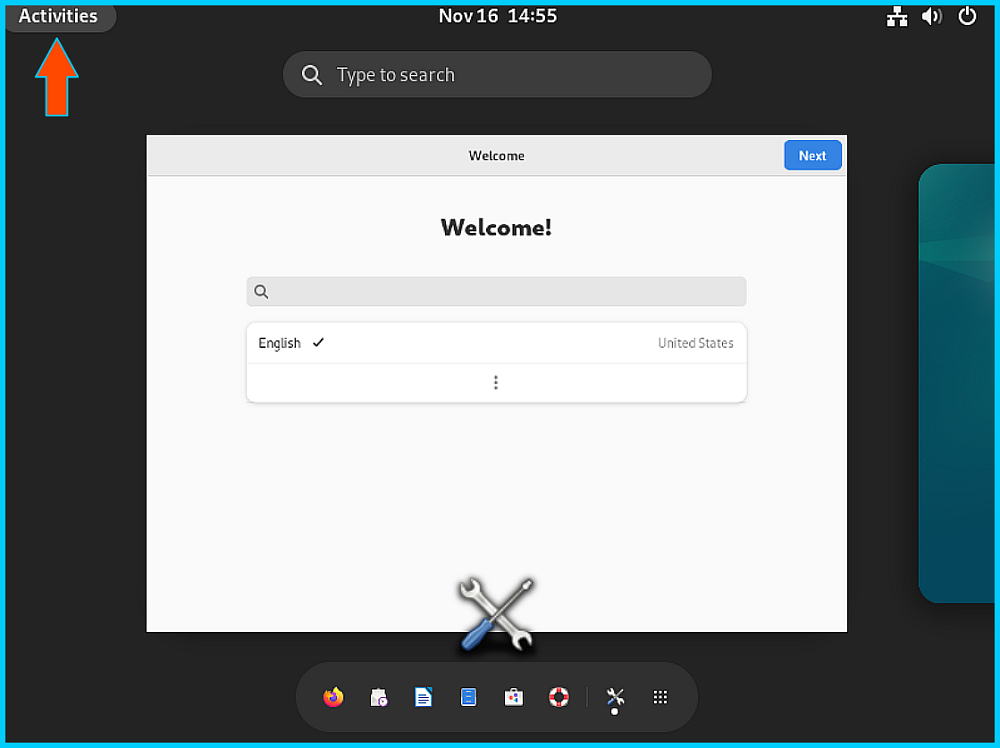
Complete the installation by setting parameters in the opened “Welcome!” window. To invoke the bottom menu, click the “Activities” button in the upper left corner.
Step 5. Installing Xeoma on Debian (2 Minutes)
If you’re setting up Linux for video surveillance tasks—it’s time to deploy Xeoma. Below is a quick way to set up Xeoma server as a service:
# Download and unpack Xeoma (x86_64)
wget https://felenasoft.com/xeoma/downloads/latest/linux/xeoma_linux64.tgz
tar -xzf xeoma_linux64.tgz
sudo chmod a+x xeoma.app
# Install as service (autostart)
sudo ./xeoma.app -install -coreauto
# Check status
sudo systemctl status XeomaCoreService
Client Connection: Install the Xeoma client on the same PC or another (Windows/Linux/macOS/Android/iOS), specify the server IP and password displayed after installation. More details in the Xeoma on Linux guide.
FAQ
- How to Install Linux (Debian) from a Flash Drive?
- Create a bootable flash drive with Debian ISO, boot via Boot Menu (usually F2/F12/Del/Esc) and follow the installer steps. Detailed step-by-step instructions on the page above.
- How to Install Debian on a Laptop?
- The process is similar to PC: flash drive with ISO, boot from USB, automatic disk partitioning, and GRUB bootloader installation.
- How to Set Up Video Surveillance Xeoma on Debian?
- Download the Xeoma archive for Linux, unpack and install the service: wget … ; tar -xzf … ; chmod a+x xeoma.app ; sudo ./xeoma.app -install -coreauto. Then connect with the Xeoma client using the displayed password.
We hope this article provided a comprehensive answer to the question of how to install Linux yourself. You can test Xeoma with a free demo license here.
February 5, 2024, updated September 18, 2025