How to use FTP upload in Xeoma?

Nowadays it is difficult to overestimate the value of information. When it comes to video surveillance, it is particularly important to make sure that there is a safe place for all the data the cameras collected. Typically, it is stored on the server’s hard drive. Prudent security managers prefer to put that server in a separate locked room and limit the access to it as much as possible. However, at times, even these measures prove insufficient. While computer technologies become more reliable with each passing year, it is still fairly (although owners would rather say “unfairly”) common for servers to malfunction and lose data as a result. Other times the server room can be breached by a burglar targeting the expensive hardware. So how does one secure the data? The most efficient way is to have backups, preferably far away from the main server. This is where FTP upload comes to save the day.
 FTP stands for File Transfer Protocol, and as the name implies, it serves to send files from one location to another. It was developed all the way back in 1971 by a talented Indian IT engineer Abhay Bhushan. It connects two machines: one of them is the server while the other is the client. The client randomly chooses a port, informs the server which one it is and the server proceeds to use its data port 20 to send the required information there. Does this make for a secure connection? No. Originally, the only defense for the FTP utility is username and password – hardly any challenge for a hacker. However, there are additional security measures that can be used here. One of them is SFTP – Secure FTP, which is, basically, a combination of normal FTP upload and TLS (SSL) connection. Another way is using VPN (private networks are nearly impossible to breach making for the best possible defense). Both of these will ensure that the data sent from one location to another arrives safely without any interference.
The server, which is going to house your backup archive, needs an FTP utility installed. One of the most popular among them is FileZilla. It’s free, so you can download and install it easily.
So, how does one implement this in Xeoma? There is a module made specifically for that – “FTP Upload”. All you need to do is set it up correctly.

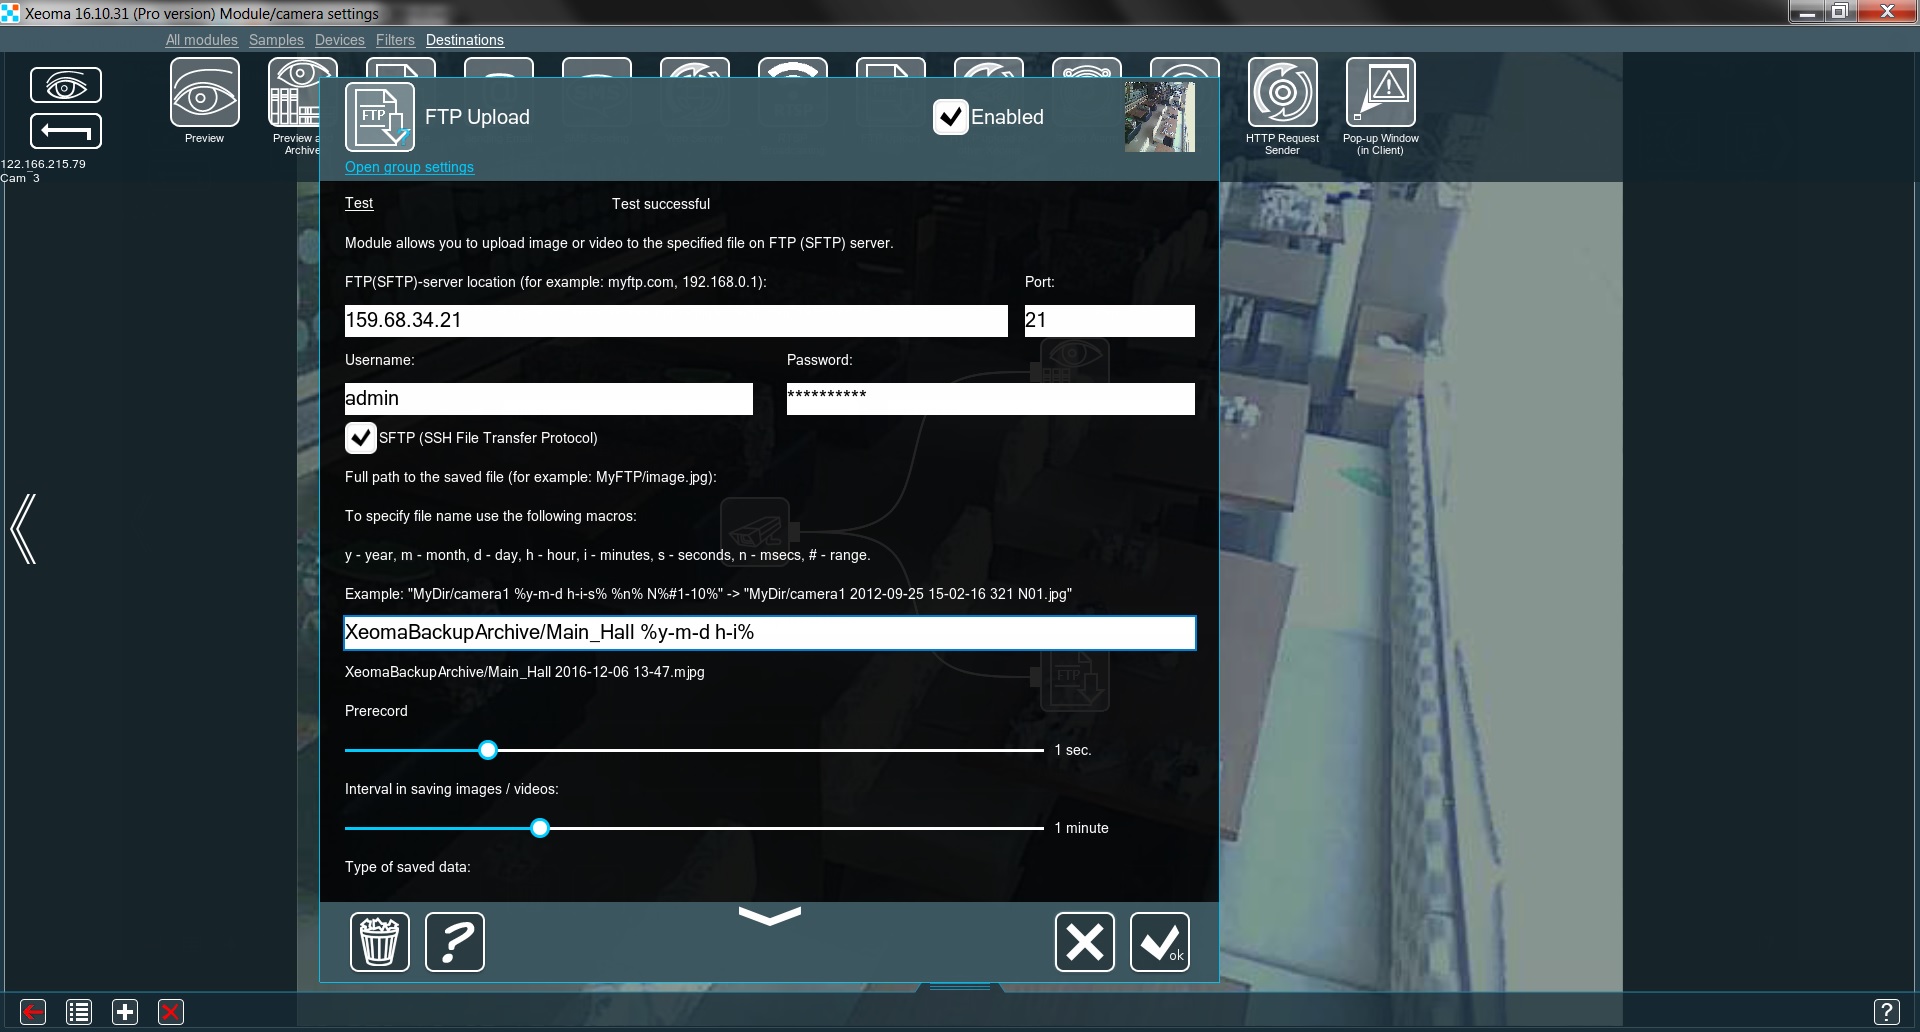
First, we need to type in the FTP server’s address and the port (the default one is 21, but you can specify a different one on the FTP server). If you want the transfer to be securely encrypted, CHECK the box SFTP (SSH File Transfer Protocol). Don’t forget to click the Test button! If something’s set up incorrectly, the message at the top will show you exactly what it is. If everything is OK, the message will say Test successful.
A backup archive doesn’t have to be quite as tidy as the main one. However, if we ever wish to actually navigate through it, it needs to be arranged in an understandable way. By far the easiest way to do so is to insert date and time into every filename. The macros are made with this in mind. All you need to do is put these symbols between two % (percent signs). The line under the input box shows exactly how the filenames will look. In our example the line %y-m-d h-i% is transformed into 2016-12-06 13-47. With this navigating the backup archive should be simple.
To make sure that we don’t miss anything, we can set the Prerecord for a few seconds and an Interval in saving images/videos. Finally, we need to choose the Type of saved data: JPEG, MJPEG, WEBM, AVI or WMV.
That’s it! The backup archive on the server with an FTP utility is ready and waiting.
December, 22 2016
Read also:
Video Surveillance vs Kidnapping
How to choose security camera