Heatmap in video surveillance system Xeoma
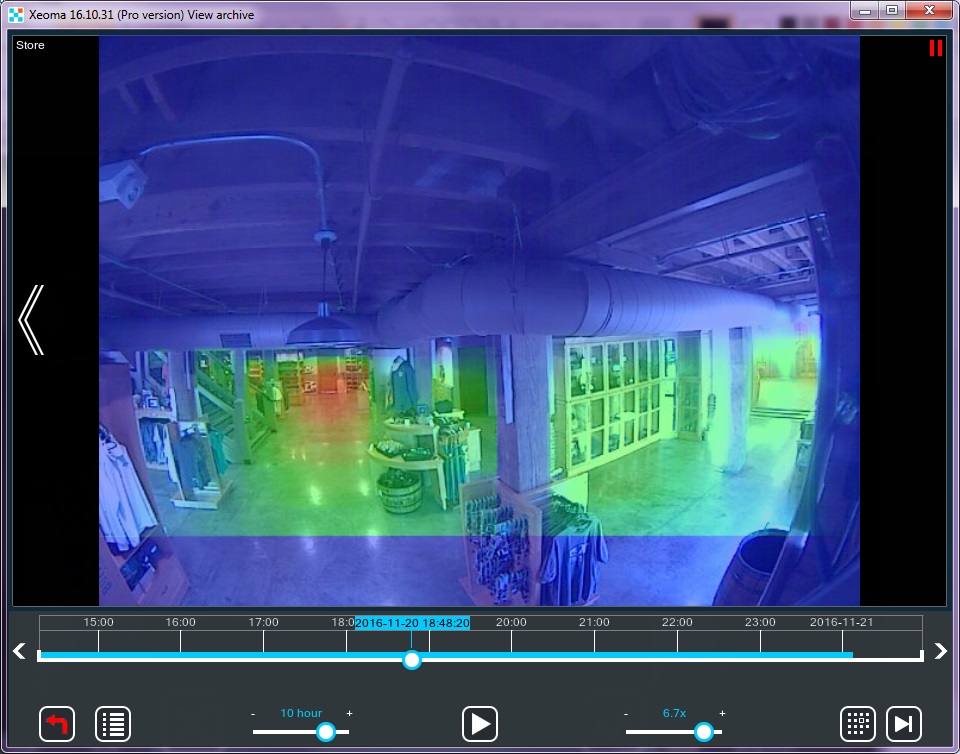
Heatmap is one of the most efficient tools in video surveillance. With its help, you can get a quick glance at motion dynamics in camera’s field of view.
The way Xeoma’s heatmap works is somewhat different from how heat cameras work. The latter is all about an object’s temperature. “Warm” or “hot” objects are shown as an area in the warm color spectre (red hues), and the colder the object is the deeper blue color it is in camera image.
Xeoma uses similar “warm-cold” color gradation, but relies on the motion frequency in a certain area rather than temperature of it.
From theory to practice
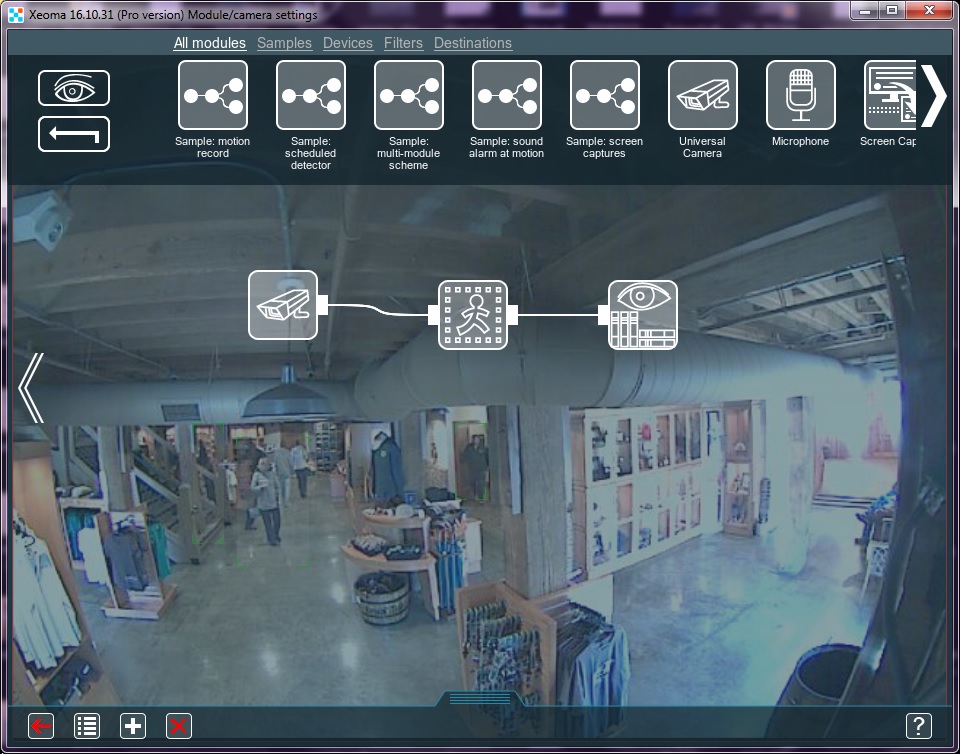
As the heatmap is based on information from the Motion Detector, it’s only logical that the scheme requires a Motion Detector module. Thus, make sure that you have it in your scheme along with a Universal Camera and Preview and Archive. Set the Motion Detector up the way you need and make sure it passes image down along the scheme.

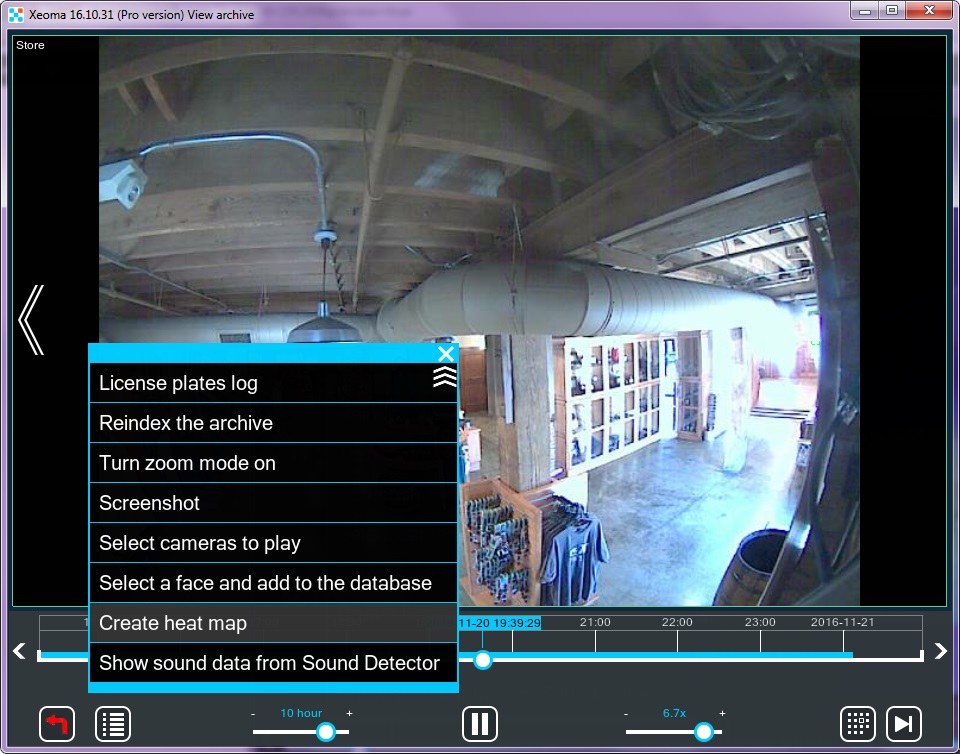
Go to the Archive Viewer (Play button in the lower panel or camera box corner). In Archive Viewer’s menu select the “Create heatmap”.

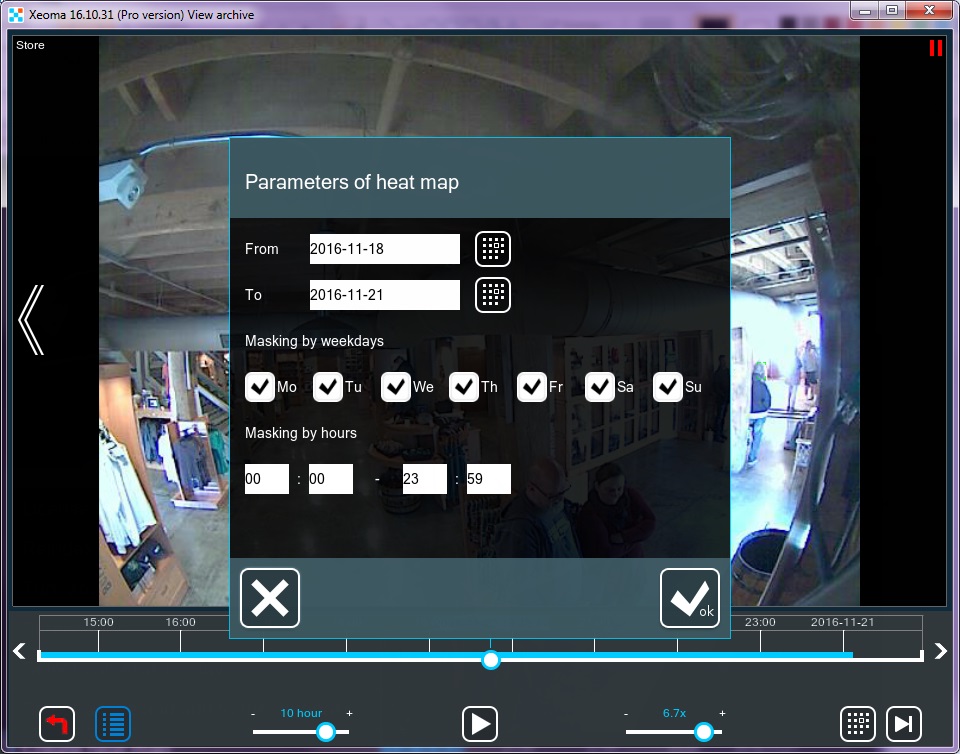
In the new prompt select a time range you need the heatmap for. It could be for example, a week’s time, 24 hours or 15 minutes. By default, all time that you have records for is selected. Attention! You must have at least 5-minutes worth of records in a certain archive for Xeoma to be able to create a heatmap for this archive for any of available period of time you select.


You can save the heatmap you got with the corresponding option in Archive Viewer’s menu.
November, 23 2016
Read also:
Motion detector in Xeoma
Fast video surveillance: Motion visualization
Fast video surveillance: multilayer eMap