| If your camera supports FTP streaming | If your camera doesn’t support FTP streaming |
FTP receiver – easier way to connect your remote camera to cloud video surveillance
Option 1: FTP streaming from your camera
You can use FTP streaming to connect your remote camera, for example, to cloud video surveillance server Xeoma Cloud. It’s convenient when you don’t want or cannot perform port-forwarding on your router at the place where camera is located, or when there’s no IP address that can be assigned to the camera (like when the camera is connected via the mobile Internet) thus no program can find it.
First of all, naturally, your remote camera must have support for this feature. There are just too many manufacturers today for us to be able to tell if your camera has it or not so please refer to the camera’s documentation in case of doubt.
First step is adding a scheme with FTP receiver as a source module in your Xeoma thus enabling FTP streaming from your camera.
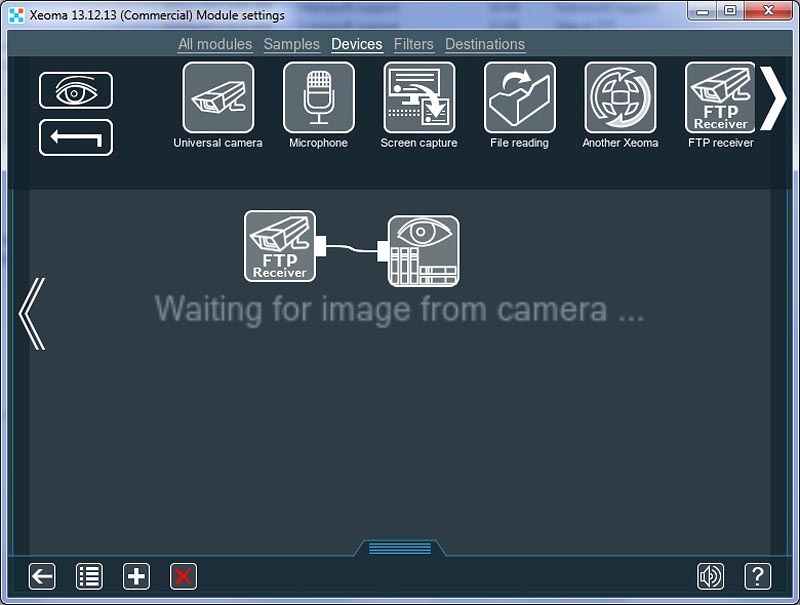
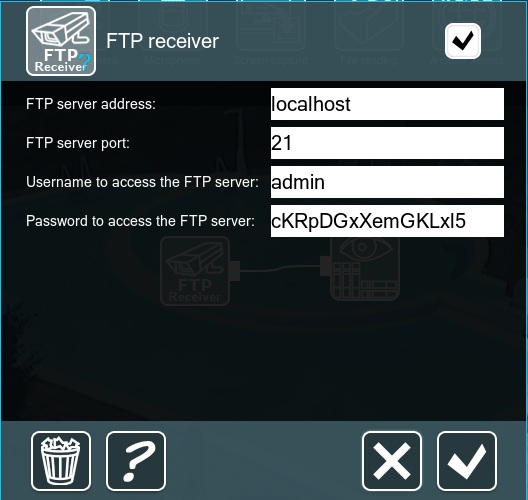
There will be no image yet, but there will be settings that you need to use in camera FTP streaming setup like port (changeable), user name, password and server address (not changeable). You will need this data later on. Tip: if you need to change the password, remove this FTP receiver module and add another – new password will be generated for the new FTP receiver module.
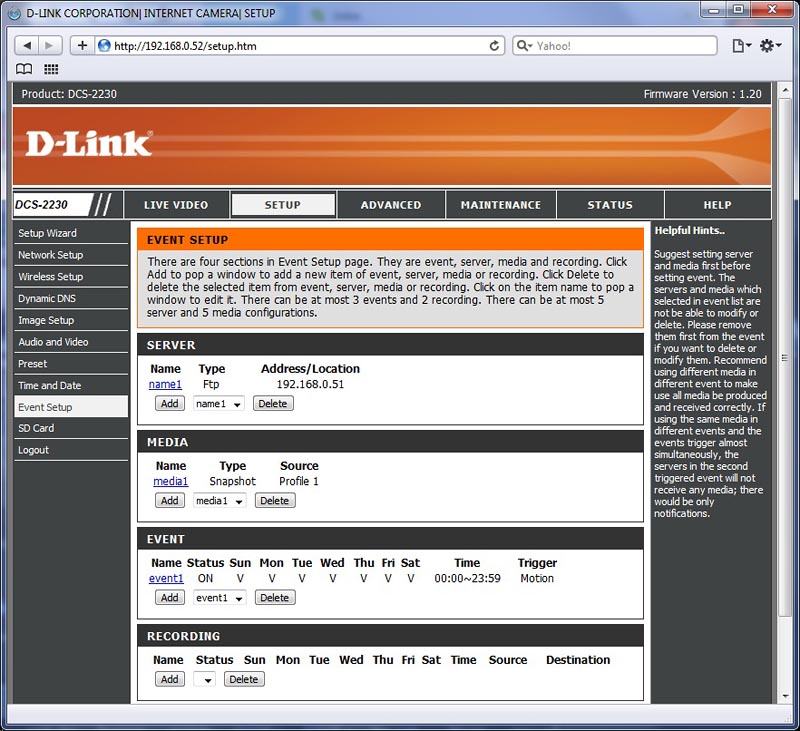
Next step is to go to the camera settings and on to the FTP streaming settings. You should look for tabs like “Event Setup”, “FTP” or the like.
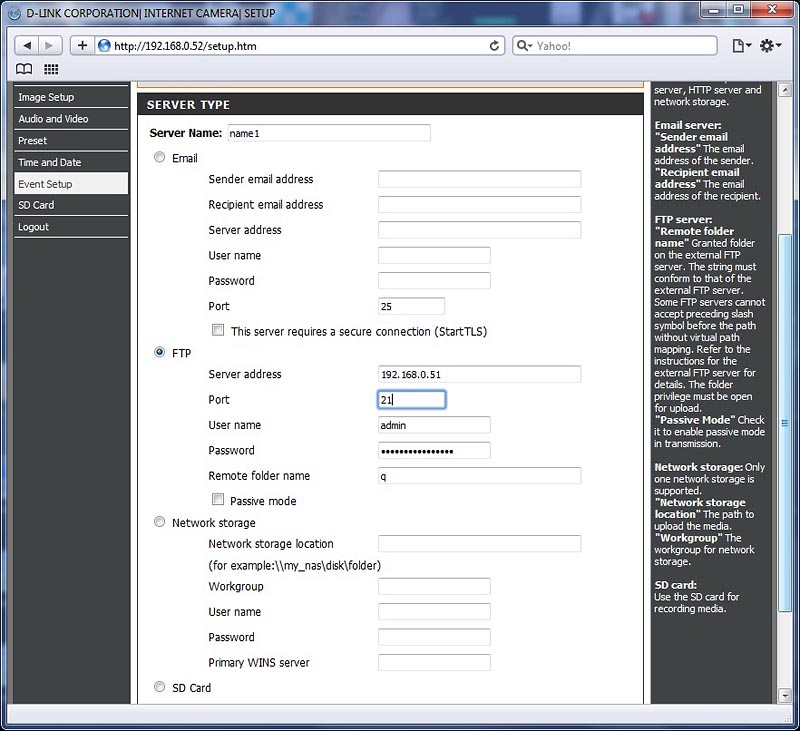
In this configuration page you need to enter FTP receiver’s data: IP address (host) where Xeoma with FTP Receiver are, port, username, password. Folder or Directory Path can be of any name, however some restrictions may prohibit use of special signs, so we’d recommend to keep it simple.
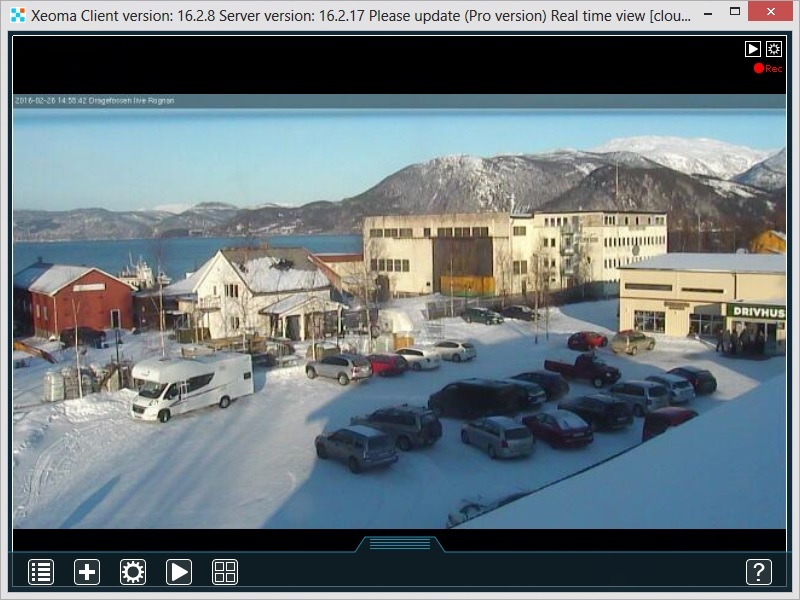
If all is correctly set up, the FTP Receiver will start showing picture from the camera.
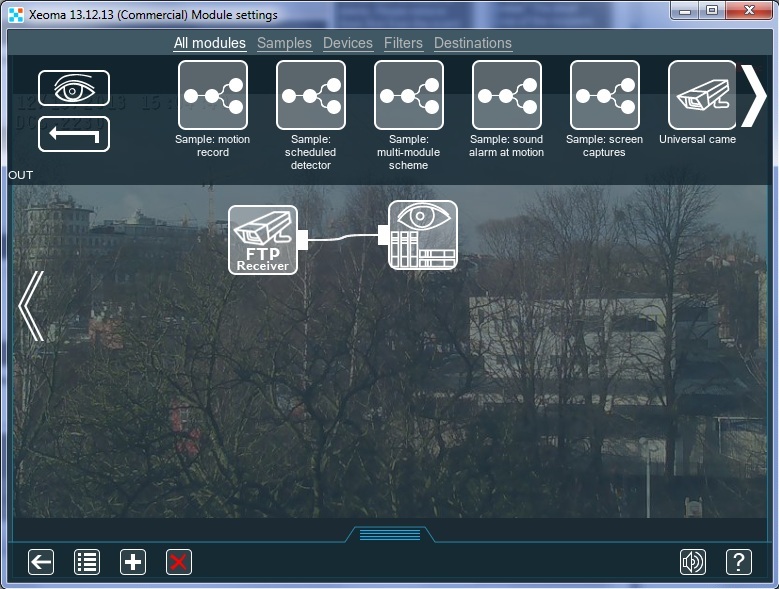
The described way will help you connect your remote camera through FTP streaming to Xeoma, including your Xeoma Cloud video surveillance account. See more about Xeoma Cloud here
Option 2. FTP Upload on computer + FTP Receiver in Cloud
If option #1 can’t be used – for example, if your camera doesn’t support FTP uploading – you can use this option to enable cloud video storage and cloud view of your camera(s). This option’s main feature is that you will need a computer running Xeoma “on site” – i.e. where your camera is located. This computer will upload pictures to your Xeoma Cloud account where you can connect from anywhere and at any time to view them, download them and/or change settings. You can use a micro pc (also known as developer boards) for this purpose. For example, for detailed information on Xeoma on Raspberry Pi, please visit this page.
Step 1. Have a computer running where your camera is located. Make sure you can view your camera from this computer (follow instructions in camera’s guide). Download Xeoma and launch it on this computer. You don’t have to activate Xeoma license there if a trial version suits your needs. Add your camera in Xeoma. Use module “FTP Upload” as a destination module for your camera’s chain:
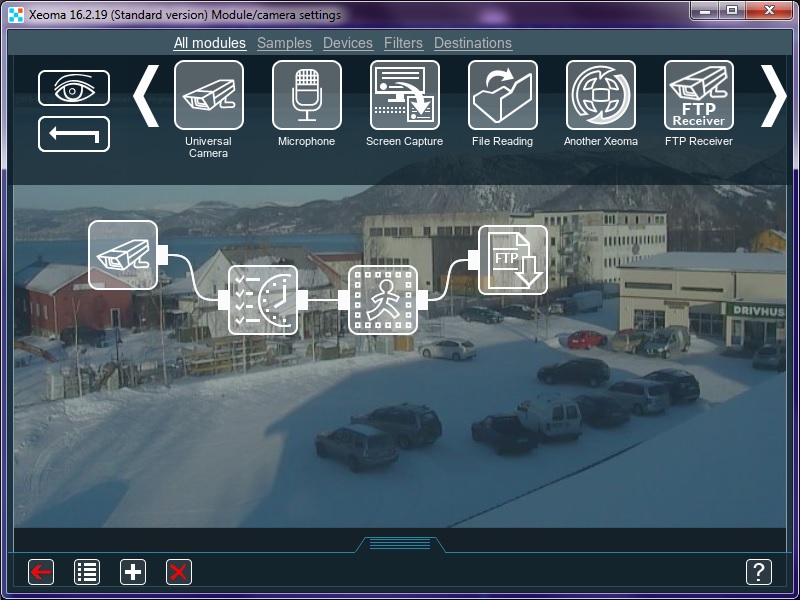
Step 2. Go to the settings of the “FTP Upload” module. Here is where you will need to enter data of FTP server you’ll upload pictures from your cameras to (your Xeoma Cloud account). See Step 3.
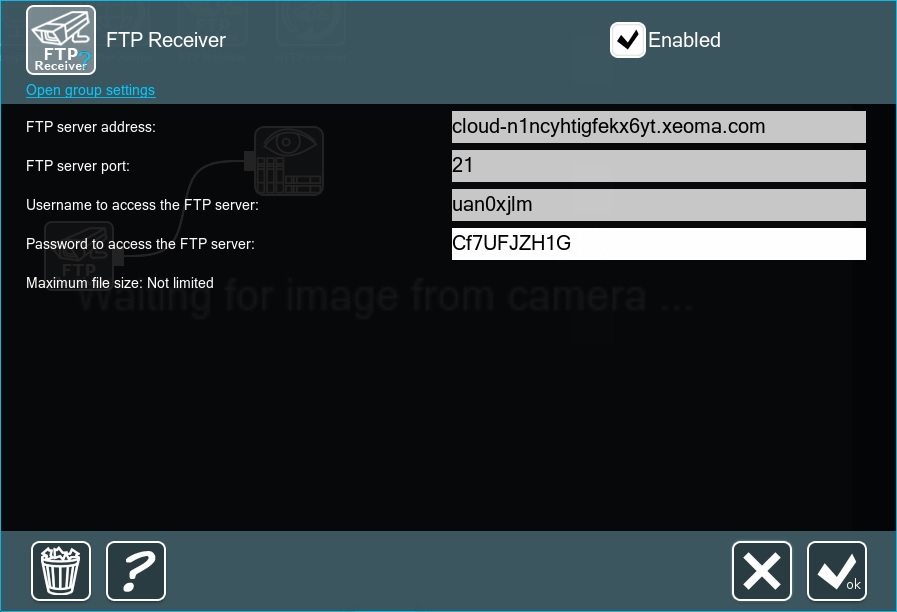
Step 3. Go to your Xeoma Cloud account. To connect your camera for cloud video storage and/or cloud view, you will need to add a chain here that begins with an FTP Receiver module (not Universal Camera module). In the FTP Receiver’s settings you will see data you will need to enter in the FTP Upload module’s settings on the computer near the camera.
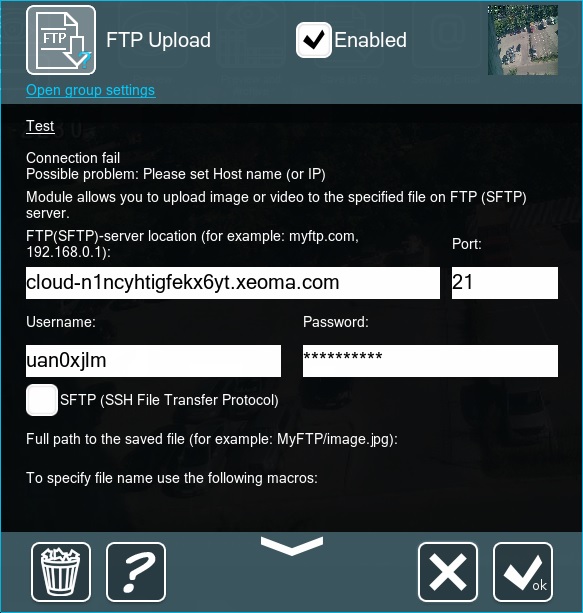
Step 4. If done correctly, you will get camera image in your Xeoma Cloud account.
This method of connection of your camera to cctv cloud has its disadvantages (you will need a computer running 24/7 where your camera is located) but this is still a good way out when nothing else works.
18 December 2013, updated 29 February 2016
Read also:
How to set your private cloud security with Xeoma Cloud
P2P support in Xeoma
Frequently Asked Questions about Xeoma software
Complete Xeoma User Manual