Multilayered eMap in Xeoma
Arranging a proper security system for an entire building is no small matter. Doing so on a budget is even more so. One of the most expensive parts of such a system is the server, so, needless to say, any manager would want to keep the number of those to a minimum. This often results in all the cameras’ feeds being shown on a single powerful server. A problem that is overlooked more often than it should be is that powerful computers have to be operated by not-so-powerful people. Even if the server has multiple screens, navigating through a great number of images effectively is quite an ordeal. So how does one arrange that in a convenient way? This article will show you one of the best options.
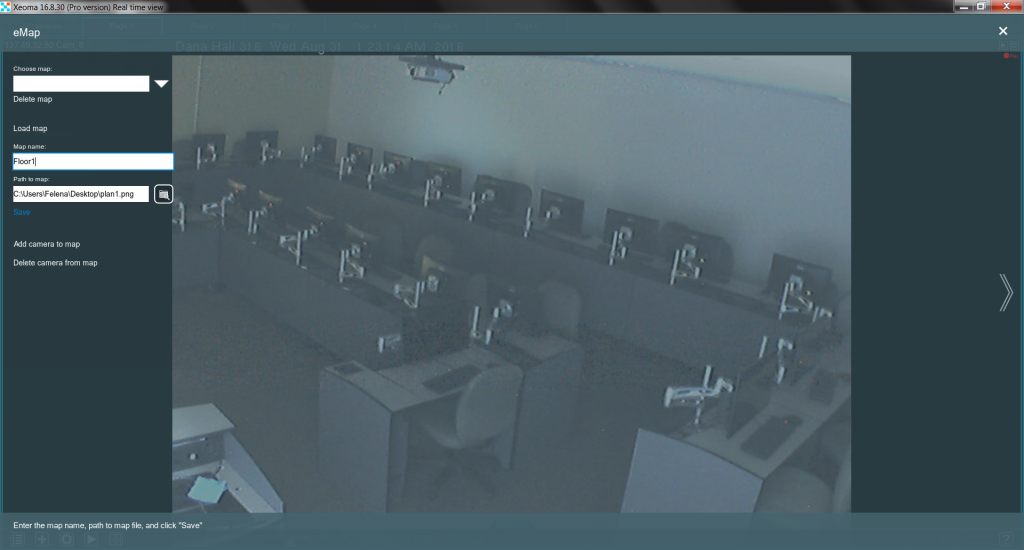
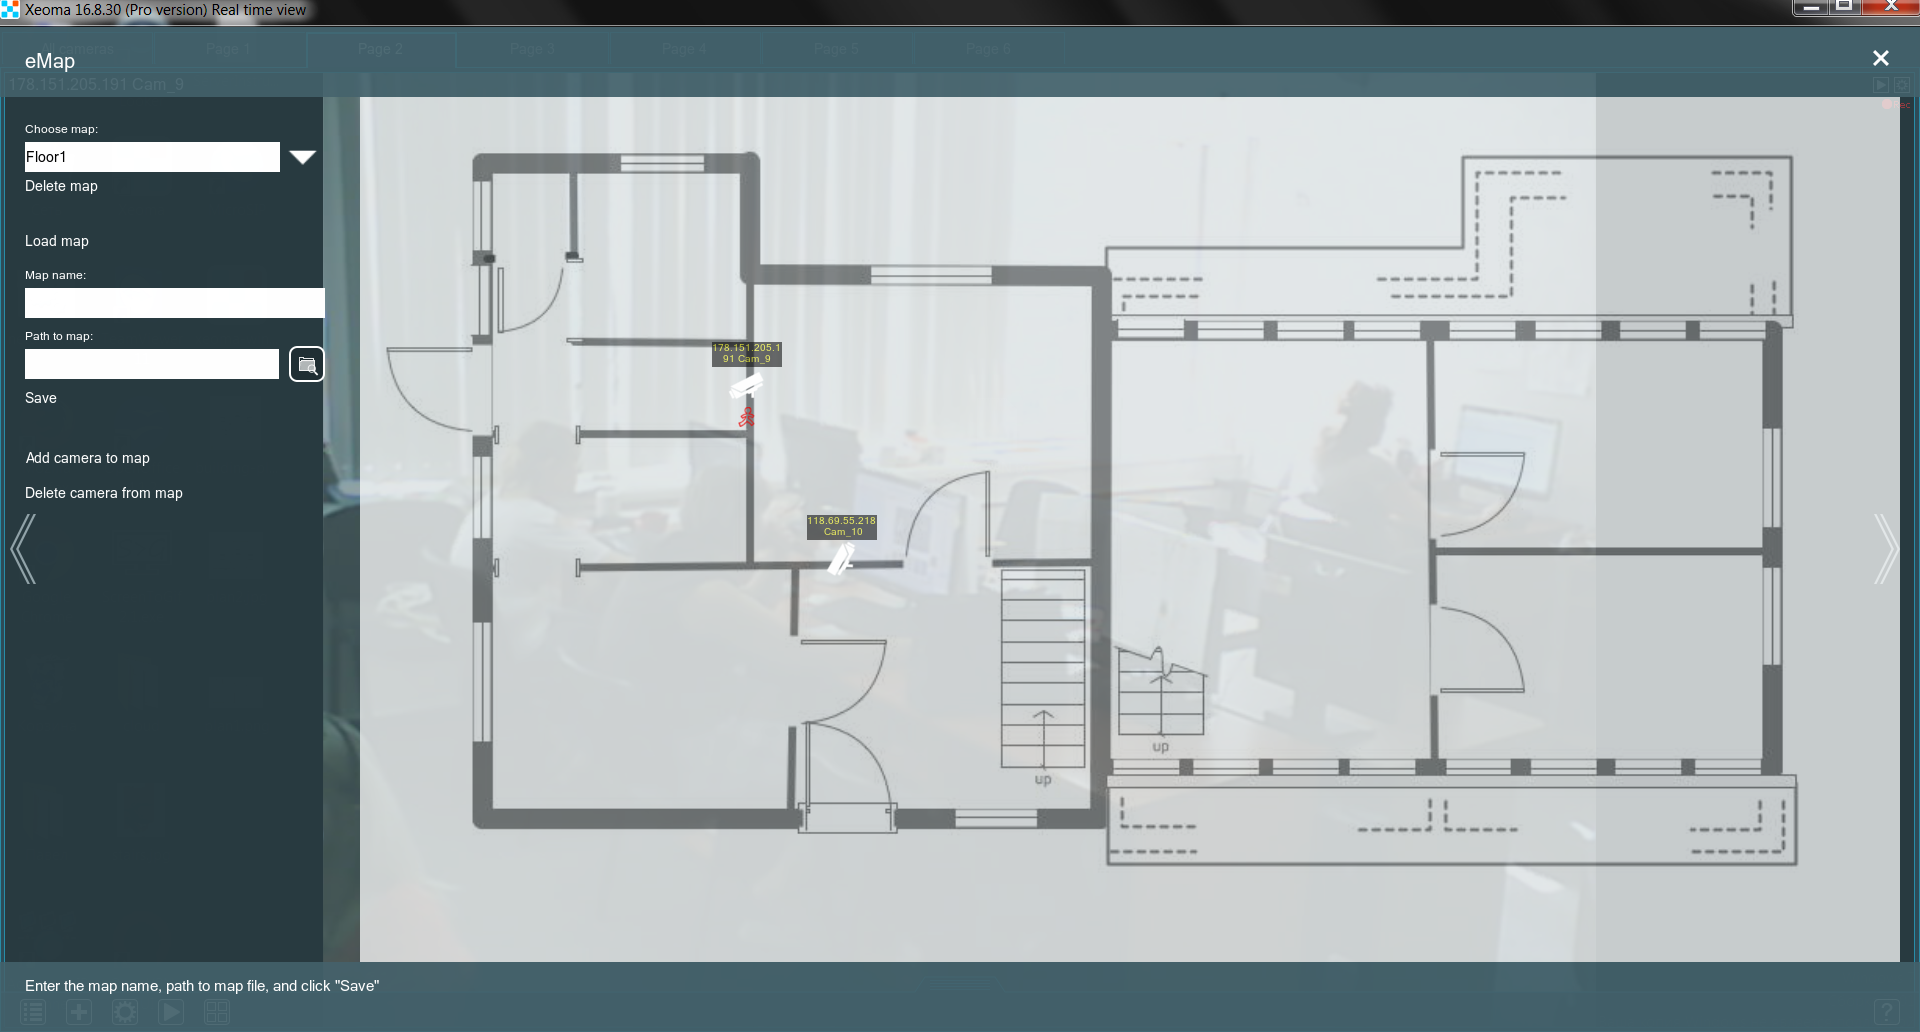
One of Xeoma’s Pro-features is eMap – an interactive map of the area under surveillance. Click the “Layouts menu” button (the one with a window on it) and choose “eMap” to start. Now press “Load map” and choose a name for it. Press the folder-button to find the right file through explorer. When you are done simply click “Save”.
Now click the drop-down menu “Choose map” and select the name of the map you’ve just entered. Now the map is on screen and ready for editing.
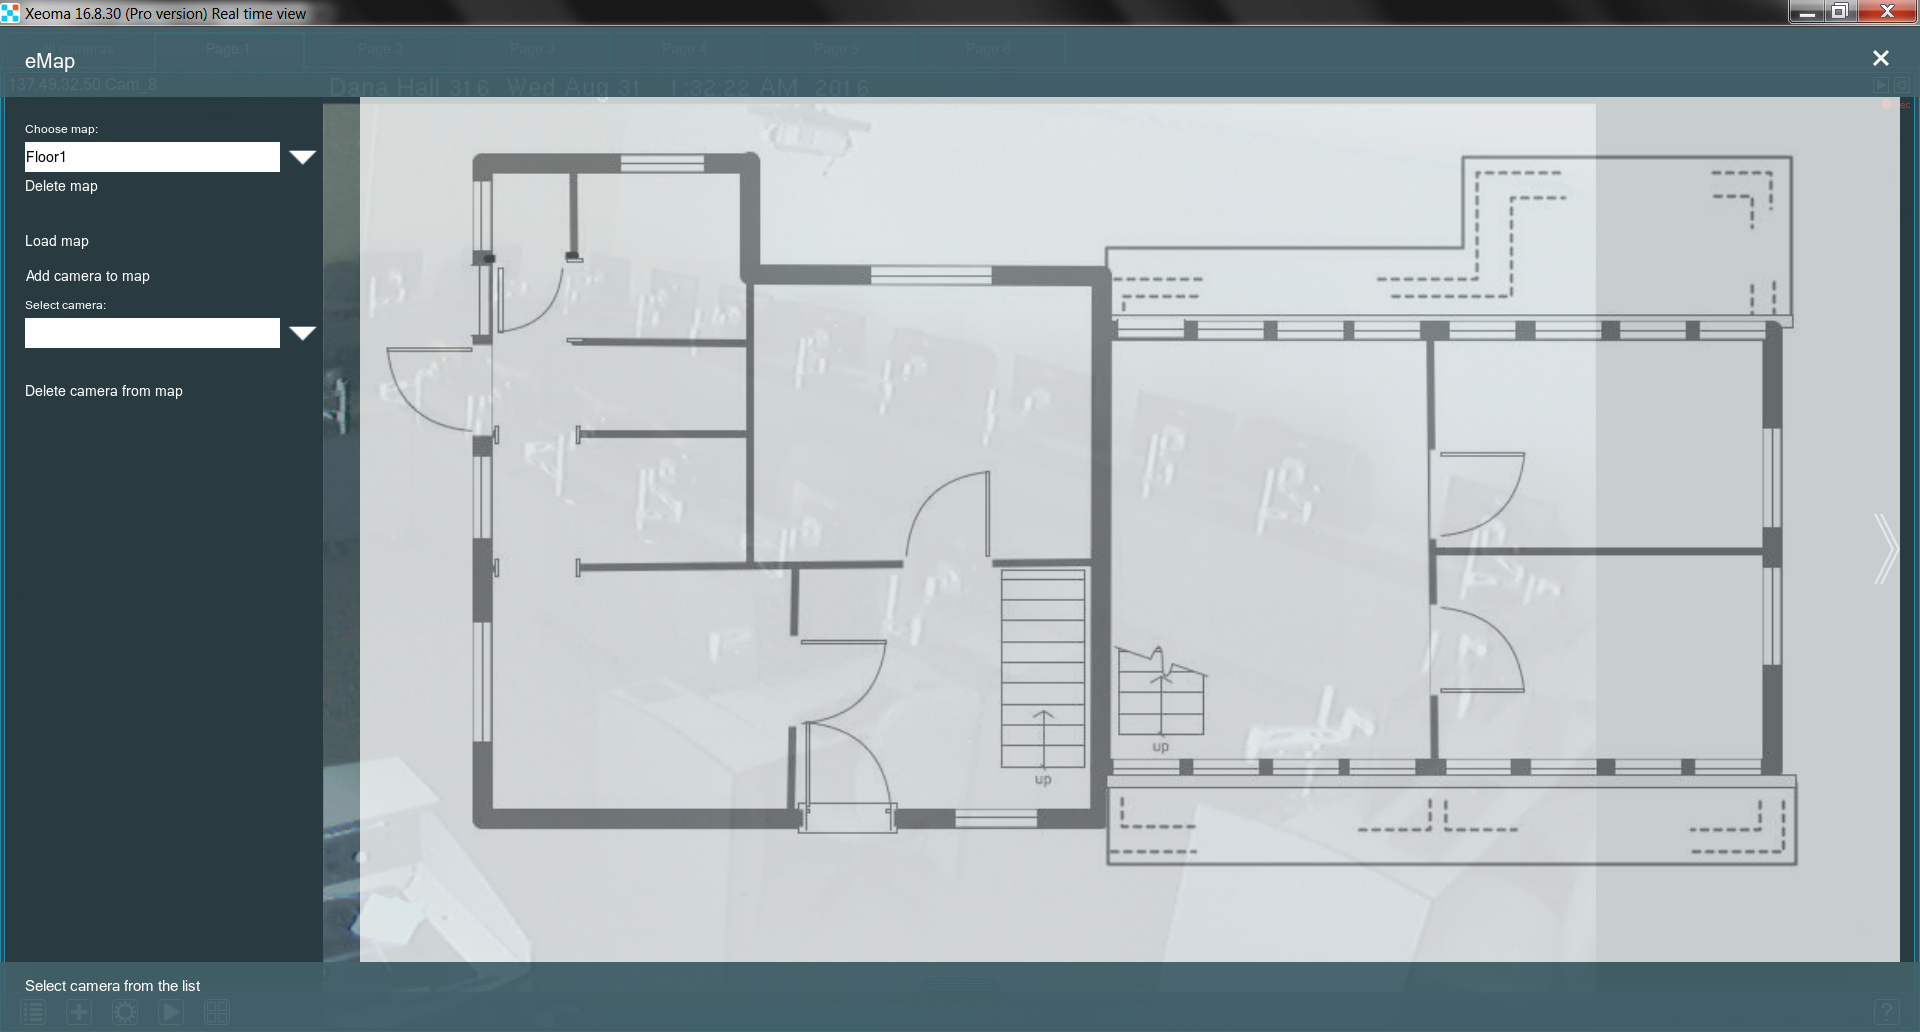
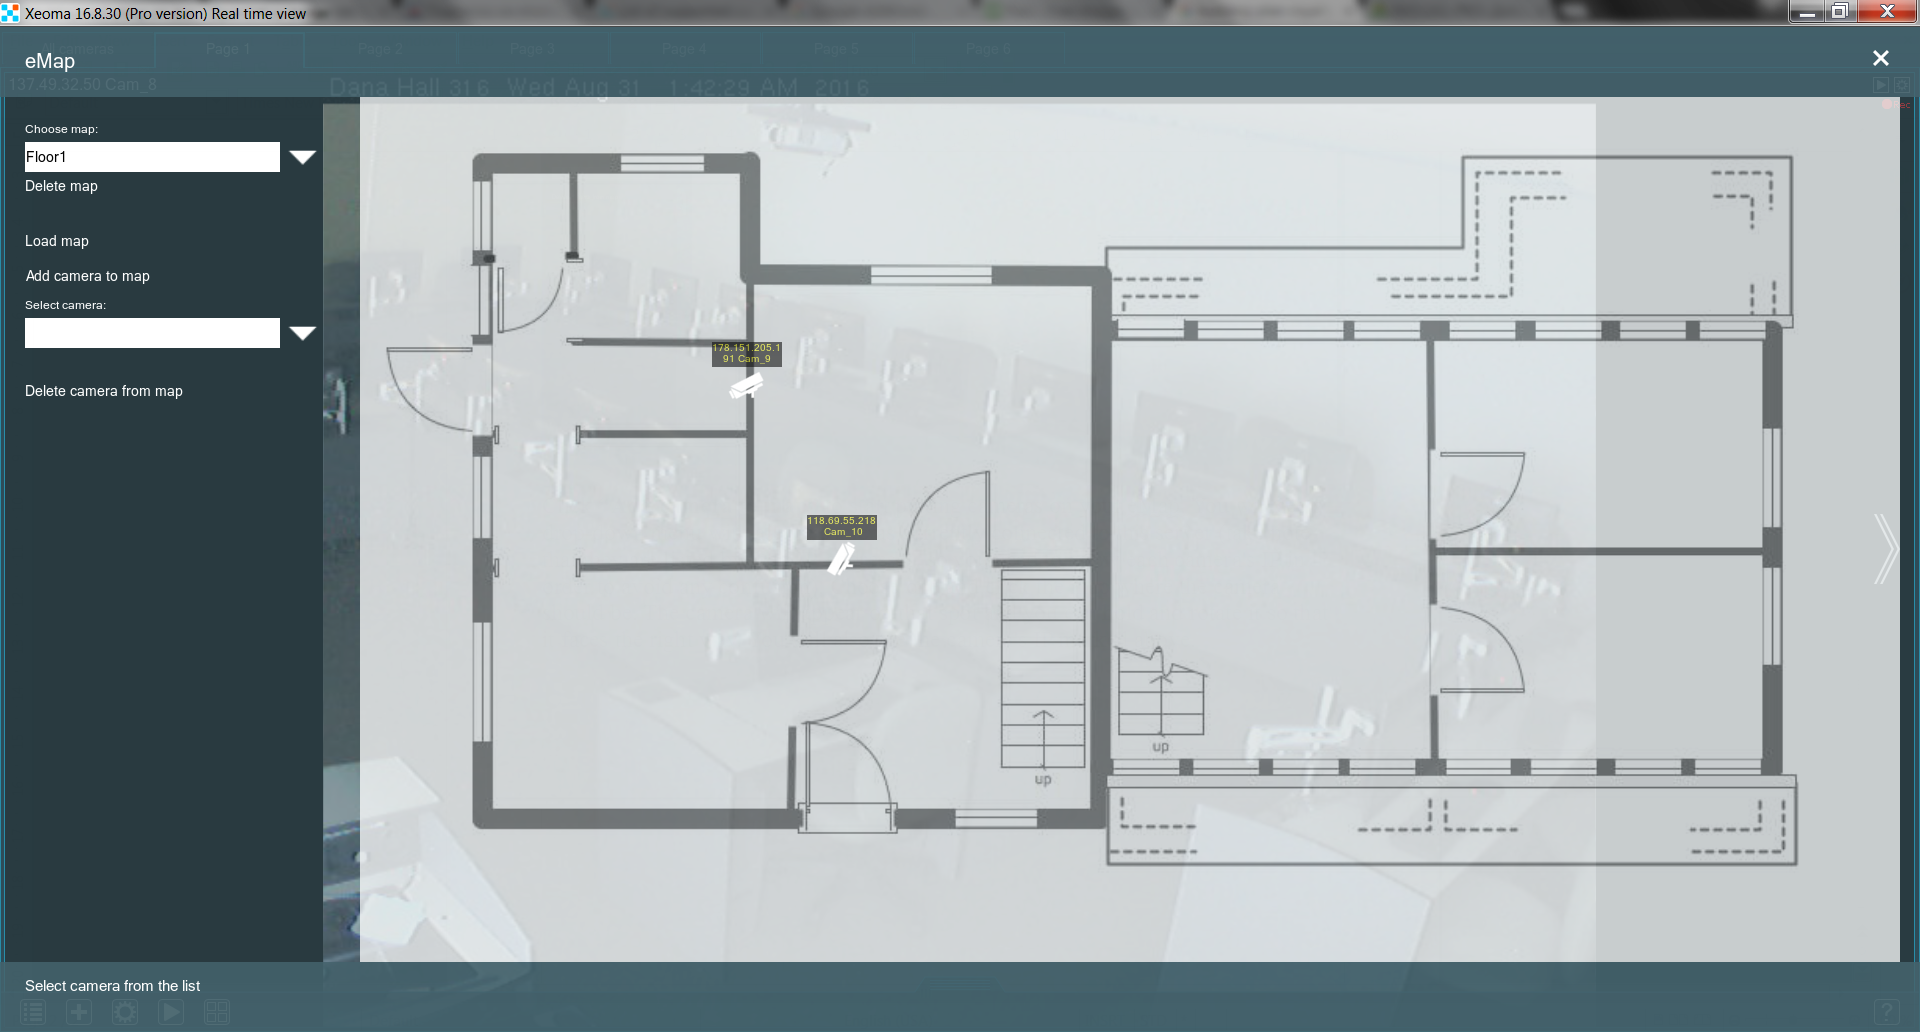
Click “Add camera to map” to start putting cameras on your eMap. You will see a drop-down menu with all the cameras currently connected to this server (take note that they are listed by their Camera names that you see in preview and that are set up in the settings of Preview and Archive or Preview modules). Choose one and click the map where the camera should be. The camera will appear on that spot and you can hold and rotate it so that it faces the right way. You will also see the camera’s IP marked above.
“But my building has several floors! How do I fit all the cameras on one map?” The new Xeoma’s function is called Multilayered eMap for a reason. Simply put, it can now store as many maps for different floors as you need. Click “Load map” again and choose a different name and path. “Save” it and you now have 2 different maps to work with. You can switch between them by using the drop-down menu “Choose map”. Add cameras to the second map the same way you did for the first one.
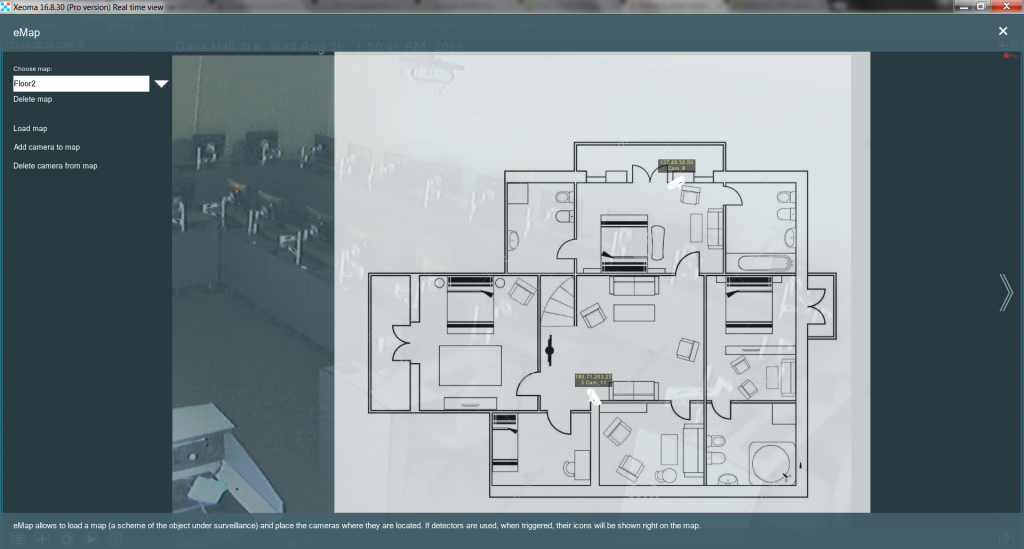
Got cameras on the stairs between floors? No problem!
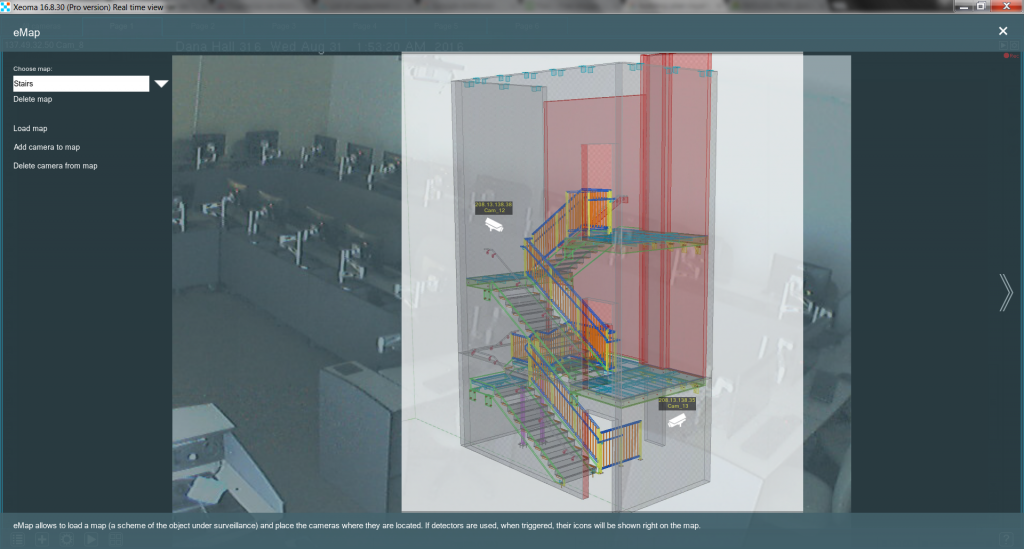
Now it’s as simple as clicking a camera to access its image. Moreover, if the chains for your cameras contain detectors (e.g. “Motion Detector”), the eMap will help you oversee their work. Each time a detector reacts, an outline of that detector’s symbol will appear in red right under the camera.
If you no longer need a certain eMap, you can always click it in the “Choose map” drop-down menu and press “Delete map” underneath. If you misplaced a camera on the map, you can press Delete camera from map and simply click it.
With this even a single screen can hold all the information you need while remaining easy to navigate.
*Starting with Xeoma beta 22.6.3 it’s now possible to use eMap (interactive maps) in multi-server mode.
8 September 2016
Read also:
Layouts menu in Xeoma’s full user manual
Layouts in Xeoma video
eMap in Xeoma video