New Feature: Secure TLS Connection
As of version 16.10.31, Xeoma supports secure TLS connection between servers and clients. But what is TLS? Does it make things any more secure? How hard is it to install? Matters of cyber security tend to be rather complicated and, as such, are generally left to qualified IT specialists. However, everything eventually becomes simplified and accessible to general public, such is the nature of progress. Let us try and get to know the TLS connection a little better, shall we?
Know it already? Skip to using it in Xeoma

First, a little bit of history. TLS stands for Transport Layer Security and it is a successor to SSL – Secure Sockets Layer. In the early 1990-s Netscape (an American company responsible for creating Netscape Navigator) came up with a way to protect any connection between a client and a server from intrusion or eavesdropping. The one to originally conceive the idea was Dr. Taher Elgamal (a renowned Egyptian cryptographer). The gist of it was this: both the client and the server need to have a unique way to encrypt their data for every time they connect. This way, even if the session is intercepted by somebody, it can’t be decrypted, thus the information is safe. This is what makes TLS connection so secure. All of this hinges upon the notion of a digital certificate (or security certificate).

What is a certificate? Think of it as a digital key to a door that connects 2 rooms. No other key can open this door and the lock can’t be picked. The security certificate is usually created by the server and sent to the client during their first interaction. The client either confirms or rejects it. This whole procedure is affectionately called handshaking. With this, the server and the client accept certain “ground rules” for their interactions (e.g. how to generate session keys that are one-use). Then they proceed to encrypt and decrypt their data using the key without the risk of any third-party manipulations. Should handshaking fail, the connection will not be established. This makes sure that no one can try and impersonate either a client or a server to trick the other side into revealing certain information.

Finally, every security certificate requires a signature, otherwise it can’t be used. Ideally, it should be signed by a third party, which is trusted by both the server and the client (the so called “trusted third party”). It is usually referred to as CA – Certificate Authority. There are 2 ways a server can sign its certificate: by applying to an actual CA (there is no shortage of those, albeit for a fee) or by signing it themselves (these are called “self-signed certificates”). The second option is obviously riskier for the client, but if the people operating the machines know that they can trust each other, then there won’t be any problems. This system of certificates and handshaking is constantly used on the web, as you access different servers via a browser, even though an average user doesn’t see it working. This serves to prove the point that the best security is the one left unseen.
Now we can focus on actually using this in Xeoma. First things first, we need to generate a security certificate on the server. The best software for that is OpenSSL: https://www.openssl.org/source/ However, it seems to provide stable operation only for Linux-based systems. The created certificates are valid on any system, though, so, if you are running Windows or Mac OS, you can either ask a Linux-using friend for help or use a virtual machine to get access to Linux. There are various commands you can use in the terminal to generate a certificate with this, but please make sure that the resulting files are named either PublicCertificate.pem and PrivateKey.pem or PublicCertificate.der and PrivateKey.der. The quickest way is to copy-paste this command:
openssl req -x509 -sha256 -new -days 3650 -newkey rsa:2048 -nodes -out PublicCertificate.pem -keyout PrivateKey.pem -subj “/C=Co/ST=SN/L=Lo/O=Or/OU=OU/CN=CN”

Now you have both freshly-generated files in your OpenSSL directory:

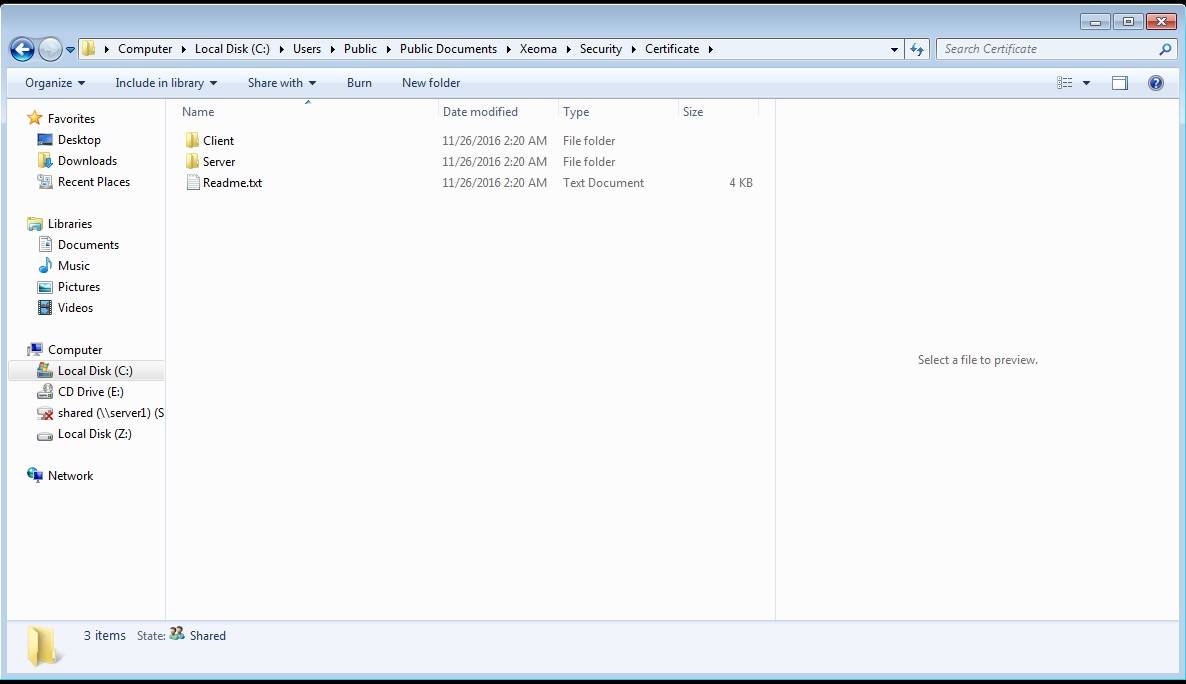
The only thing left to do is to move them to Xeoma’s main directory, in Xeoma → Security → Certificate:

Put both PublicCertificate.pem and PrivateKey.pem in the Server folder (they will replace the files already inside). Please note that PrivateKey.pem is particularly important, no one should have access to it other than you. Otherwise, your security may be compromised. Now all the clients need to put the PublicCertificate.pem in the Client folder and the secure connection is guaranteed. If you need a single client to connect to several different servers via different certificates, you can put them all in the Client folder (under names PublicCertificate1.pem, PublicCertificate2.pem, etc., but make sure that the names coincide with those on the servers).
November, 22 2016
Read also:
Cheaper than DVR system? Security surveillance system with Raspberry Pi board!
How to set your private cloud security with Xeoma Cloud