Connecting Xeoma via VPN
Connection of OpenVPN server Connection of VPN client
First of all, you need to understand whether you need a server or a client on your machine. If you want your computer to serve as a hub for other machines that would connect to it in order to view cameras, then it’s a server. If you simply want to connect to something else that holds the info on the cameras, then it’s a client.
Connection of OpenVPN server
Server
In order to establish a functional server via VPN, you will need to configure it properly. You can do it by following these steps:
1. Download free OpenVPN software that corresponds with your OS from https://openvpn.net/index.php/open-source/downloads.html
2. Install it (checking ALL the parts) in C:\OpenVPN
3. Time to make a valid Certificate Authority (CA) file for your server. To do that, open the console:
1) Enter the folder by typing: cd C:\OpenVPN\easy-rsa
2) Run the configuring file by typing: init-config.bat
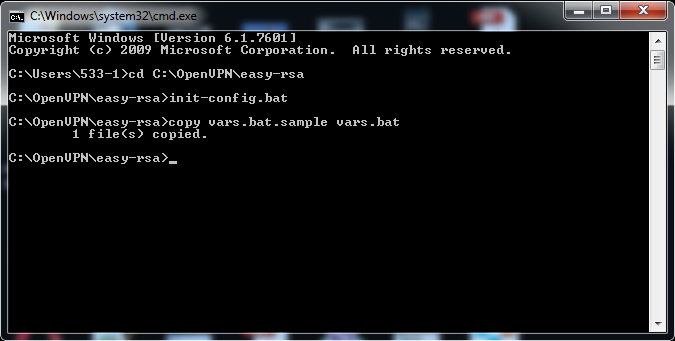
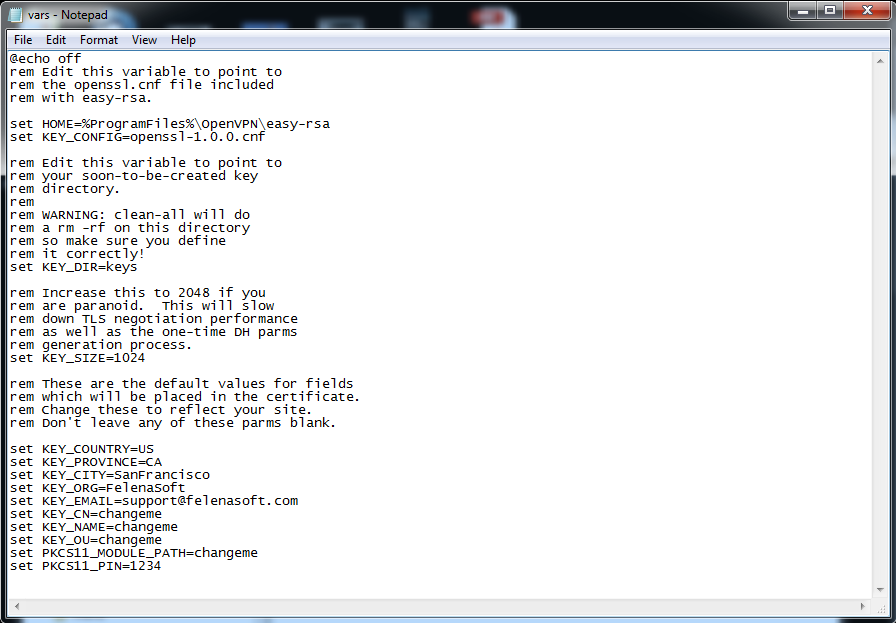
3) Go to C:\OpenVPN\easy-rsa and edit vars.bat (simple notepad will do). Within you will find:
set KEY_COUNTRY=US
set KEY_PROVINCE=CA
set KEY_CITY=SanFrancisco
set KEY_ORG=OpenVPN
set KEY_EMAIL=mail@host.domain
Edit these values to correspond with your country, province, city, organization and e-mail respectively.
4) Run vars.bat by typing in the console: vars.bat
5) Now run 2 more files by typing:
clean-all.bat
build-ca.bat
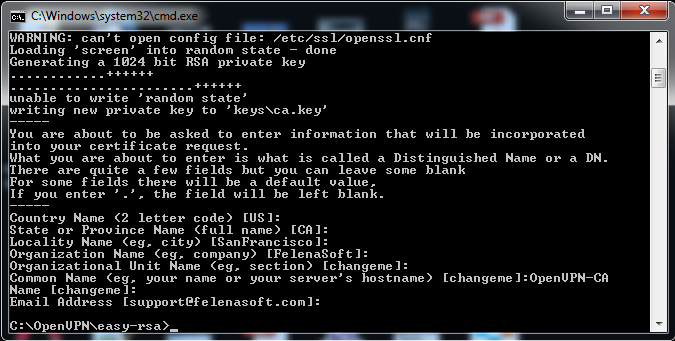
6) Press ENTER for all the values, except Common Name, here type:
OpenVPN-CA
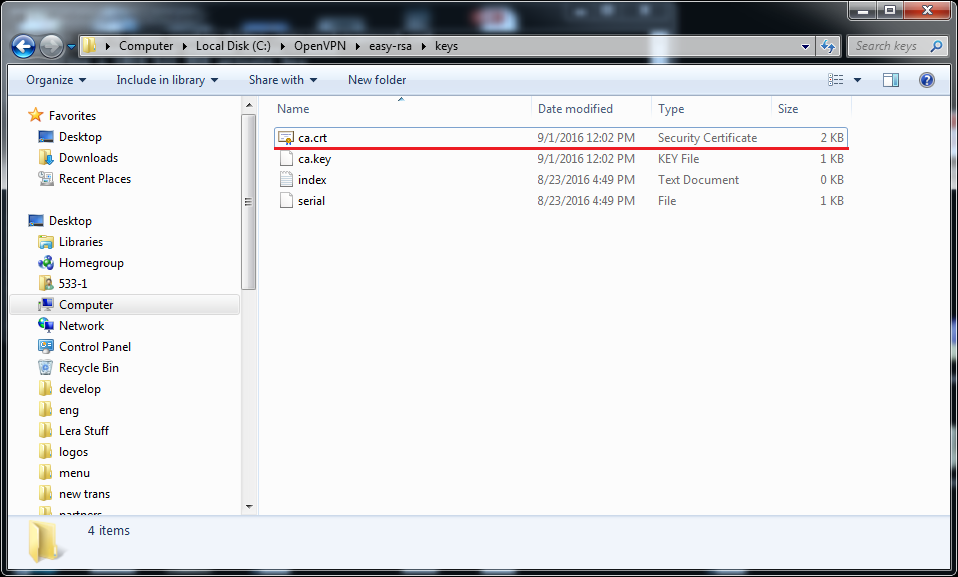
7) That’s it! Now you have generated a valid Certificate Authority file called ca.crt that you can find in C:\OpenVPN\easy-rsa\keys.
4. Time to make an actual certificate and a key for the server:
1) Type: build-key-server.bat server
2) Press ENTER for all the values, except Common Name, here type: server
3) The console will ask you: “Sign the certificate?” Type: y
4) The console will ask you: “1 out of 1 certificate requests certified, commit?” Type: y
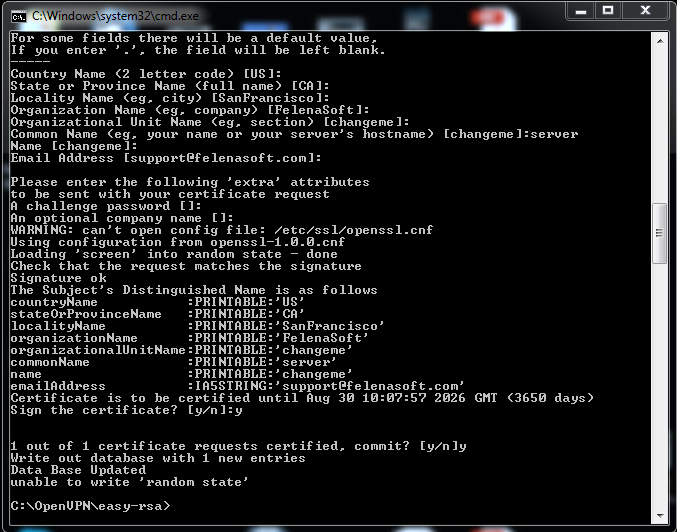
5) That’s it! You have generated the files server.crt and server.key that you can find in C:\OpenVPN\easy-rsa\keys.
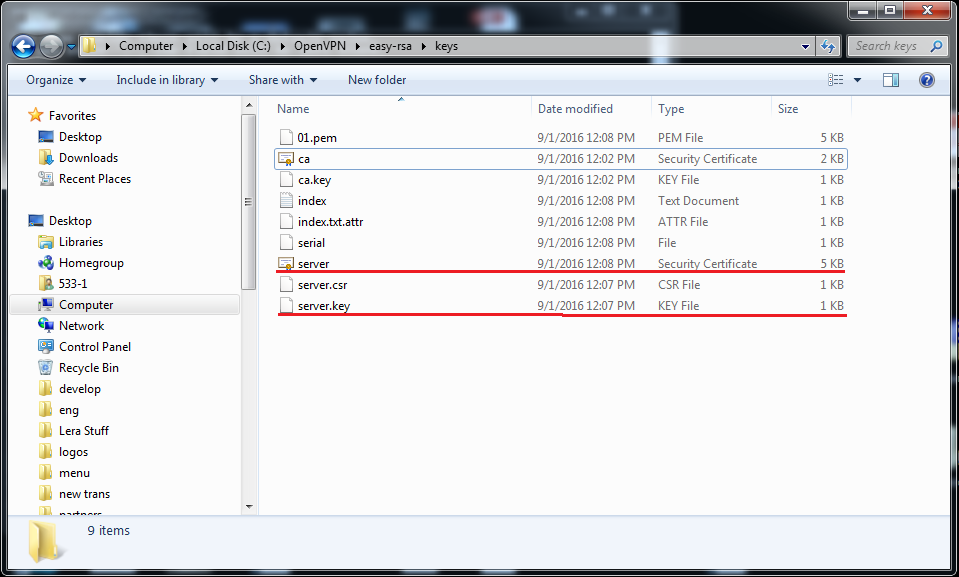
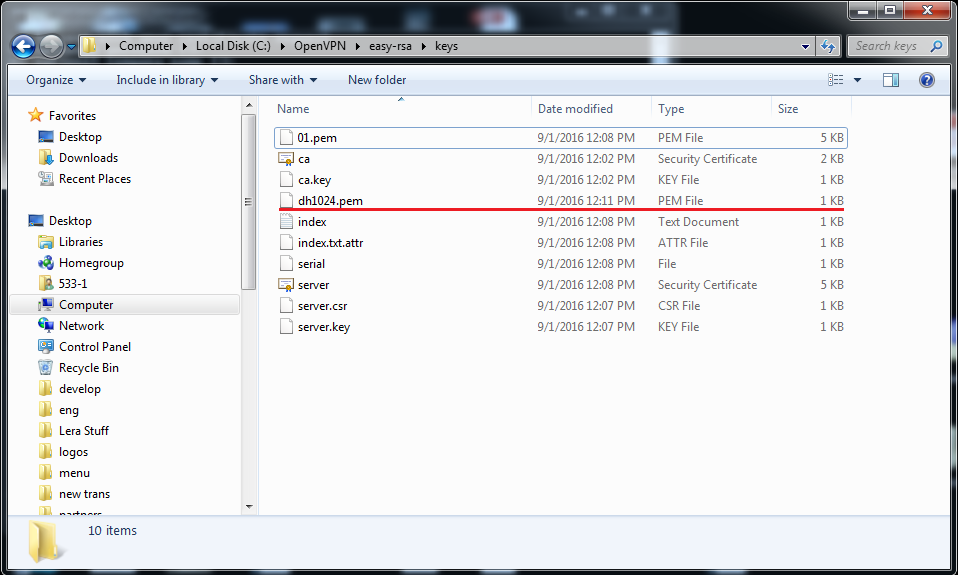
5. Time to set the Diffie-Hellman parameters (basically, the defense for your keys). Type: build-dh.bat
Now you have generated the file dh1024.pem that you can find in C:\OpenVPN\easy-rsa\keys.
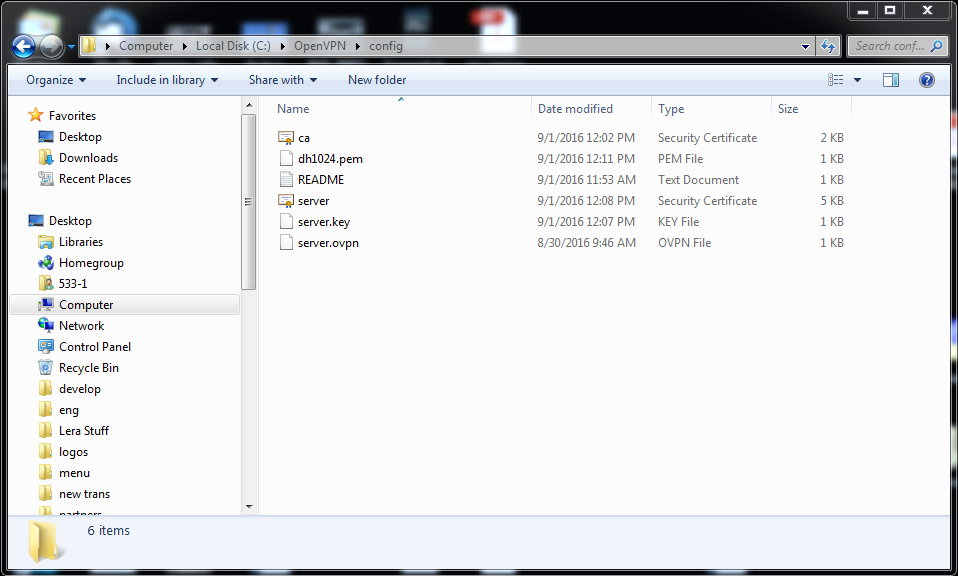
6. Now copy the files ca.crt, server.crt, server.key and dh1024.pem in C:\OpenVPN\easy-rsa\keys and paste them in C:\OpenVPN\config. You will also need to create a file server.ovpn in this folder. Use the notepad for that and put this information in the file:
port 1194
proto tcp
dev tun
ca ca.crt
cert server.crt
key server.key
dh dh1024.pem
topology subnet
server 10.8.0.0 255.255.0.0
keepalive 10 120
cipher AES-256-CBC
persist-key
persist-tun
reneg-sec 86400
verb 3
7. You can now set users for your server:
1) The users require logins and passwords in order to access your server. Add this information to the server.ovpn file (use the notepad):
# Path to the folder with config files
client-config-dir C:\\OpenVPN\\ccd
# Verification of the authentication data via verify.bat
auth-user-pass-verify C:\\OpenVPN\\verify.bat via-file
# When username and password are checked, don’t ask for the certificate
client-cert-not-required
# Username for further authentication
username-as-common-name
# Allow external scripts
script-security 2
2) Create the folder ccd in C:\OpenVPN, it is needed for the users’ configuration files.
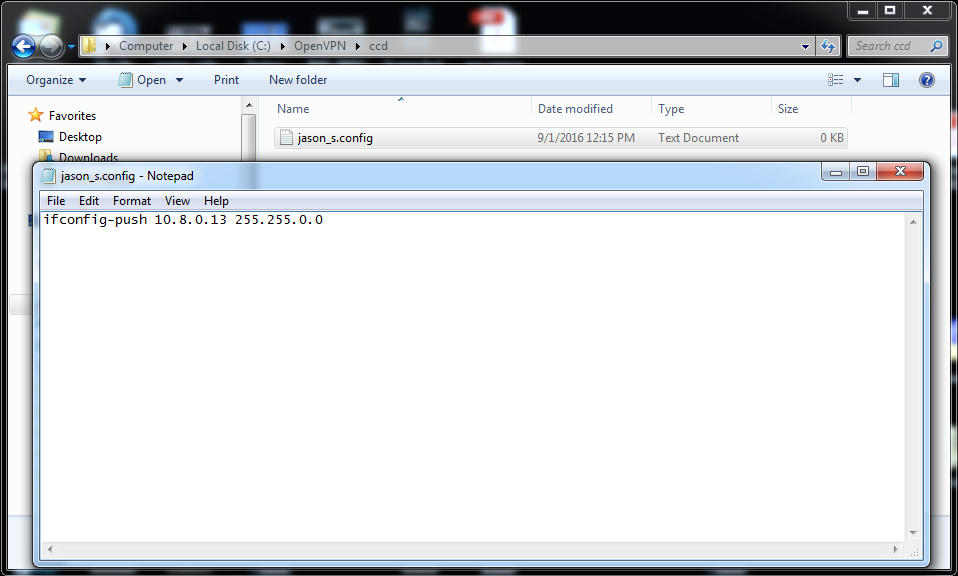
3) Every user requires a separate file in this folder. The filenames should be ‹User_Login›.config (so every filename contains the login of the user). Within the file type the IP-address you want to give to that user like this:
ifconfig-push ‹IP_address› ‹Mask› (where ‹IP_address› is 10.8.0.0 with the mask 255.255.0.0 according to the server.ovpn file)
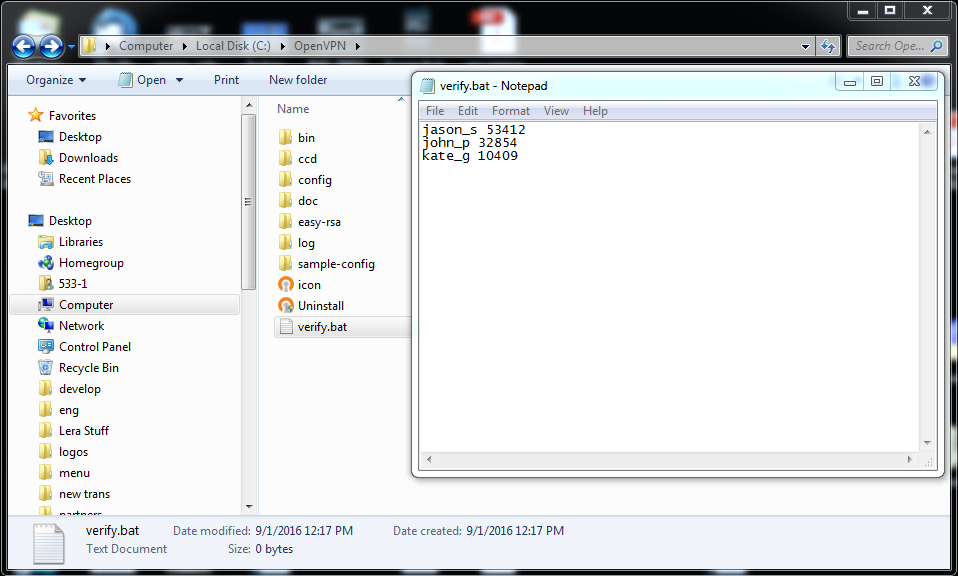
4) Create the file verify.bat in the folder C:\OpenVPN (use the notepad). This is going to be the file the server will use to check your users’ logins and passwords. Within the file just type the logins and passwords for your users separating them with a space.
8. Finally, you are ready to launch the server. Click the OpenVPN GUI icon. Now your system tray (lower right corner of the screen) holds the OpenVPN GUI icon, right-click on it and choose Connect. Wait a few seconds and the icon will become green and display the IP-address of your server.

All set to go!
Connection of VPN client
OpenVPN-client on Windows
OpenVPN-client on Linux
VPN-client (PPTP, L2TP/IPSec PSK) on Windows
VPN-client (PPTP, L2TP/IPSec PSK) on Linux
To configure a client connection properly, follow these steps:
1. Follow the steps 1 and 2 for the server instruction.
2. Follow this link: https://felenasoft.com/xeoma/downloads/cloud/cloud.ca.crt to download a valid certificate.
3. Follow this link: https://felenasoft.com/xeoma/downloads/cloud/client.ovpn to download a configuration file.
4. Open the file with a Notepad and in the line remote cloud.xeoma.com 1194 change cloud.xeoma.com to the full address you’ve received in the e-mail.
5. Now copy-paste both cloud.ca.crt and client.ovpn in C:\OpenVPN\config.

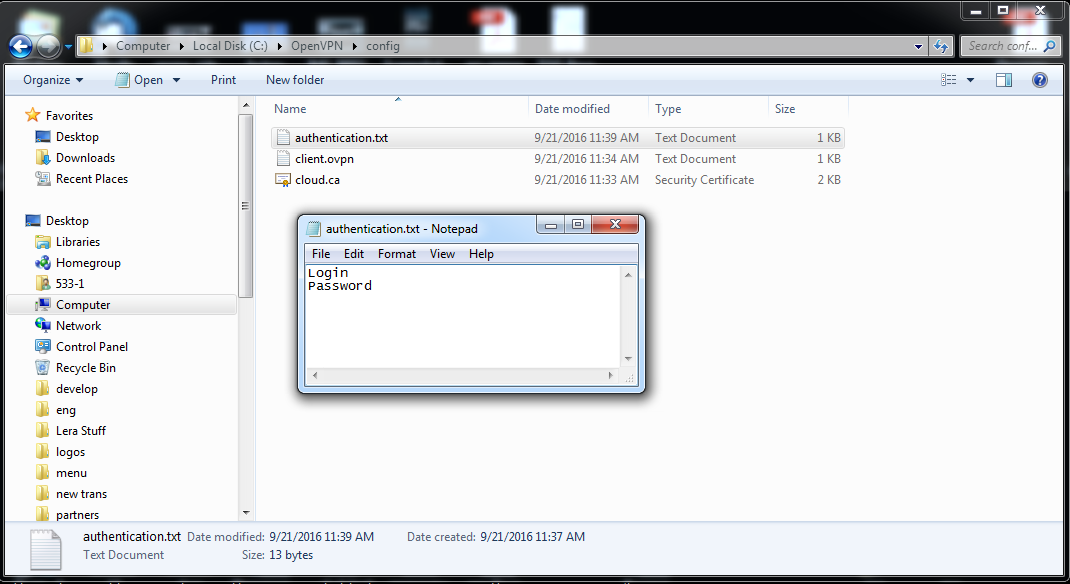
6. Within the same folder create authentication.txt. It should contain logins and passwords, each in its own line.
7. Now launch OpenVPN GUI and wait until its icon appears in the system tray. Right-click on it and choose Connect. Wait a few seconds and the icon will become green and display the assigned IP-address.
All done!
Now there is one last thing to make sure that you can view the cameras remotely. The cameras’ IP-addresses need to be forwarded. To do that, open the console (make sure that you use the Administrator):
1. Type in: netsh
2. Type in: interface
3. Type in: portproxy
4. You’ll need to choose a port for your camera. In this article we’ll use 12345 and camera’s IP 192.168.0.1 as an example. Keep in mind that you will need different ports for different cameras. Also, you will need the camera’s current port.
5. Type in: add v4tov4 listenport=12345 connectaddress=192.168.0.1 connectport=22 listenaddress=0.0.0.0 (all in one line)
This will forward the port 12345 to 192.168.0.1:22.
All set!
To configure a client connection properly, follow these steps:
1. Install OpenVPN using this command: sudo apt-get install openvpn
2. Follow this link: https://felenasoft.com/xeoma/downloads/cloud/cloud.ca.crt to download a valid certificate.
3. Follow this link: https://felenasoft.com/xeoma/downloads/cloud/client.conf to download a configuration file.
4. Open the file with a Notepad and in the line remote cloud.xeoma.com 1194 change cloud.xeoma.com to the full address you’ve received in the e-mail.
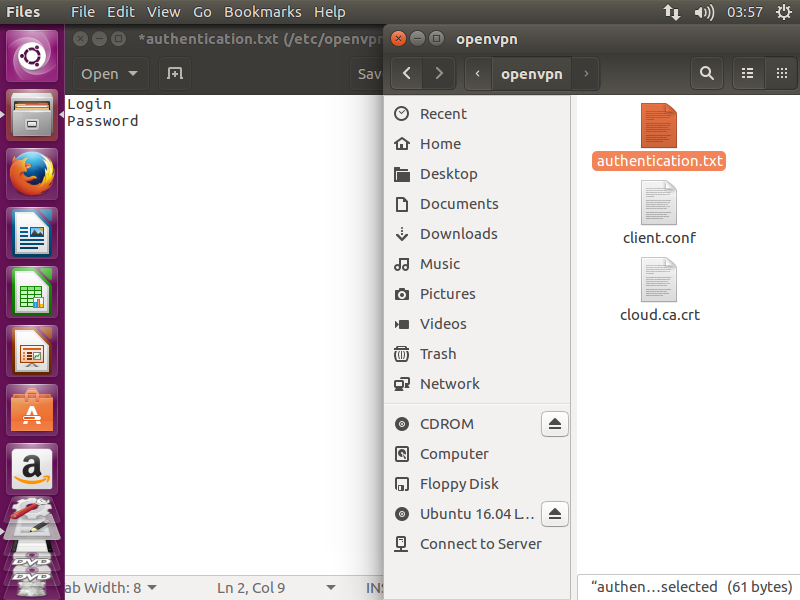
5. Now copy-paste both cloud.ca.crt and client.conf in /etc/openvpn/
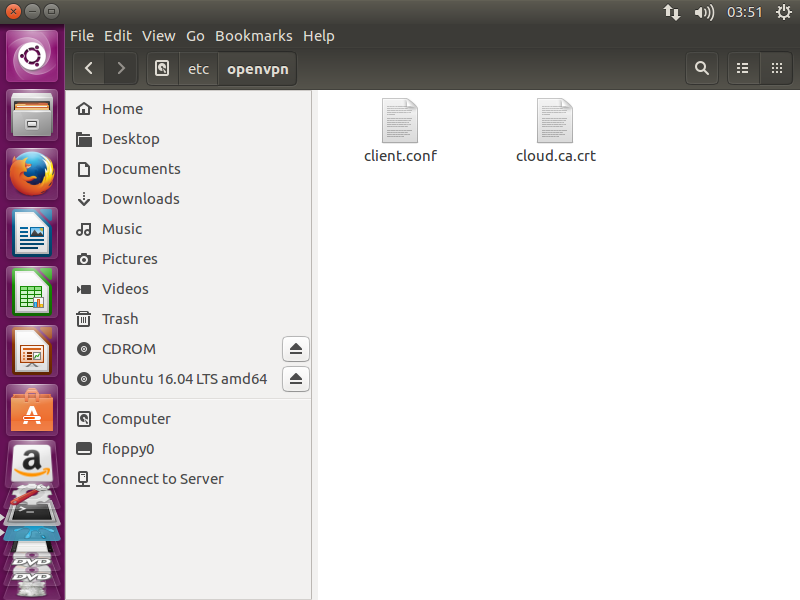
6. Within the same folder create authentication.txt. It should contain logins and passwords, each in its own line.
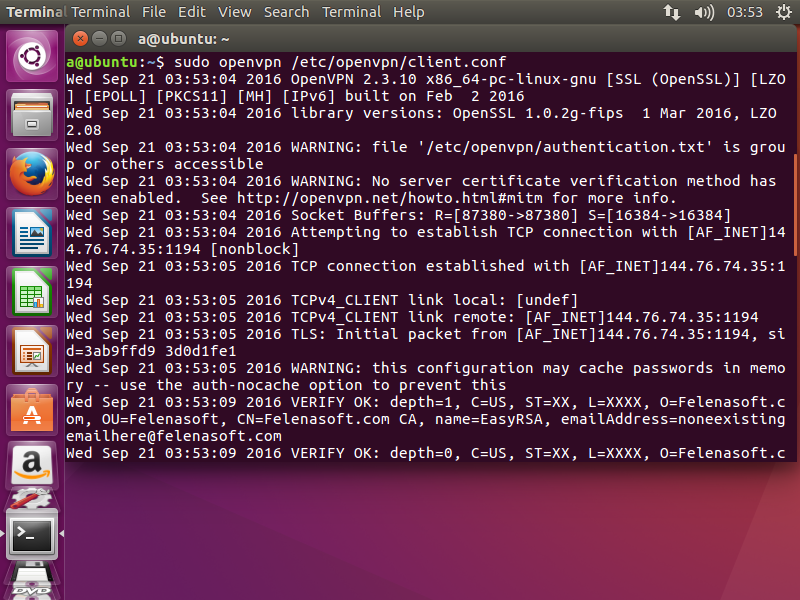
7. Now simply launch OpenVPN by typing: sudo openvpn /etc/openvpn/client.conf
All done!
Now there is one last thing to make sure that you can view the cameras remotely. The cameras’ IP-addresses need to be forwarded.
1. Type in: iptables -t nat -A PREROUTING -p tcp -d 10.8.109.142 –dport 554 -j DNAT –to-destination 192.168.0.177:554 (here 10.8.109.142 with port 554 is the camera’s IP, which is substituted by 192.168.0.177:554)
2. Type in: iptables -t nat -A POSTROUTING -p tcp –dst 192.168.0.177 –dport 554 -j SNAT –to-source 10.8.109.142 (here 192.168.0.177 with port 554 is substituted back with 10.8.109.142)
All set!
12 September 2016